Linux服务器中已经检索到GPU显卡,但是使用过程中无法正常运行,如何解决?
- 2026-09-16 23:26:29

一边学习,一边总结,一边分享!

我们这里使用的是西柚服务器,他们的下载网络确实很快,有国际专线,前面我们在zenodo数据中下载T2T泛基因组,轻轻松松搞定,2026年Pan-genome可能作为顶刊的一个方向,如何快速下载T2T-Pan-genome数据?。立减券:西柚云服务器立减优惠活动,或输入优惠码:BioinfoDu。
网址:
https://dayu.xiyoucloud.net/dayu/api/v1/anonymous/affiliate/BioinfoDu写在前面
我们前面分享了在Linux中安装omicverse / OmicClaw,Bulk RNA和单细胞分析“信手捏来”?和在Linux服务器中部署omicverse-web。最近,将前期闲置的显卡放到服务器中,在做相关的配置时,发现在运行omicverse时,显卡无法正常使用。因此,也基于此次契机,记录一下解决方案。
我们遇到的问题,可能各有不同,主要问题基本是:相关python包不兼容的问题。
使用GPU 加速安装omicverse
使用开发者的给教程进行安装,但此方法可能还是由于各服务器系统、配置、环境等因素,会导致存在一些问题。
# 1. 创建新的 conda 环境conda create -n rapids python=3.11# 2. 使用 conda 安装 RAPIDSconda install rapids=24.04 -c rapidsai -c conda-forge -c nvidia -y # 3. 安装额外的 RAPIDS 组件conda install cudf=24.04 cuml=24.04 cugraph=24.04 cuxfilter=24.04 cucim=24.04 pylibraft=24.04 raft-dask=24.04 cuvs=24.04 -c rapidsai -c conda-forge -c nvidia -y # 4. 安装 rapids-singlecellpip install rapids-singlecell# 5. 安装 OmicVersecurl -sSL https://raw.githubusercontent.com/Starlitnightly/omicverse/refs/heads/master/install.sh | bash -s难点,我们自己GPU显卡已经安装,且可以看到,如图所示。但是,无法在 omicverse中识别
nvidia-smi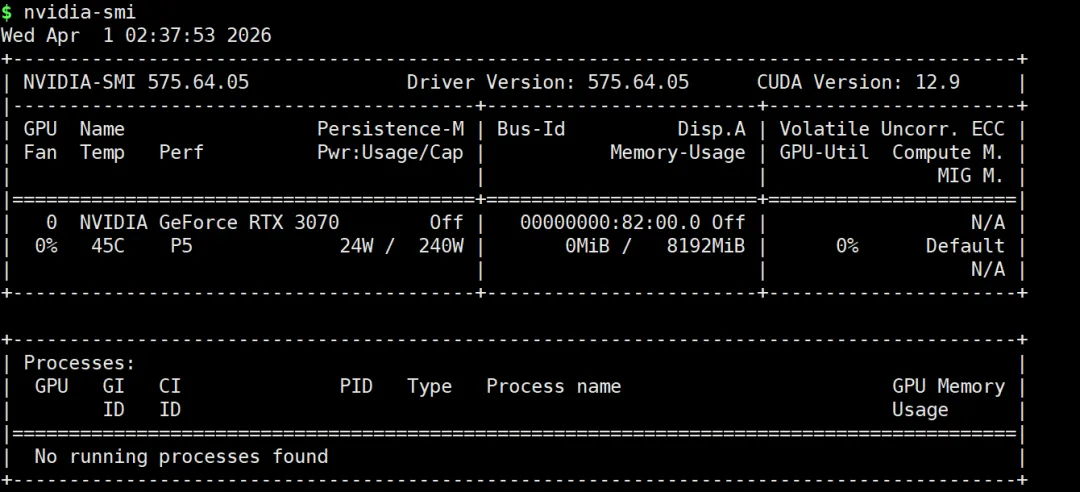
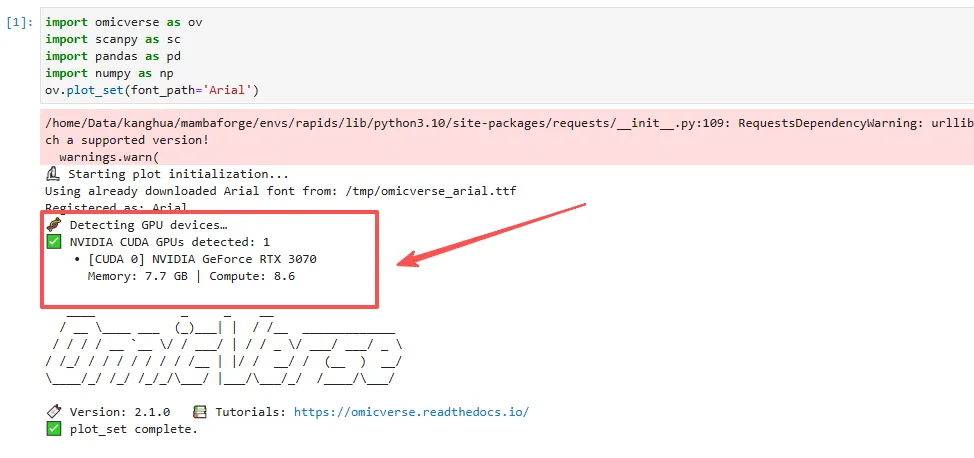
运行过程中无法识别出GPU:
import omicverse as ovimport scanpy as scimport pandas as pdimport numpy as npov.plot_set(font_path='Arial')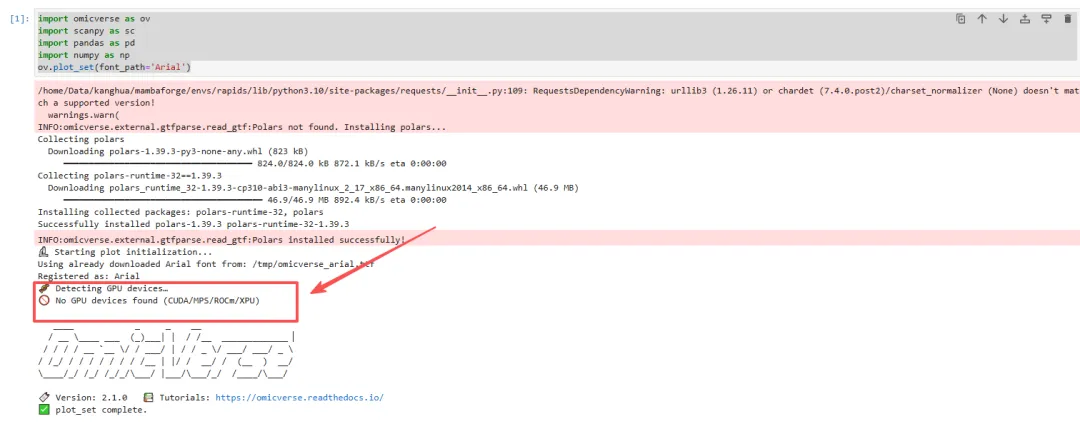
问题:
可能是对应的Python包未安装 可能是CUDA 软件未安装 ................... ** 目前我们遇到的问题是未安装CUDA ??**
CUDA 安装
软件下载网址
https://developer.nvidia.cn/cuda-downloads?target_os=Linux&target_arch=x86_64&Distribution=Ubuntu&target_version=22.04&target_type=runfile_local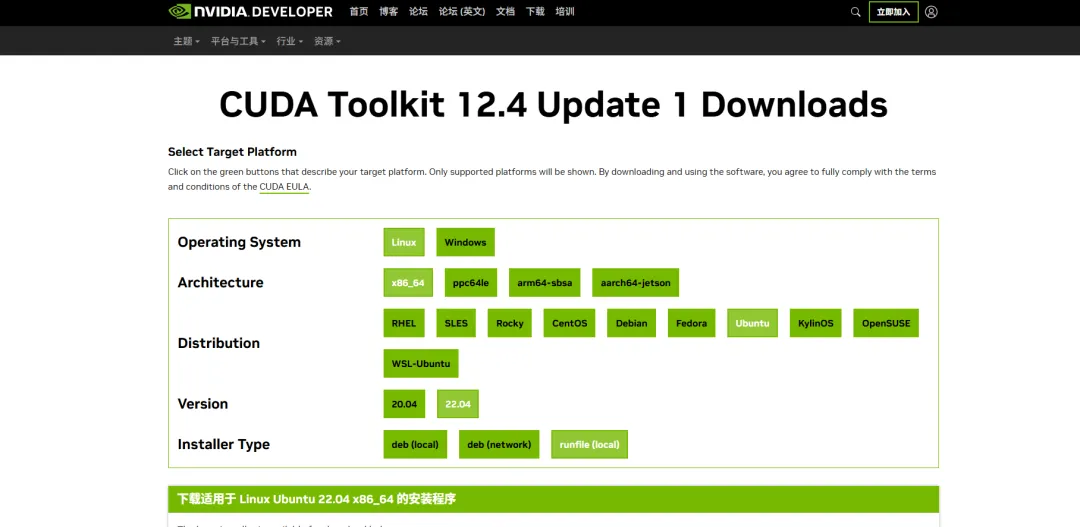
选择自己系统的版本
下载
wget https://developer.download.nvidia.com/compute/cuda/12.4.1/local_installers/cuda_12.4.1_550.54.15_linux.runsudo sh cuda_12.4.1_550.54.15_linux.run软件比较大,有4.2GB。
$ du -sh cuda_12.4.1_550.54.15_linux.run 4.2G cuda_12.4.1_550.54.15_linux.run安装选项
如果你前期没有安装其他相关软件,可以选择默认参数安装 若是,你安装失败,可以看一下是否有软件冲突
以上是小编遇到的问题,如何解决?
Driver [X] ← ❌ 取消勾选!!
Toolkit [X] ← ✅ 保留
● ❌ 不安装 Driver ● ✅ 只安装 CUDA Toolkit
验证安装是否成功
进入python
$ python>>> import cupy>>> print("GPU count:", cupy.cuda.runtime.getDeviceCount())GPU count: 1>>> exit()
修复 ImportError: libcudart.so.12: cannot open shared object file: No such file or directory
可能你也会遇到这样的情况
>>> import cupy Traceback (most recent call last): File "/home/Data/kanghua/mambaforge/envs/rapids/lib/python3.10/site-packages/cupy/__init__.py", line 17, in <module> from cupy import _core # NOQA File "/home/Data/kanghua/mambaforge/envs/rapids/lib/python3.10/site-packages/cupy/_core/__init__.py", line 3, in <module> from cupy._core import core # NOQA ImportError: libcudart.so.12: cannot open shared object file: No such file or directory The above exception was the direct cause of the following exception: Traceback (most recent call last): File "<stdin>", line 1, in <module> File "/home/Data/kanghua/mambaforge/envs/rapids/lib/python3.10/site-packages/cupy/__init__.py", line 19, in <module> raise ImportError(f''' ImportError: ================================================================ Failed to import CuPy. If you installed CuPy via wheels (cupy-cudaXXX or cupy-rocm-X-X), make sure that the package matches with the version of CUDA or ROCm installed. On Linux, you may need to set LD_LIBRARY_PATH environment variable depending on how you installed CUDA/ROCm. On Windows, try setting CUDA_PATH environment variable. Check the Installation Guide for details: https://docs.cupy.dev/en/latest/install. html Original error: ImportError: libcudart.so.12: cannot open shared object file: No such file or directory 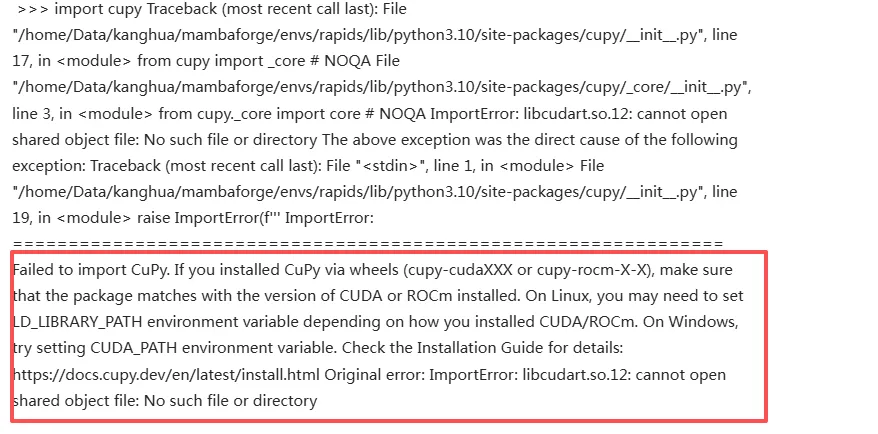
问题:
❌ CuPy 报错:libcudart.so.12 not found
✅ 你已经安装了 CUDA 12.4 Toolkit
修复
第一步:确认库确实存在
ls /usr/local/cuda-12.4/lib64/libcudart.so.12*第二步:让系统认识 CUDA 库
sudo sh -c 'echo /usr/local/cuda-12.4/lib64 > /etc/ld.so.conf.d/cuda.conf'sudo ldconfig第三步:验证是否修复成功
ldconfig -p | grep libcudart
python -c "import cupy; print(cupy.cuda.runtime.getDeviceCount())"
安装的 CUDA 与版本不对,导致在omicverse中无法正确识别GPU
检查,使用pip检查
pip list | grep torch问题是什么?
● CuPy = ✅ GPU可用
● OmicVerse = ❌ 无GPU
2. 版本是否一致
❗ 这里就是问题根源
👉 你的 PyTorch 是:
● CUDA 13.0(cu130)版本
● 但你系统实际是:CUDA 12.4
⚠️ 为什么这会导致 OmicVerse 检测不到 GPU?
PyTorch GPU 是否可用取决于:
👉 PyTorch 编译时的 CUDA版本 ≠ 系统 CUDA版本 → GPU 不可用
目前可能出现的问题:
项目 版本
系统 CUDA 12.4
CuPy 12.x ✅
PyTorch cu130 ❌
👉 结果:
● CuPy → 正常(用的是 CUDA 12)
● PyTorch → ❌ GPU不可用
● OmicVerse → ❌ 认为没有 GPU
解决方法
1. 重新安装
卸载已安装的包,安装正确版本
pip uninstall torch -ypip install torch --index-url https://download.pytorch.org/whl/cu121
查看对应的包
pip list | grep torch如果你安装torch时出现以下报错
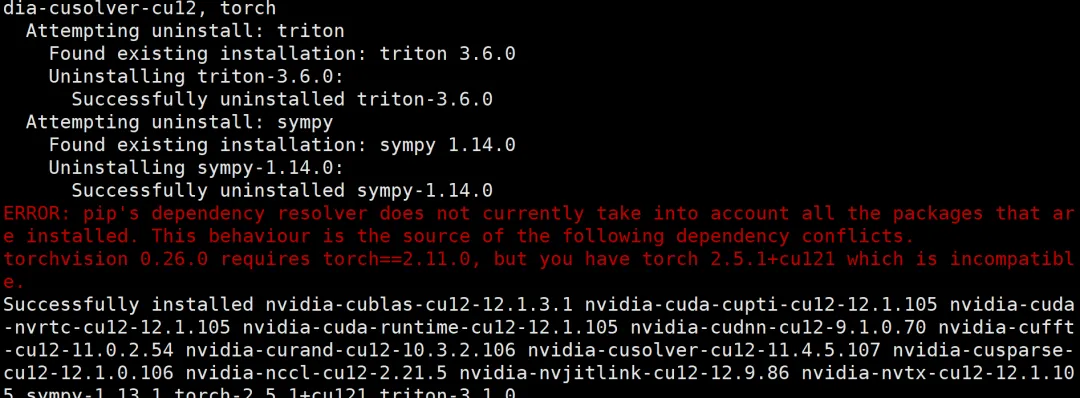
卸载torchvision后
pip uninstall torchvision -y重新执行以下命令
pip install torchvision==0.20.1 --index-url https://download.pytorch.org/whl/cu121完成!!
若我们的教程对你有所帮助,请
点赞+收藏+转发,这是对我们最大的支持。
欢迎关注《BioinfoR生信笔记》
关于自我简介可查看「BioinfoR生信筆記」关注须知! BioinfoR生信筆記,仅有微信社群。关于社群请详细查看「BioinfoR生信筆記」入群声明,里面有你想了解的内容。
BioinfoR生信筆記 ,注于分享生物信息学相关知识和R语言绘图教程。发表论文投稿及招聘信息请使用word格式或MarkDown格式发送到bioinfor2025@163.com,均为无偿。
2025已离你我而去,2026加油!!
往期部分文章
1. 最全WGCNA教程(替换数据即可出全部结果与图形)
推荐大家购买最新的教程,若是已经购买以前WGNCA教程的同学,可以在对应教程留言,即可获得最新的教程。(注:此教程也仅基于自己理解,不仅局限于此,难免有不恰当地方,请结合自己需求,进行改动。)
2. 精美图形绘制教程
3. 转录组分析教程
4. 转录组下游分析
BioinfoR生信筆記 ,注于分享生物信息学相关知识和R语言绘图教程。
