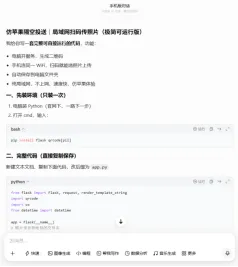
from flask import Flask, request, render_template_stringimport qrcodeimport socketimport osfrom datetime import datetimeimport threadingimport sysapp = Flask(__name__)# 路径处理if getattr(sys, 'frozen', False): APP_FOLDER = os.path.dirname(sys.executable)else: APP_FOLDER = os.path.dirname(os.path.abspath(__file__))SAVE_FOLDER = os.path.join(APP_FOLDER, "photos")os.makedirs(SAVE_FOLDER, exist_ok=True)# 前端:增加上传状态、加载提示、防重复点击 + 成功弹窗UPLOAD_PAGE = """<!DOCTYPE html><html><head><metacharset="utf-8"><metaname="viewport"content="width=device-width, initial-scale=1.0"><title>PicLink 图传</title><style>*{box-sizing:border-box;margin:0;padding:0}body{background:#f5f5f7;font-family:Arial;padding:30px}.container{max-width:400px;margin:0 auto;background:white;border-radius:20px;padding:30px;box-shadow:0 2px 15px rgba(0,0,0,0.05)}h2{text-align:center;margin-bottom:20px}input{width:100%;padding:12px;margin:15px 0;border:1px solid #ddd;border-radius:12px}.btn-row{display:flex;gap:10px;margin-top:10px}button{flex:1;background:#007aff;color:white;border:none;padding:14px;border-radius:12px;font-size:16px;transition:all 0.2s}button.clear{background:#ff3b30}button:disabled{background:#999;cursor:not-allowed;opacity:0.8}.tip{text-align:center;margin:10px 0;color:#333;font-size:14px}.status-text{text-align:center;margin:15px 0;font-size:14px;color:#666;height:20px}.copyright{text-align:center;margin-top:30px;color:#999;font-size:14px;cursor:pointer}</style></head><body><divclass="container"><h2>📤 PicLink 图传</h2><inputtype="file"id="photoFile"accept="image/*"multiple><divclass="tip"id="fileTip">未选择图片</div><divclass="status-text"id="statusText"></div><divclass="btn-row"> <buttonid="uploadBtn"onclick="uploadFile()">确认上传</button> <buttonclass="clear"onclick="clearFile()">清除选择</button></div></div><divclass="copyright"onclick="window.open('https://blog.csdn.net/weixin_45386955','_blank')">©2026 周国波</div><script>let fileList = [];let isUploading = false;const fileInput = document.getElementById('photoFile');const fileTip = document.getElementById('fileTip');const statusText = document.getElementById('statusText');const uploadBtn = document.getElementById('uploadBtn');// 监听文件选择fileInput.addEventListener('change', function(){ fileList = Array.from(this.files); if(fileList.length > 0){ fileTip.innerText = "已选中:" + fileList.length + " 张图片"; }else{ fileTip.innerText = "未选择图片"; } statusText.innerText = "";});// 上传async function uploadFile(){ // 防止重复点击 if(isUploading) return; if(fileList.length === 0){ alert("请先选择图片"); return; } // 上传中锁定按钮 isUploading = true; uploadBtn.disabled = true; statusText.innerText = "⏳ 上传中,请稍候..."; const formData = new FormData(); fileList.forEach(file=>{ formData.append("photo", file); }); try { const res = await fetch("/upload", { method: "POST", body: formData }); if(res.ok){ // ✅ 成功弹窗 + 清空 alert("✅ 上传成功!"); clearFile(); }else{ alert("❌ 上传失败!"); } } catch (err) { alert("❌ 网络异常,上传失败"); } // 解锁 isUploading = false; uploadBtn.disabled = false; statusText.innerText = "";}// 清除选中文件function clearFile(){ fileInput.value = ''; fileList = []; fileTip.innerText = "未选择图片"; statusText.innerText = "";}</script></body></html>"""@app.route("/")def index(): return UPLOAD_PAGE@app.route("/upload", methods=["POST"])def upload(): files = request.files.getlist("photo") for file in files: if file and file.filename: filename = datetime.now().strftime("%Y%m%d_%H%M%S_") + file.filename save_path = os.path.join(SAVE_FOLDER, filename) file.save(save_path) return "ok"# 获取局域网IPdef get_ip(): try: s = socket.socket(socket.AF_INET, socket.SOCK_DGRAM) s.connect(("8.8.8.8", 80)) ip = s.getsockname()[0] s.close() return ip except: return "127.0.0.1"# 显示二维码def show_qr(): import time time.sleep(1) ip = get_ip() url = f"http://{ip}:5000" print("="*50) print("PicLink 图传服务已启动") print("访问地址:", url) print("图片保存路径:", SAVE_FOLDER) print("="*50) qrcode.make(url).show()if __name__ == "__main__": threading.Thread(target=show_qr, daemon=True).start() app.run(host="0.0.0.0", port=5000, debug=False, use_reloader=False)






 10个月宝宝每天需要喝多少奶粉?