一起学Python第121天:Pillow 模块知识体系
- 2026-10-11 07:09:27
📅 系列:一起学Python | 难度:⭐⭐
🔗 上期回顾:第120天:Pillow 了解
一、Pillow 只是"打开裁剪保存"?太浪费了!
学了三天 Pillow,你可能觉得它就是个"图片工具箱"——打开、裁剪、缩放、加滤镜、保存。但如果你只用到这些,就像买了一把瑞士军刀,却只用它来开瓶盖。
Pillow 真正的威力在于那些藏在文档角落里的"隐藏技能"——它们不显眼,但在实际工作中能救你一命。
今天这期,我整理了 10 个 Pillow 隐藏技能,每个都附带可直接运行的代码,全部使用网络图片,无需本地文件。
二、10个隐藏技能实战
技能 1:智能缩略图——保持比例+完美填充
thumbnail() 保持比例但会留白,resize() 会变形。如何居中裁剪+完美填充?
from PIL import Imagefrom io import BytesIOimport requestsdef load_image(url):"""从 URL 加载图片并返回 PIL Image 对象"""response = requests.get(url)response.raise_for_status() # 确保请求成功return Image.open(BytesIO(response.content))def smart_thumbnail(img, size=(200, 200)):"""保持比例,居中裁剪,再缩放"""w, h = img.sizetarget_w, target_h = sizeratio = max(target_w/w, target_h/h)new_size = (int(w*ratio), int(h*ratio))img = img.resize(new_size, Image.LANCZOS)left = (img.width - target_w) // 2top = (img.height - target_h) // 2return img.crop((left, top, left+target_w, top+target_h))url = "https://picsum.photos/600/400"img = load_image(url)thumb = smart_thumbnail(img, (200, 200))thumb.show()

💡 应用场景:用户头像、商品封面、瀑布流图片,必须固定尺寸但不能变形。
技能 2:质量压缩——肉眼难辨 vs 体积减半
上传图片时,如何既保证清晰又减小体积?
from io import BytesIOdef compress_image(img, quality=60, max_size_kb=100):"""智能压缩:先降质量,如果还超就缩尺寸"""while True:buf = BytesIO()img.save(buf, format='JPEG', quality=quality, optimize=True)size_kb = len(buf.getvalue()) / 1024if size_kb <= max_size_kb or quality <= 20:breakquality -= 5buf.seek(0)return Image.open(buf)# 使用url = "https://picsum.photos/1200/800"img = load_image(url)compressed = compress_image(img, quality=60, max_size_kb=100)print(f"压缩后体积: {compressed.size}")
optimize=True 启用霍夫曼编码优化,quality=60 时肉眼几乎看不出差异,体积减少 70%。技能 3:圆角图片——一键生成社交媒体风格
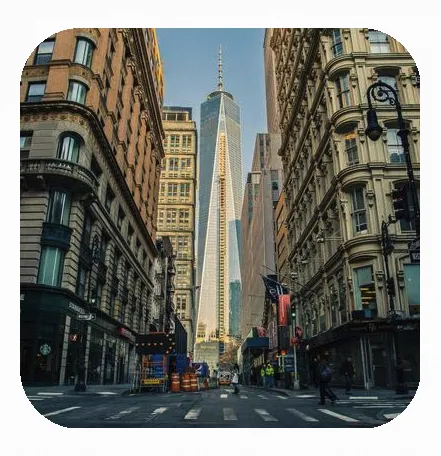
朋友圈、小红书、Instagram 的头像和封面都是圆角,Pillow 怎么做?
from PIL import Image, ImageDrawfrom io import BytesIOimport requestsdef load_image(url):"""从 URL 加载图片"""resp = requests.get(url)resp.raise_for_status()return Image.open(BytesIO(resp.content))def round_corner(img, radius=50):"""给图片添加圆角(返回 RGBA 模式)"""img = img.convert('RGBA')# 创建圆形遮罩(用于四角)circle = Image.new('L', (radius * 2, radius * 2), 0)draw = ImageDraw.Draw(circle)draw.ellipse((0, 0, radius * 2, radius * 2), fill=255)alpha = Image.new('L', img.size, 255)w, h = img.size# 四个角贴上裁剪好的圆角遮罩alpha.paste(circle.crop((0, 0, radius, radius)), (0, 0))alpha.paste(circle.crop((radius, 0, radius * 2, radius)), (w - radius, 0))alpha.paste(circle.crop((0, radius, radius, radius * 2)), (0, h - radius))alpha.paste(circle.crop((radius, radius, radius * 2, radius * 2)), (w - radius, h - radius))img.putalpha(alpha)return img# 使用url = "https://picsum.photos/400/400"img = load_image(url)rounded = round_corner(img, radius=60)rounded.save("rounded.png") # PNG 保留透明通道
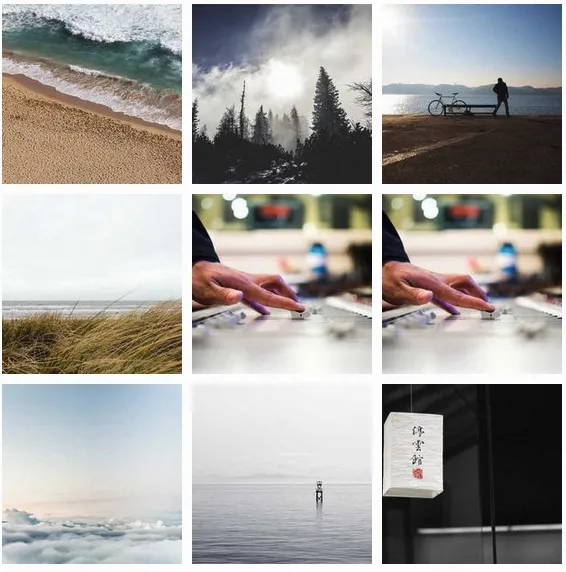
技能 4:九宫格拼图——朋友圈晒图必备
from PIL import Imagefrom io import BytesIOimport requestsdef create_grid(url_list, cell_size=200, gap=10):"""创建九宫格拼图"""n = len(url_list)cols = int(n**0.5) # 自动计算列数rows = (n + cols - 1) // colsgrid_w = cols * cell_size + (cols-1) * gapgrid_h = rows * cell_size + (rows-1) * gapgrid = Image.new('RGB', (grid_w, grid_h), (255, 255, 255))for i, url in enumerate(url_list):r = requests.get(url, timeout=15)cell = Image.open(BytesIO(r.content)).convert('RGB')cell = cell.resize((cell_size, cell_size), Image.LANCZOS)row, col = i // cols, i % colsx = col * (cell_size + gap)y = row * (cell_size + gap)grid.paste(cell, (x, y))return grid# 使用urls = [f"https://picsum.photos/200/200?random={i}" for i in range(9)]grid = create_grid(urls, cell_size=180, gap=10)grid.show()
技能 5:颜色量化——256色也能很好看
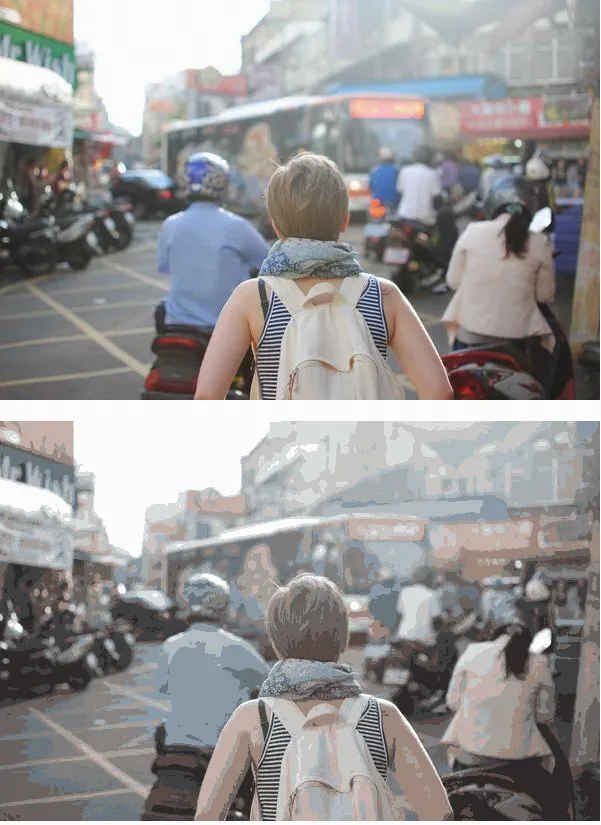
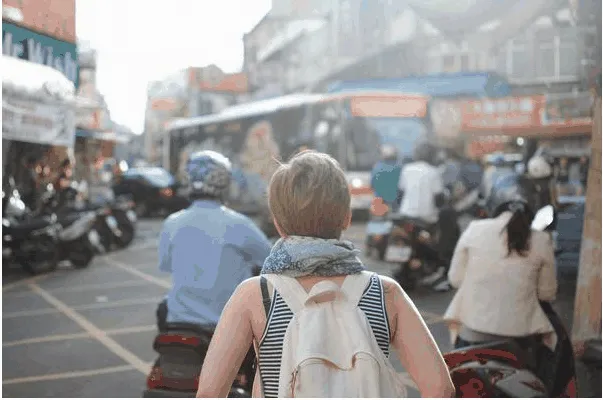
做 GIF 或复古风格海报时,需要减少颜色数量:
from PIL import Imagefrom io import BytesIOimport requestsdef load_image(url, timeout=10):"""从 URL 加载图片,返回 PIL.Image 对象"""try:resp = requests.get(url, timeout=timeout)resp.raise_for_status()return Image.open(BytesIO(resp.content))except Exception as e:print(f"图片加载失败: {e}")return None# ================= 主程序 =================url = "https://picsum.photos/600/400"img = load_image(url)if img is None:print("无法加载图片,请检查网络或 URL")else:# 确保图片为 RGB 模式(quantize() 要求)if img.mode != 'RGB':img = img.convert('RGB')# 量化到 16 色和 128 色,并转回 RGB 以便保存/显示quant_16 = img.quantize(colors=16).convert('RGB')quant_128 = img.quantize(colors=128).convert('RGB')# 保存为 PNG(推荐,可保留色彩精度)quant_16.save("retro_16.png")quant_128.save("retro_128.png")# 可选:展示原图与量化结果img.show(title="原始图片")quant_16.show(title="16色量化")quant_128.show(title="128色量化")print("✅ 图片已保存为 retro_16.png 和 retro_128.png")
🔥 应用场景:相册去重、版权检测、图片搜索。
技能 7:EXIF 清除——保护隐私
手机照片包含 GPS、拍摄时间等敏感信息,上传前必须清除:
def clean_exif(img):"""清除所有EXIF信息"""data = list(img.getdata())clean = Image.new(img.mode, img.size)clean.putdata(data)return clean# 使用url = "https://picsum.photos/600/400"img = load_image(url)safe = clean_exif(img)safe.save("safe.jpg", quality=85)
clean_exif 通过重建图片数据来剥离元数据,比单纯删除标签更彻底。技能 8:图片拼接——长截图拼接
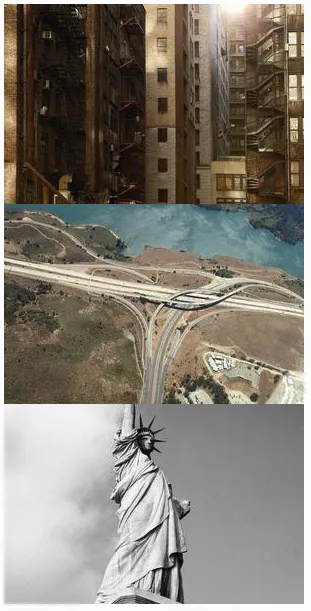
import ioimport requestsfrom PIL import Imagedef load_image(url):"""从 URL 加载图片"""resp = requests.get(url, timeout=15)resp.raise_for_status()img = Image.open(io.BytesIO(resp.content))return img.convert('RGB')def concat_images(images, direction='horizontal'):"""拼接多张图片"""if direction == 'horizontal':total_w = sum(img.width for img in images)max_h = max(img.height for img in images)result = Image.new('RGB', (total_w, max_h), (255, 255, 255))x = 0for img in images:result.paste(img, (x, (max_h - img.height)//2))x += img.widthelse:total_h = sum(img.height for img in images)max_w = max(img.width for img in images)result = Image.new('RGB', (max_w, total_h), (255, 255, 255)) # 修复:原来行首多了个 ny = 0for img in images:result.paste(img, ((max_w - img.width)//2, y))y += img.heightreturn result# 使用urls = [f"https://picsum.photos/300/200?random={i}" for i in range(3)]imgs = [load_image(u) for u in urls]long = concat_images(imgs, 'vertical')long.show()
技能 9:批量格式转换——一行代码搞定
import osfrom PIL import Imagedef batch_convert(input_dir, output_dir, target_format='PNG'):"""批量转换图片格式"""os.makedirs(output_dir, exist_ok=True)for filename in os.listdir(input_dir):if filename.lower().endswith(('.jpg', '.jpeg', '.png', '.bmp')):img = Image.open(os.path.join(input_dir, filename))name = os.path.splitext(filename)[0]img.save(os.path.join(output_dir, f"{name}.{target_format.lower()}"))# 使用# batch_convert("./raw", "./converted", "WEBP")
技能 10:内存优化——流式处理大图片
处理超大图片(如 10000×10000 的卫星图)时,避免内存爆炸:
from PIL import Imagedef process_large_image(url, tile_size=1024):"""分块处理大图片"""# 使用 draft 模式降低加载分辨率resp = requests.get(url, stream=True)img = Image.open(BytesIO(resp.content))# 只加载缩略图预览img.draft('RGB', (800, 600))# 或者分块处理w, h = img.sizefor y in range(0, h, tile_size):for x in range(0, w, tile_size):box = (x, y, min(x+tile_size, w), min(y+tile_size, h))tile = img.crop(box)# 处理每一块...print(f"处理块: {box}")# 使用url = "https://picsum.photos/2000/2000"process_large_image(url, tile_size=512)
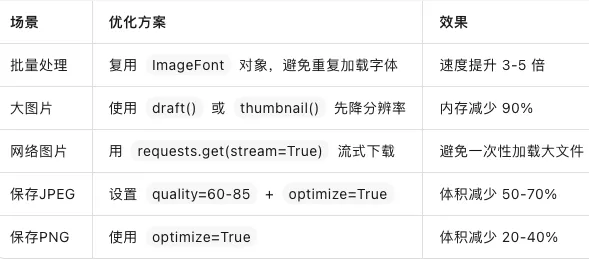
draft(mode, size) 让 Pillow 在解码时就降低分辨率,而不是加载完整图再缩放。性能优化黄金法则
总结
今天我们解锁了 Pillow 的 10 个隐藏技能:
✅ 智能缩略图 —— 居中裁剪,完美填充不变形
✅ 质量压缩 ——
quality+optimize,肉眼难辨体积减半✅ 圆角图片 —— Alpha 遮罩,社交媒体风格
✅ 九宫格拼图 —— 自动排列,朋友圈晒图神器
✅ 颜色量化 ——
quantize(),复古风/GIF必备✅ 感知哈希 —— 图片指纹,去重/版权检测
✅ EXIF清除 —— 重建数据,彻底保护隐私
✅ 图片拼接 —— 长截图/横向对比图
✅ 批量转换 —— 格式统一,WEBP 省流量
✅ 流式处理 ——
draft()分块,大图片不爆内存
关键记忆:Pillow 的隐藏技能 = 缩略图不变形 + 压缩有技巧 + 圆角靠遮罩 + 去重用哈希。

open()、save()、crop() 只是冰山一角,而那些藏在水下的 quantize()、draft()、putalpha(),才是让你在图像处理海洋里不沉底的真正浮力。