AI Agent 开发很快会碰到一批看起来属于不同领域的问题。
模型请求要通过 HTTP 发出去,流式输出依赖异步处理,Function Calling 要校验工具参数,RAG 要调用 Embedding 和向量数据库,Agent 工具通常还要通过 Web 服务暴露,MCP Server 本身也是一个长期运行的服务。它们最后都会落回普通的 Python 工程问题。
因此,整个 AI Agent 开发系列先安排这篇 Python 工程基础。暂时不调用大模型,也不实现 Agent,而是用一个天气查询服务把后续会反复出现的能力集中练一遍。
- 类型标注、数据结构与 Pydantic 约束程序内外的数据
async、await 与 HTTPX 负责异步网络调用- FastAPI 把能力暴露成带校验的 HTTP 接口
后续接入 LLM API 时,天气 API 会换成模型 API。学习流式输出时,异步请求会继续沿用。Function Calling 会复用参数模型和异常处理,RAG 会增加文档解析、Embedding 与检索,Agent 和 MCP 则会在现有 HTTP 服务、工具函数和测试方式上继续扩展。先把这些基础代码写明白,后面才能把注意力放在模型、检索和 Agent 的行为上。
这篇文章从空目录开始,完成一个可以查询上海、北京和深圳实时天气的 HTTP 服务。项目使用 Python 3.12、uv、HTTPX、FastAPI、Pydantic 和 pytest。
建议把整个过程做三遍。
最终目录如下。
weather-service/├── app/│ ├── __init__.py│ ├── cities.py│ ├── main.py│ └── weather.py├── tests/│ ├── __init__.py│ ├── test_cities.py│ └── test_weather.py├── .python-version├── pyproject.toml└── uv.lock
开始前需要准备什么
你需要 VS Code、Claude Code 扩展(配置参考我上一篇文章:“开篇与起飞”),以及能够访问互联网的开发环境。本文使用 Python 3.12,终端命令统一在 VS Code 的集成终端中执行。
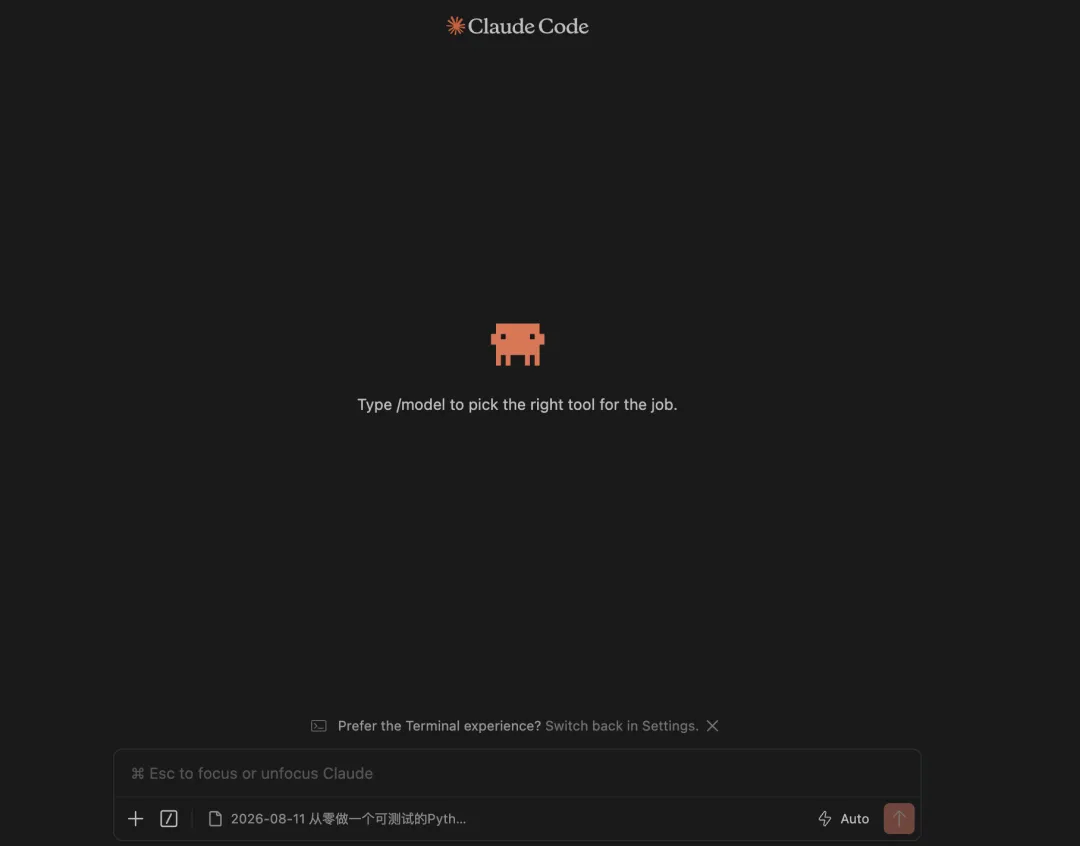
本文全程通过这个对话面板与 Claude Code 交流,不在终端中执行 claude 命令,也不要求额外安装独立的 Claude Code CLI。
确认 uv 是否可用。
uv --version
如果没有安装 uv,可以按官方安装方式执行。
curl -LsSf https://astral.sh/uv/install.sh | sh
安装结束后重新打开终端,再执行一次 uv --version。
Claude Code 可以协助检查环境、生成少量样板代码、解释报错和运行验证。核心代码仍然需要逐行审查,否则服务虽然跑通,隐藏的依赖、异常分支和实现取舍仍可能说不清。
一、环境搭建与项目结构
Python 环境为什么要隔离
不同项目可能依赖同一个库的不同版本。所有依赖都装进系统 Python,项目之间很容易互相影响。
虚拟环境给当前项目提供一套独立的 Python 解释器和依赖目录。传统做法通常要分别使用 venv 和 pip。
python3 -m venv .venvsource .venv/bin/activatepip install httpx fastapi
uv 把 Python 版本、虚拟环境、依赖声明、锁文件和命令执行放进同一套工具里。我们后面统一使用 uv,先知道传统工具各自负责什么,遇到旧项目时才不会看不懂。
创建项目
在终端执行下面的命令。
uv python install 3.12uv init weather-servicecd weather-serviceuv python pin 3.12uv add "fastapi[standard]" httpxuv add --dev pytest pytest-asynciomkdir -p app teststouch app/__init__.py tests/__init__.py
这些命令分别做了什么。
uv python install 3.12 安装可由 uv 管理的 Python 3.12uv init weather-service 创建 Python 项目uv python pin 3.12 把项目使用的 Python 版本写进 .python-versionuv add 把运行依赖写进 pyproject.toml,并更新 uv.lockuv add --dev 添加只在开发和测试时使用的依赖__init__.py 让 app 和 tests 成为可导入的 Python 包
执行下面的命令检查结果。
uv run python --versionuv run python -c "import fastapi, httpx; print('dependencies ok')"
你应该看到 Python 3.12 和 dependencies ok。
pyproject.toml、uv.lock 和 .venv 各管什么
pyproject.toml 记录项目声明,包括项目名、Python 版本要求和直接依赖。开发者需要读它,也经常会修改它。
uv.lock 记录解析后的精确依赖版本。把它提交到 Git,其他人执行 uv sync 时可以安装同一组版本。
.venv 保存当前机器上的解释器和已安装包。它体积大,而且可以通过 pyproject.toml 与 uv.lock 重建,通常不提交到 Git。
可以用下面的命令模拟另一位开发者安装项目。
uv sync
用 Claude Code 检查环境
打开项目目录后,点击 VS Code 中的 Claude Code 图标,在图形化对话面板中新建会话。
输入下面这段话。
先不要改文件。检查当前项目的 Python 版本、uv 配置、运行依赖和开发依赖。逐条执行必要的只读命令,解释 pyproject.toml、uv.lock、.python-version 和 .venv 分别负责什么。发现问题时先说明原因,不要直接修复。
Claude Code 会读取项目文件,并在获得许可后通过 VS Code 的集成终端执行检查命令。它给出的解释要和你刚才的实际结果互相印证,不能因为它说环境正常就跳过终端输出。
环境与依赖自测
关掉 Claude Code,删除当前练习目录,重新建一次项目。你需要独立回答下面四个问题。
uv run python 为什么不需要手动激活 .venv
四个问题都能讲清,再继续写业务代码。
二、Python 核心语法
我们先写城市坐标模块。创建 app/cities.py。
CITIES = {"shanghai": (31.2304, 121.4737),"beijing": (39.9042, 116.4074),"shenzhen": (22.5431, 114.0579),}defnormalize_city(city):return city.strip().lower()deffind_coordinates(city): normalized_city = normalize_city(city)if normalized_city notin CITIES:returnNonereturn CITIES[normalized_city]defprint_supported_cities():for city in CITIES: print(city.title())
先运行它。
uv run python -c "from app.cities import find_coordinates, print_supported_cities; print_supported_cities(); print(find_coordinates(' Shanghai '))"
预期输出类似下面这样。
ShanghaiBeijingShenzhen(31.2304, 121.4737)
逐行看懂这段代码
CITIES 是变量。它指向一个字典,键是统一转成小写的城市名,值是经纬度组成的元组。
函数用 def 定义,函数体依靠缩进划分。Python 没有 Java 风格的大括号,缩进属于语法的一部分。
defnormalize_city(city):return city.strip().lower()
这段代码先去掉字符串两端的空白,再转成小写。
if normalized_city notin CITIES:returnNone
in 检查字典里有没有这个键。None 表示这里没有找到结果。函数提前 return 后,后面的语句不会继续执行。
for city in CITIES: print(city.title())
循环字典时默认遍历键。title() 把单词首字母转成大写。
增加推导式
把 print_supported_cities 改成返回列表的函数。
defsupported_cities():return [city.title() for city in CITIES]
列表推导式可以拆成普通循环。
defsupported_cities(): result = []for city in CITIES: result.append(city.title())return result
两种写法结果相同。推导式适合简单映射或筛选。逻辑一旦需要多层判断、异常处理或很多中间变量,普通循环更容易读。
Java 或 Kotlin 开发者容易踩的坑
Python 的变量不用先声明类型,也没有 new。这让代码更短,也意味着一些错误要到运行时才暴露。
Python 用 None 表示空值,判断时写 is None 和 is not None。
coordinates = find_coordinates("unknown")if coordinates isNone: print("城市不存在")
不要把 is 当成 Java 的 ==。is 判断两个名字是否指向同一个对象。普通值比较使用 ==。
核心语法练习
独立完成下面的改动。
- 增加
is_supported(city),返回布尔值 - 让
supported_cities() 只返回名称长度超过七个字符的城市
完成后把第三项恢复成返回所有城市,因为后面的服务需要完整列表。
核心语法自测
不看文章写出一个函数。它接收城市名,先清理输入,再查询字典。找到时返回坐标,找不到时返回 None。
能写出来,并能解释 def、缩进、if、for、in 和 return,再继续增加类型。
三、数据结构、类型标注与 dataclass
上一节的代码可以运行,但函数接收什么、返回什么,要靠读实现猜。现在给它加上类型。
把 app/cities.py 改成下面这样。
from dataclasses import dataclassCITIES: dict[str, tuple[float, float]] = {"shanghai": (31.2304, 121.4737),"beijing": (39.9042, 116.4074),"shenzhen": (22.5431, 114.0579),}@dataclass(frozen=True, slots=True)classCoordinates: latitude: float longitude: floatdefnormalize_city(city: str) -> str:return city.strip().lower()deffind_coordinates(city: str) -> Coordinates | None: location = CITIES.get(normalize_city(city))if location isNone:returnNone latitude, longitude = locationreturn Coordinates(latitude=latitude, longitude=longitude)defsupported_cities() -> list[str]:return [city.title() for city in CITIES]
四种常用数据结构怎么选
list
list 有顺序、可修改,允许重复。城市接口返回多个名字时适合用列表。
cities: list[str] = ["Shanghai", "Beijing", "Shanghai"]cities.append("Shenzhen")
dict
dict 保存键值映射。我们需要通过城市名找到坐标,所以用字典。
city_codes: dict[str, int] = {"shanghai": 1,"beijing": 2,}
set
set 保存不重复的值,适合成员判断和去重,不保证按插入顺序输出。
visited: set[str] = {"Shanghai", "Beijing"}visited.add("Shanghai")
集合里仍然只有两个城市。
tuple
tuple 有顺序、不可修改,适合表示一组固定位置的数据。字典里的 (纬度, 经度) 使用元组。
location: tuple[float, float] = (31.2304, 121.4737)latitude, longitude = location
解包以后,第一个值进入 latitude,第二个值进入 longitude。元组只靠位置表达含义,字段多了以后容易看错。因此我们在函数返回处把它转换成 Coordinates。
类型标注能做什么
这行表达两个约定。
deffind_coordinates(city: str) -> Coordinates | None: ...
- 返回值可能是
Coordinates,也可能是 None
Python 运行时通常不会自动强制这些类型。你仍然可以错误地传入整数,问题可能到函数内部才出现。类型标注主要服务于读代码、编辑器提示和静态类型检查器。
dataclass 解决什么问题
如果不用 dataclass,一个只保存经纬度的类也要自己写初始化方法。
@dataclass 会根据字段生成初始化、比较和字符串展示等常用代码。
@dataclass(frozen=True, slots=True)classCoordinates: latitude: float longitude: float
frozen=True 让实例创建后不能随意改字段,适合坐标这种值对象。
slots=True 限制实例只能拥有声明过的字段,并减少一部分内存开销。它要求 Python 3.10 或更高版本,这也是本文固定 Python 3.12 的原因之一。
数据结构与类型练习
- 新建
City 数据类,包含 name 和 coordinates - 给
supported_cities() 的中间变量加类型标注 - 用
set 对 ['Shanghai', 'Beijing', 'Shanghai'] 去重
数据结构与类型自测
你需要脱离文章解释下面的选择。
四、async,await 与并发
外部天气 API 可能需要几百毫秒才返回。程序发出请求后,大部分时间都在等网络。
同步函数在等待时会占住当前执行流程。
deffetch_weather_sync(): response = httpx.get("https://example.com")return response.json()
异步函数遇到 await 时,可以把执行机会交回事件循环。事件循环可以先处理其他已经就绪的任务。
asyncdeffetch_weather_async(client: httpx.AsyncClient): response = await client.get("https://example.com")return response.json()
async def 调用后先得到协程对象。协程要由事件循环调度,或者在另一个异步函数中 await。
做一个最小实验
创建 async_demo.py。
import asyncioimport timeasyncdefwait_for_city(city: str, seconds: int) -> str:await asyncio.sleep(seconds)returnf"{city} finished"asyncdefrun_sequentially() -> None: started_at = time.perf_counter() first = await wait_for_city("Shanghai", 1) second = await wait_for_city("Beijing", 1) print(first, second) print(f"sequential cost {time.perf_counter() - started_at:.2f}s")asyncdefrun_concurrently() -> None: started_at = time.perf_counter() first, second = await asyncio.gather( wait_for_city("Shanghai", 1), wait_for_city("Beijing", 1), ) print(first, second) print(f"concurrent cost {time.perf_counter() - started_at:.2f}s")asyncdefmain() -> None:await run_sequentially()await run_concurrently()if __name__ == "__main__": asyncio.run(main())
运行它。
uv run python async_demo.py
顺序执行大约需要两秒,并发执行大约需要一秒。两项工作都在等待,所以可以交错进行。
async 不适合什么
async 适合网络请求、数据库访问和文件流等 IO 等待。大量计算会一直占用线程,单纯加 async 不会让计算变快。
还要记住一个边界。并发不等于并行。上面的两个任务在同一线程里交替推进,它们没有同时占用两个 CPU 核心做计算。
最常见的三个错误
调用异步函数却忘了 await。
result = wait_for_city("Shanghai", 1)
此时 result 是协程对象,不是字符串。
在异步函数里使用阻塞等待。
import timetime.sleep(1)
这会卡住事件循环。异步代码中应使用 await asyncio.sleep(1)。
把 asyncio.run() 塞进已经运行的事件循环。FastAPI 会管理事件循环,路由里直接 await 异步函数,不要再调用 asyncio.run()。
异步编程自测
关掉文章,自己写两个等待一秒的协程。先顺序执行,再用 asyncio.gather 并发执行,并打印耗时。随后解释下面这句话。
“async 不会让一次网络请求更快,它让程序在等待这次请求时还能处理别的工作。
五、用 HTTPX 调天气 API
我们使用 Open-Meteo 的公开天气 API。下面这个请求不需要 API Key。
https://api.open-meteo.com/v1/forecast?latitude=31.2304&longitude=121.4737¤t=temperature_2m,relative_humidity_2m,weather_code,wind_speed_10m&timezone=auto
先在浏览器打开它,观察 JSON 中的 current 和 current_units。
创建 app/weather.py。
import asyncioimport httpxfrom pydantic import BaseModel, ValidationErrorfrom app.cities import CoordinatesWEATHER_URL = "https://api.open-meteo.com/v1/forecast"MAX_ATTEMPTS = 3classCurrentWeather(BaseModel): time: str temperature: float temperature_unit: str humidity: int humidity_unit: str wind_speed: float wind_speed_unit: str weather_code: intclassWeatherServiceError(Exception):passasyncdeffetch_weather( client: httpx.AsyncClient, coordinates: Coordinates,) -> CurrentWeather: params = {"latitude": coordinates.latitude,"longitude": coordinates.longitude,"current": ("temperature_2m,relative_humidity_2m,""weather_code,wind_speed_10m" ),"timezone": "auto", }for attempt in range(MAX_ATTEMPTS):try: response = await client.get(WEATHER_URL, params=params) response.raise_for_status() data = response.json() current = data["current"] units = data["current_units"]return CurrentWeather( time=current["time"], temperature=current["temperature_2m"], temperature_unit=units["temperature_2m"], humidity=current["relative_humidity_2m"], humidity_unit=units["relative_humidity_2m"], wind_speed=current["wind_speed_10m"], wind_speed_unit=units["wind_speed_10m"], weather_code=current["weather_code"], )except (httpx.TimeoutException, httpx.NetworkError) as exc:if attempt == MAX_ATTEMPTS - 1:raise WeatherServiceError("天气服务连接失败") from excawait asyncio.sleep(2**attempt)except httpx.HTTPStatusError as exc:raise WeatherServiceError(f"天气服务返回 HTTP {exc.response.status_code}" ) from excexcept (KeyError, ValueError, ValidationError) as exc:raise WeatherServiceError("天气服务返回的数据格式异常") from excraise WeatherServiceError("天气服务连接失败")
请求经过了哪些步骤
response = await client.get(WEATHER_URL, params=params)
HTTPX 会把 params 编码成 URL 查询参数。await 等待网络响应,同时允许事件循环处理别的任务。
response.raise_for_status()
HTTP 状态码是 4xx 或 5xx 时,这行会抛出 HTTPStatusError。不调用它,错误页面也可能继续进入 JSON 解析流程,问题会变得更难定位。
data = response.json()
这一步把 JSON 响应转换成 Python 字典和列表。外部数据不受我们控制,所以随后还要处理缺少字段、JSON 无法解析和字段类型错误。
为什么需要超时
网络请求如果没有超时,上游迟迟不返回时,我们的接口可能一直挂着。HTTP 客户端稍后在 FastAPI 生命周期里创建。
timeout = httpx.Timeout(5.0, connect=2.0)client = httpx.AsyncClient(timeout=timeout)
这里给默认操作五秒,并把建立连接的等待限制为两秒。具体数字要根据应用和上游服务调整。入门项目先理解一点,超时必须显式存在。
为什么只重试网络错误
临时断网和连接超时可能下一次就恢复,所以可以有限重试。
上游返回 400 往往说明请求有问题,盲目重试不会改变结果。数据字段缺失也应尽快暴露,方便排查接口变化。
2**attempt 会依次得到 1、2、4。当前代码只在前两次失败后等待,所以实际等待一秒和两秒。这叫指数退避。
为什么抛出自定义异常
调用方不需要知道 HTTPX 的所有异常类型。WeatherServiceError 把外部依赖的各种错误收敛成天气服务自己的错误,FastAPI 路由只处理这一类即可。
单独运行一次天气请求
在项目根目录执行下面的命令。
uv run python - <<'PY'import asyncioimport httpxfrom app.cities import Coordinatesfrom app.weather import fetch_weatherasync def main() -> None: timeout = httpx.Timeout(5.0, connect=2.0) async with httpx.AsyncClient(timeout=timeout) as client: weather = await fetch_weather( client, Coordinates(31.2304, 121.4737), )print(weather.model_dump())asyncio.run(main())PY
如果请求成功,你会看到当前温度、湿度、风速和天气代码。
HTTP 请求与异常处理练习
- 暂时把
WEATHER_URL 改成错误域名,观察网络异常 - 把它改成返回 404 的地址,观察 HTTP 状态异常
你要能从异常类型判断问题发生在连接、HTTP 状态,还是响应数据。
六、用 FastAPI 提供 HTTP 服务
创建 app/main.py。
from contextlib import asynccontextmanagerfrom typing import Annotated, AsyncIteratorimport httpxfrom fastapi import FastAPI, HTTPException, Query, Requestfrom pydantic import BaseModelfrom app.cities import find_coordinates, supported_citiesfrom app.weather import CurrentWeather, WeatherServiceError, fetch_weatherclassWeatherResponse(BaseModel): city: str weather: CurrentWeatherclassCitiesResponse(BaseModel): cities: list[str]@asynccontextmanagerasyncdeflifespan(app: FastAPI) -> AsyncIterator[None]: timeout = httpx.Timeout(5.0, connect=2.0) app.state.http_client = httpx.AsyncClient(timeout=timeout)yieldawait app.state.http_client.aclose()app = FastAPI(title="Weather Service", lifespan=lifespan)@app.get("/health")asyncdefhealth() -> dict[str, str]:return {"status": "ok"}@app.get("/cities", response_model=CitiesResponse)asyncdefcities() -> CitiesResponse:return CitiesResponse(cities=supported_cities())@app.get("/weather", response_model=WeatherResponse)asyncdefweather( request: Request, city: Annotated[str, Query(min_length=2, max_length=30)],) -> WeatherResponse: coordinates = find_coordinates(city)if coordinates isNone:raise HTTPException( status_code=404, detail=f"暂不支持城市 {city}", )try: current = await fetch_weather( request.app.state.http_client, coordinates, )except WeatherServiceError as exc:raise HTTPException(status_code=502, detail=str(exc)) from excreturn WeatherResponse(city=city.title(), weather=current)
路由是什么
@app.get("/health")asyncdefhealth() -> dict[str, str]:return {"status": "ok"}
装饰器把 HTTP 的 GET /health 请求交给 health 函数。函数返回的字典会被 FastAPI 转成 JSON。
/cities 返回支持的城市,/weather 接收城市名并查询天气。
查询参数怎样进入函数
请求地址如下。
/weather?city=Shanghai
FastAPI 根据函数参数名,把查询字符串里的 city 传进函数。
city: Annotated[str, Query(min_length=2, max_length=30)]
这段声明要求 city 是字符串,长度在 2 到 30 之间。缺少参数或长度不合法时,FastAPI 会直接返回 422,不会进入天气查询逻辑。
response_model 做了什么
@app.get("/weather", response_model=WeatherResponse)asyncdefweather() -> WeatherResponse: ...
response_model 会校验并序列化输出,同时把结构写入 OpenAPI 文档。它让调用方知道成功响应有哪些字段。
Pydantic 的 BaseModel 会做运行时校验,这和普通 Python 类型标注不同。外部输入与输出到达系统边界时,运行时校验很有价值。
HTTP 状态码怎么选
本文用了三个常见状态。
502 表示本服务正常接到请求,但依赖的上游天气服务失败
同一个失败不能全部返回 500。调用方需要根据状态码决定修改参数、稍后重试,还是排查服务。
为什么复用 AsyncClient
lifespan 在应用启动时创建一个 AsyncClient,关闭时释放它。多个请求共用客户端,可以复用底层连接池。
不要在每个请求里反复写下面这段代码。
asyncwith httpx.AsyncClient() as client: ...
偶尔调用一次没有问题,高频接口会失去连接复用的收益。
启动服务
uv run fastapi dev app/main.py
打开交互文档。
http://127.0.0.1:8000/docs
再测试三个接口。
curl -s 'http://127.0.0.1:8000/health'curl -s 'http://127.0.0.1:8000/cities'curl -s 'http://127.0.0.1:8000/weather?city=Shanghai'
故意发出错误请求。
curl -i 'http://127.0.0.1:8000/weather'curl -i 'http://127.0.0.1:8000/weather?city=x'curl -i 'http://127.0.0.1:8000/weather?city=Unknown'
你应该依次看到缺少参数、参数太短和城市不存在。
FastAPI 自测
脱离文章新增一个接口。
GET /coordinates?city=Shanghai
成功时返回城市名、纬度和经度,不支持的城市返回 404。完成后再看 FastAPI 自动生成的 /docs 是否包含新接口。
组装项目、使用 Claude Code 和完成验收
代码能够启动,只能证明最基本的运行路径成立。接下来要把项目变成可检查、可修改、可复现的作品。
先让 Claude Code 做一次受控审查
先初始化 Git,并保存当前手写版本。在 VS Code 的集成终端执行。
git initgit add .git commit -m "build initial weather service"
随后打开 Claude Code 图形化对话面板,新建一个会话,输入下面的提示。
请审查当前天气服务,不要立刻改代码。先读取 pyproject.toml、app/cities.py、app/weather.py 和 app/main.py,再执行现有运行检查。检查项目结构、Python 类型、async/await、HTTP 超时与异常处理、FastAPI 参数校验。列出你确认存在的问题和建议,不要扩展新功能。
看完建议以后,只选择你能解释的修改。可以继续输入。
只修复刚才确认的实际问题。保持当前三文件结构,不增加框架和抽象。修改完成后运行测试与服务检查,并说明每处改动解决了什么。
Claude Code 完成修改后,先保留当前对话,回到 VS Code 的集成终端审查差异。
git statusgit diffgit diff --stat
逐行检查下面四件事。
看不懂的改动先撤掉或重新询问,不能因为测试通过就直接接受。
给城市模块写测试
创建 tests/test_cities.py。
from app.cities import Coordinates, find_coordinates, normalize_city, supported_citiesdeftest_normalize_city() -> None:assert normalize_city(" Shanghai ") == "shanghai"deftest_find_coordinates() -> None:assert find_coordinates("Shanghai") == Coordinates(31.2304, 121.4737)assert find_coordinates("unknown") isNonedeftest_supported_cities() -> None:assert supported_cities() == ["Shanghai", "Beijing", "Shenzhen"]
不访问真实网络也能测试天气模块
测试不能每次都依赖真实天气服务。网络会波动,实时温度也一直变化。HTTPX 的 MockTransport 可以拦截请求并返回固定响应。
创建 tests/test_weather.py。
import httpximport pytestfrom app.cities import Coordinatesfrom app.weather import WeatherServiceError, fetch_weather@pytest.mark.asyncioasyncdeftest_fetch_weather_success() -> None:defhandler(request: httpx.Request) -> httpx.Response:return httpx.Response(200, json={"current": {"time": "2026-08-11T20:30","temperature_2m": 25.9,"relative_humidity_2m": 91,"weather_code": 51,"wind_speed_10m": 14.2, },"current_units": {"temperature_2m": "°C","relative_humidity_2m": "%","weather_code": "wmo code","wind_speed_10m": "km/h", }, }, )asyncwith httpx.AsyncClient( transport=httpx.MockTransport(handler) ) as client: weather = await fetch_weather( client, Coordinates(31.2304, 121.4737), )assert weather.temperature == 25.9assert weather.humidity == 91@pytest.mark.asyncioasyncdeftest_fetch_weather_bad_payload() -> None:defhandler(request: httpx.Request) -> httpx.Response:return httpx.Response(200, json={"unexpected": True})asyncwith httpx.AsyncClient( transport=httpx.MockTransport(handler) ) as client:with pytest.raises(WeatherServiceError, match="数据格式异常"):await fetch_weather( client, Coordinates(31.2304, 121.4737), )
运行测试。
uv run pytest -q
预期结果如下。
5 passed
完整验收
先运行自动测试。
uv syncuv run pytest -q
再启动服务。
uv run fastapi dev app/main.py
开另一个终端执行。
curl -i 'http://127.0.0.1:8000/health'curl -i 'http://127.0.0.1:8000/cities'curl -i 'http://127.0.0.1:8000/weather?city=Shanghai'curl -i 'http://127.0.0.1:8000/weather?city=Unknown'
最后查看改动。
git statusgit diff
只有命令实际成功,才能说项目跑通。Claude Code 的文字总结不能代替这些结果。
七、脱离示例独立实现
这一步最费劲,也最有用。
把当前项目保留下来,再新建一个空目录。不要打开本文,也不要打开 Claude Code 对话面板。只看下面的需求,从头写第二遍。
使用 Python 3.12、uv、HTTPX 和 FastAPI,实现天气查询服务。要求支持上海、北京和深圳。提供 /health、/cities 和 /weather 三个接口。/weather 接收 city 查询参数。外部请求必须使用异步客户端,并配置超时。网络错误最多请求三次,等待时间逐次增加。上游失败转换成 502,不支持的城市返回 404。为城市查询和天气响应解析写自动测试,测试不得访问真实网络。
卡住时按下面的顺序处理。
提问时不要直接索要完整代码。可以这样问。
我在独立复写天气服务。下面是我的代码和完整报错。请先解释错误发生在哪一层,给我最小修改方向,不要直接重写整个文件。
最终检查清单
合上文章,尝试脱稿回答下面的问题。
环境与依赖
pyproject.toml 与 uv.lock 有什么区别
Python 核心语法
数据结构与类型
list、dict、set 和 tuple 各自适合什么数据
异步编程
asyncio.gather 为什么能缩短多个 IO 任务的总等待时间
HTTP 调用与异常处理
raise_for_status() 为什么不能省
FastAPI
response_model 和普通类型标注有什么区别
项目验收与 AI 辅助
- Claude Code 生成代码以后,为什么还要审查
git diff
这些问题答不出来,可以回到对应小节重新写一遍。最终标准很具体,能够从空目录独立复现服务,测试全部通过,并讲清每个关键决定。
关键资料
[uv 官方文档](https://docs.astral.sh/uv/)
[Python 官方教程](https://docs.python.org/3/tutorial/)
[HTTPX 官方文档](https://www.python-httpx.org/)
[FastAPI 官方教程](https://fastapi.tiangolo.com/tutorial/)
[Open-Meteo API 文档](https://open-meteo.com/en/docs)
[Claude Code 的 VS Code 扩展文档](https://code.claude.com/docs/en/ide-integrations)
 10个月宝宝每天需要喝多少奶粉?