前言:在Linux系统中修改IP地址是网络管理的基础操作,这里详细介绍临时修改(重启失效)和永久修改(重启生效)两种方式,涵盖主流发行版(CentOS/RHEL、Debian/Ubuntu)及工具(ifconfig、ip、nmcli)的使用方法。
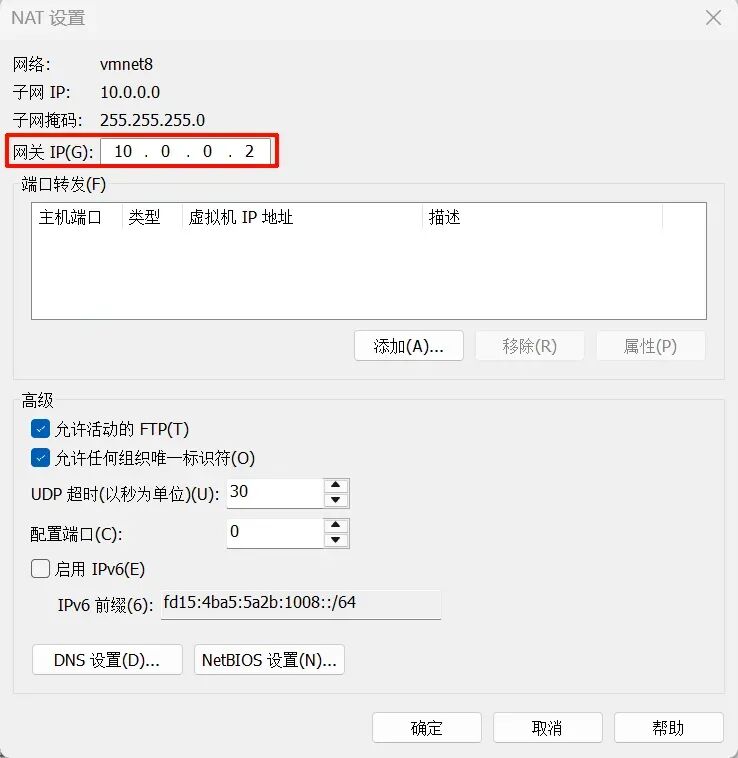
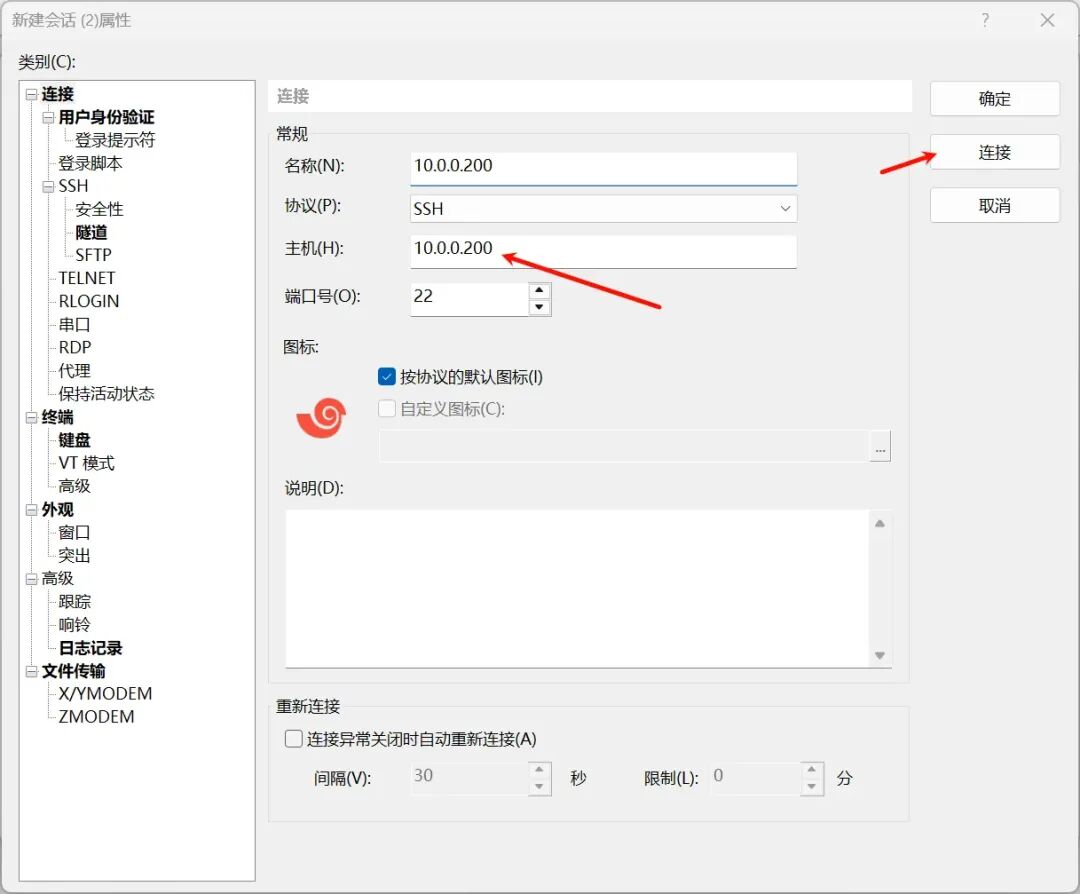
基础背景:1.宿主机(Windows)IP:192.168.0.215 子网掩码:255.255.255.0 网关:192.168.0.12.VMnet8 IP:192.168.255.1 子网掩码:255.255.255.0 DHCP Server:192.168.255.2543.虚拟机(Linux)IP:10.0.0.200 子网掩码:255.255.255.0 网关:10.0.0.2 DNS Server:223.5.5.54.因为虚拟机和VMnet8不在同一网段,所以Windows→VMnet8→Linux之间均不互通,通过修改Linux或者VMnet8的IP地址,使三者之间互通。
一、临时修改IP地址
优点:临时修改IP地址适用于快速测试或临时网络调整,无需修改配置文件。缺点:重启后配置丢失。
使用ifconfig命令
说明:1、传统方法,低版本Linux系统默认预装ifconfig命令,可直接使用。较新版本Linux系统默认不预装ifconfig命令,不能直接使用,需要手动安装ifconfig命令。2、在较新的 Linux 发行版中ifconfig命令已弃用并替换为ip命令,并且可能不包含在该发行版中。如果收到一条错误消息“ifconfig: command not found”,则表示这个Linux系统上未安装包含该命令的软件包。
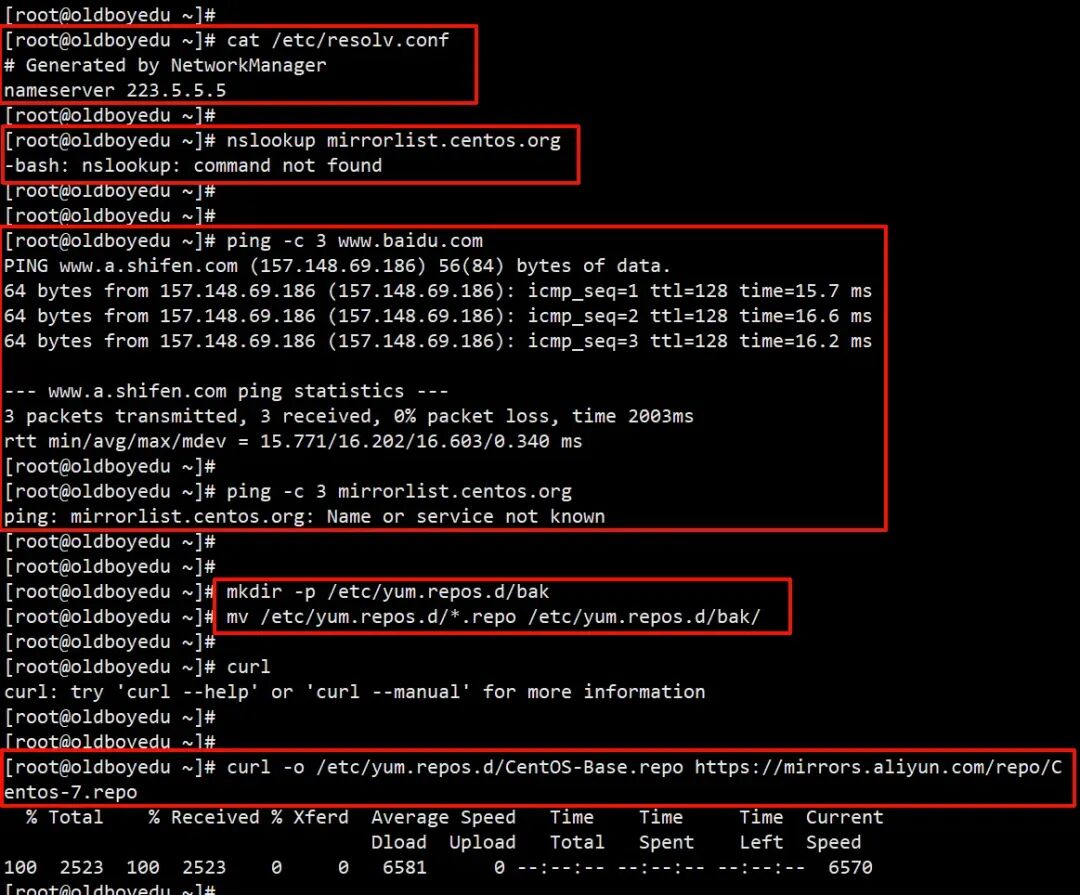
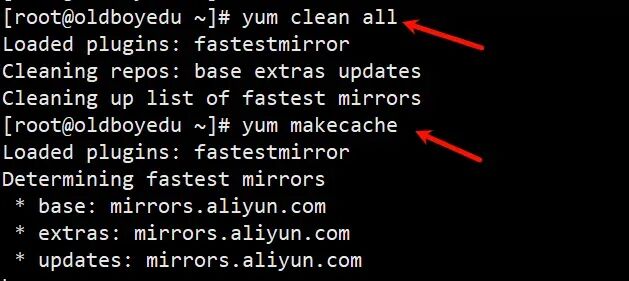
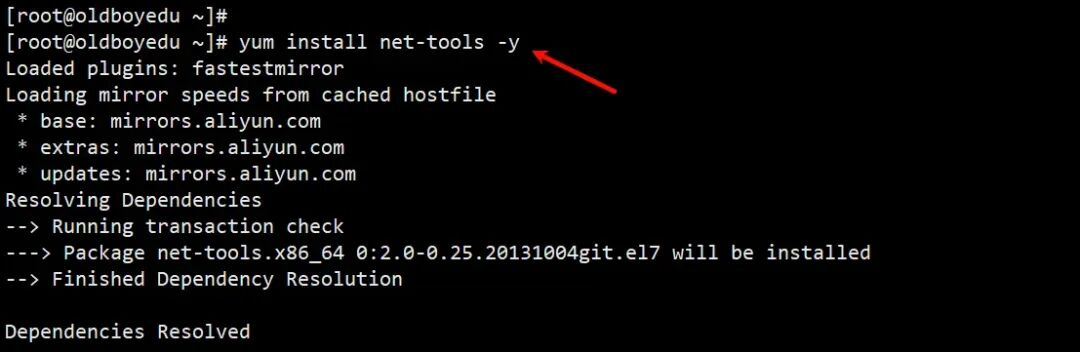
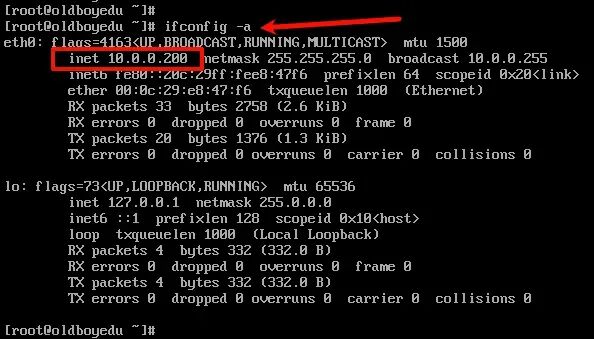
# ifconfig命令安装 适用于较新版本Linux# 在基于Ubuntu和基于Debian的Linux发行版上安装ifconfig命令sudo apt install net-tools -y# 在CentOS和其他基于RHEL的Linux发行版上安装ifconfig命令sudo dnf install net-tools -y # CentOS 8+# 或sudo yum install net-tools -y # CentOS 7及之前的版本# CentOS 7实践示例yum install net-tools -y# 报错如下# Loaded plugins: fastestmirror# Loading mirror speeds from cached hostfile# Could not retrieve mirrorlist http://mirrorlist.centos.org/?release=7&arch=x86_64&repo=os&infra=stock error was# 14: curl#6 - "Could not resolve host: mirrorlist.centos.org; Unknown error"# 报错排查思路# 1.检查DNS配置cat /etc/resolv.conf# Generated by NetworkManagernameserver 223.5.5.5 # DNS配置没问题# 2.测试外网连通性ping -c 3 www.baidu.comPING www.a.shifen.com (157.148.69.186) 56(84) bytes of data.64 bytes from 157.148.69.186 (157.148.69.186): icmp_seq=1 ttl=128 time=15.7 ms64 bytes from 157.148.69.186 (157.148.69.186): icmp_seq=2 ttl=128 time=16.6 ms64 bytes from 157.148.69.186 (157.148.69.186): icmp_seq=3 ttl=128 time=16.2 ms--- www.a.shifen.com ping statistics ---3 packets transmitted, 3 received, 0% packet loss, time 2003msrtt min/avg/max/mdev = 15.771/16.202/16.603/0.340 msping -c 3 mirrorlist.centos.orgping: mirrorlist.centos.org: Name or service not known# 3.初步评估是因为CentOS 7已经停止维护,官方源失效# 4.将yum源配置为阿里云 CentOS 7 vault 源# 4.1备份原有源mkdir -p /etc/yum.repos.d/bakmv /etc/yum.repos.d/*.repo /etc/yum.repos.d/bak/# 4.2下载阿里云CentOS 7 vault源curl -o /etc/yum.repos.d/CentOS-Base.repo https://mirrors.aliyun.com/repo/Centos-7.repo % Total % Received % Xferd Average Speed Time Time Time Current Dload Upload Total Spent Left Speed100 2523 100 2523 0 0 6581 0 --:--:-- --:--:-- --:--:-- 6570# 或者wget -O /etc/yum.repos.d/CentOS-Base.repo https://mirrors.aliyun.com/repo/Centos-7.repo# 4.3清理yum clean allLoaded plugins: fastestmirrorCleaning repos: base extras updatesCleaning up list of fastest mirrors# 4.4生成新缓存yum makecache# 5.开始安装ifconfigdnf-bash: dnf: command not founduname -aLinux oldboyedu 3.10.0-1160.el7.x86_64 #1 SMP Mon Oct 19 16:18:59 UTC 2020 x86_64 x86_64 x86_64 GNU/Linuxyum install net-tools -y# 6.验证ifconfig命令是否安装成功ifconfig -a #可以查看到ip,说明ifconfig命令安装成功
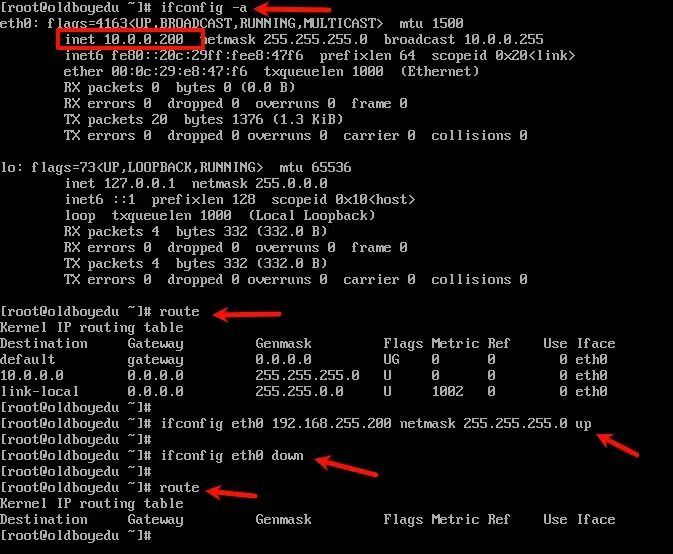
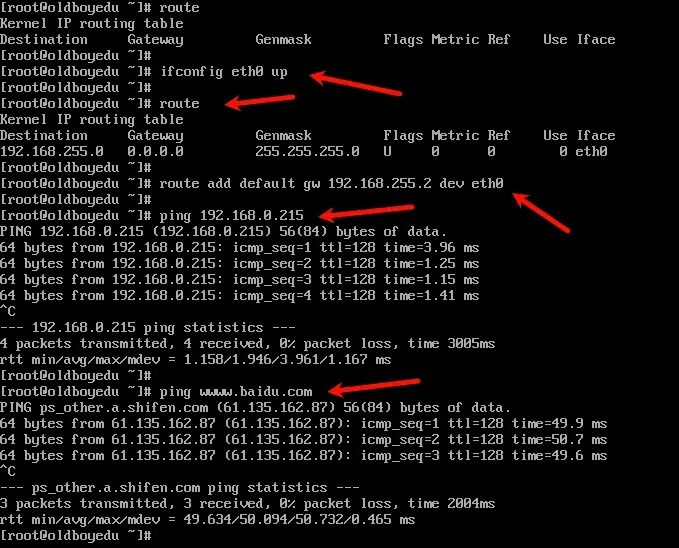
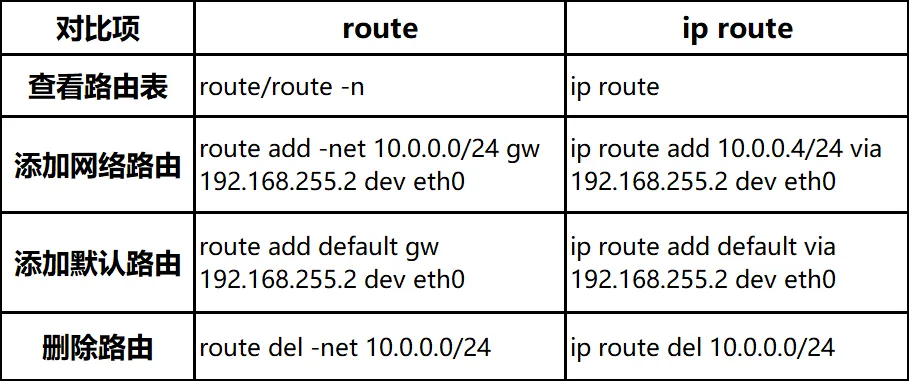
# 使用ifconfig命令临时修改IP地址# 设置IP地址和子网掩码ifconfig eth0 192.168.255.200 netmask 255.255.255.0 up# 删除IP地址(可选)ifconfig eth0 down # 关闭网卡eth0route # 查看路由表ifconfig eth0 up # 开启网卡eth0route # 查看路由表# 添加新网关,用route命令route add default gw 192.168.255.2 dev eth0# eth0为网卡名称,需根据实际情况替换(如ens33、enp0s3)。
route 命令 VS ip route 命令验证修改结果
修改yum源并安装net-tools

ifconfig临时修改IP
使用ip命令
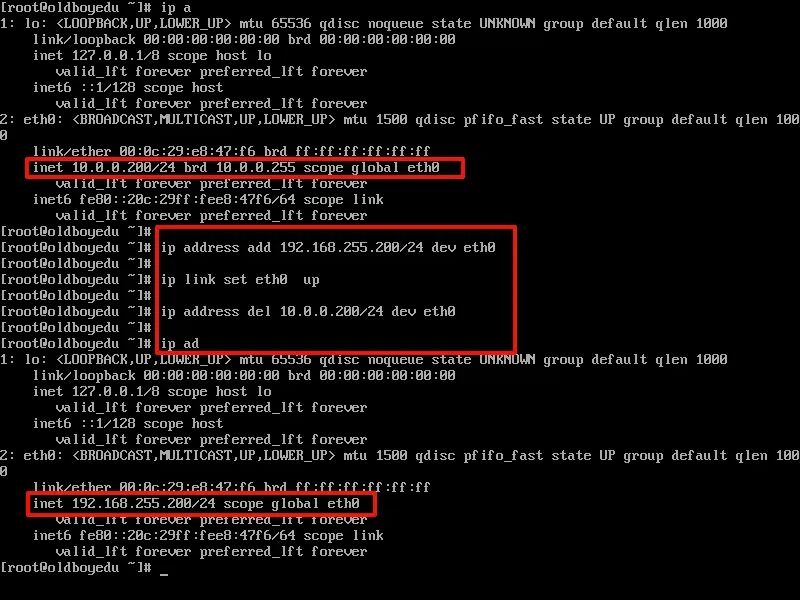
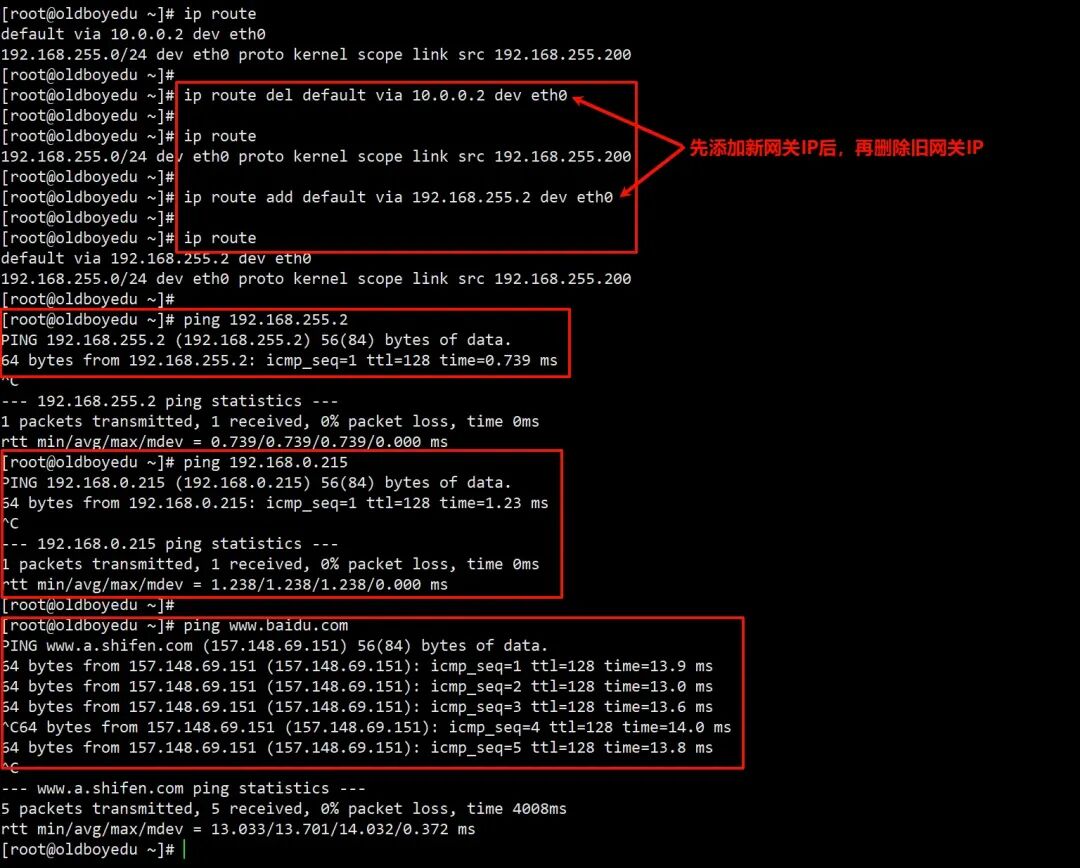
# 添加IP地址和子网掩码ip address add 192.168.255.200/24 dev eth0# 重启网卡ip link set eth0 up# 删除IP地址(可选)ip address del 10.0.0.200/24 dev eth0# 删除旧网关ip route del default via 10.0.0.2 dev eth0 # 删除网关10.0.0.2# 添加新网关ip route # 查看路由表ip route add default via 192.168.255.2 dev eth0 # 添加网关192.168.255.2
IP命令是ifconfig命令的现代替代工具,功能更强大。
验证修改结果
二、编辑VMware虚拟网络编辑器
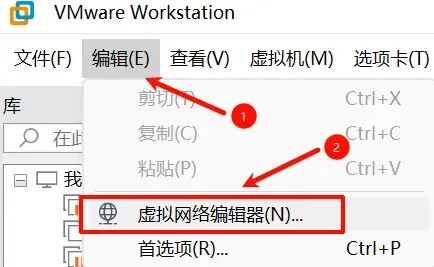
打开VMware软件的虚拟网络编辑器:
菜单栏→编辑(E)→虚拟网络编辑器(N)。

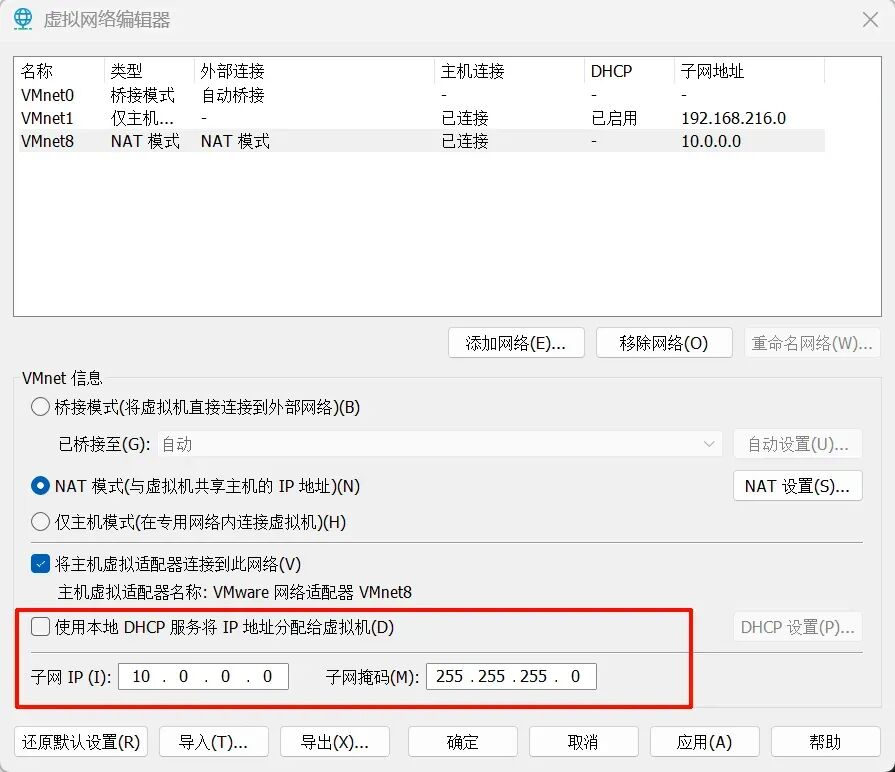
修改子网:
(1)选择VMnet8 NAT模式
(2)不勾选“使用本地DHCP服务将IP地址分配给虚拟机(D)”
(3)更改子网IP:10.0.0.0和子网掩码:255.255.255.0

三、永久修改IP地址
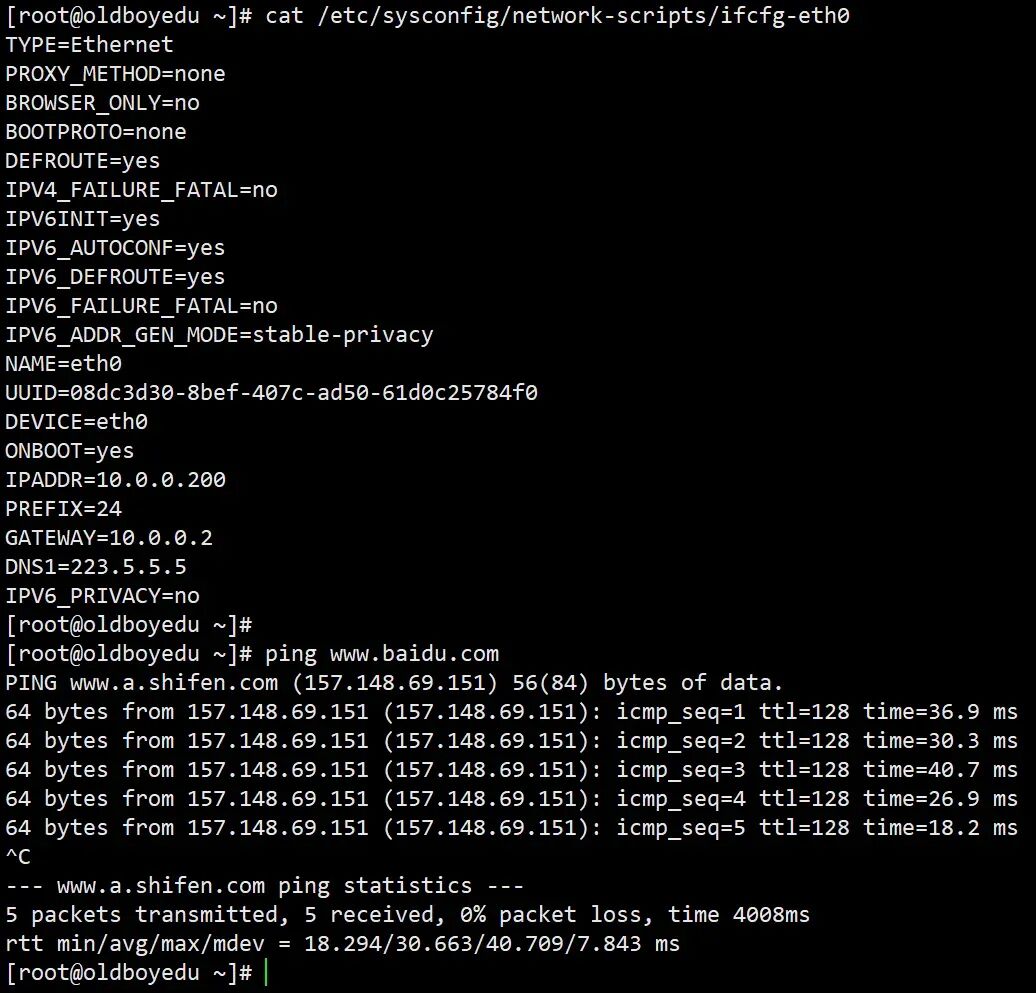
修改配置文件(CentOS/RHEL系列)
# 步骤# 1.编辑网卡配置文件(路径可能因发行版不同)vi /etc/sysconfig/network-scripts/ifcfg-eth0# 2.修改或添加以下内容DEVICE=eth0BOOTPROTO=static # 静态IP(或none)ONBOOT=yes # 开机自启IPADDR=10.0.0.200 # 目标IP地址NETMASK=255.255.255.0 # 子网掩码GATEWAY=10.0.0.2 # 默认网关DNS1=223.5.5.5 # 主DNSDNS2=114.114.114.114 # 备DNS# 3.重启网络服务systemctl restart network # CentOS 7+# 或service network restart # 旧版系统
验证修改结果
修改配置文件(Debian/Ubuntu系列)
# 步骤# 1.编辑网卡配置文件(路径可能为/etc/network/interfaces)vi /etc/network/interfaces# 2.修改或添加以下内容auto eth0iface eth0 inet static address 10.0.0.200 netmask 255.255.255.0 gateway 10.0.0.2 dns-nameservers 223.5.5.5 114.114.114.114# 3.重启网络服务systemctl restart networking # Ubuntu 16.04+# 或/etc/init.d/netwroking restart # 旧版系统
使用nmcli(NetworkManager工具)
# 适用于启用NetworkManager的系统,如Fedora、CentOS 8+# 查看当前连接nmcli connection show# 修改IP地址(假设连接名为"System eth0")nmcli connection modify "System eth0" \ ipv4.addresses 10.0.0.200/24 \ ipv4.gateway 10.0.0.2 \ ipv4.dns "223.5.5.5 114.114.114.114" \ ipv4.method manual# 重启连接nmcli connection down "System eth0" && nmcli connection up "System eth0"
 10个月宝宝每天需要喝多少奶粉?
