本地视频去水印和高清放大-python版
- 2026-10-11 07:58:49
本地视频去水印和高清放大-python版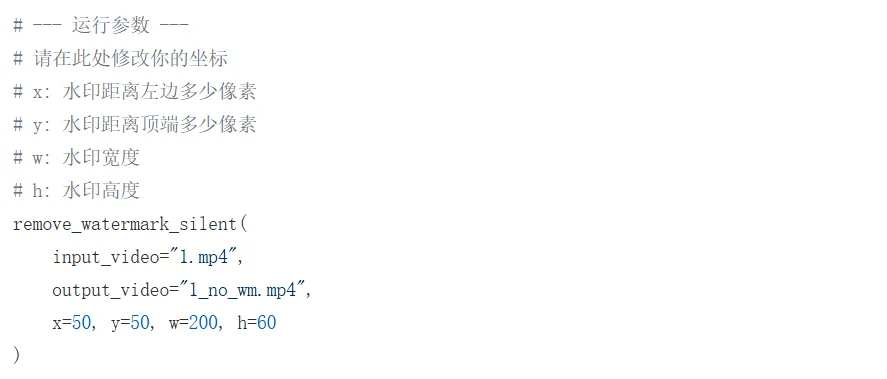
很多时候我们如果不充会员,用云端网站做出的视频往往都带有水印,并且长宽也无法自己定义,用我下面的这2份代码,可以实现水印消除和高清放大,纯本地运行。
去水印使用OpenCV的算法,高清放大使用Real-ESRGAN,第一次运行时只需要下载大约60M的模型即可。
我使用mac m4跑的,如果用别的平台,代码整体逻辑都不变,哪里都能运行。
先安装下面的依赖,除了python的包以外,还需要安装ffmpeg。
另外,处理的时候为了提高速度,我的视频没有声音,如果你的视频有声音的话,建议先用剪映等工具把音频去掉,处理好后再把声音合并上去。
如果因为平台不同代码运行报错,就把代码和错误信息随便丢给一个AI,修改下就行了,应该不会有大问题。
# 安装基础 AI 库 pip install torch torchvision #安装 Real-ESRGAN 处理库 pip install realesrgan # 安装 opencv pip install opencv-python pip install basicsr pip install numpy brew install ffmpeg代码已上传
https://github.com/xfei365/mycode
也可以从下面直接复制。下面这个是除去水印的代码,只需要修改你的原始视频路径,和水印相对于视频画面的坐标以及水印宽高,看代码里的注释就行了。修改后的视频会自动保存在原始视频同目录下。
import cv2import numpy as npimport subprocessimport osdef remove_watermark_silent(input_video, output_video, x, y, w, h):"""专门针对无声视频的去水印脚本x, y: 水印左上角坐标w, h: 水印宽高"""if not os.path.exists(input_video):print(f"❌ 找不到输入文件: {input_video}")return# 1. 打开视频cap = cv2.VideoCapture(input_video)width = int(cap.get(cv2.CAP_PROP_FRAME_WIDTH))height = int(cap.get(cv2.CAP_PROP_FRAME_HEIGHT))fps = cap.get(cv2.CAP_PROP_FPS)total_frames = int(cap.get(cv2.CAP_PROP_FRAME_COUNT))if width == 0 or height == 0:print("❌ 视频读取失败,请检查文件。")return# 2. 准备中间临时文件temp_processed = "temp_raw_processed.mp4"# 使用 mp4v 编码生成临时无声视频fourcc = cv2.VideoWriter_fourcc(*'mp4v')out = cv2.VideoWriter(temp_processed, fourcc, fps, (width, height))# 3. 准备遮罩 (Mask)mask = np.zeros((height, width), dtype=np.uint8)mask[y:y+h, x:x+w] = 255print(f"🚀 M4 硬件加速启动...")print(f"🎬 正在处理无声视频: {input_video} ({total_frames} 帧)")# 4. 逐帧修复count = 0while cap.isOpened():ret, frame = cap.read()if not ret:break# AI 修复算法 (Telea 算法)# 效果好,且在 M4 的 CPU 上运行极快dst = cv2.inpaint(frame, mask, inpaintRadius=3, flags=cv2.INPAINT_TELEA)out.write(dst)count += 1if count % 20 == 0 or count == total_frames:print(f"⏳ 进度: {count}/{total_frames} 帧", end='\r')cap.release()out.release()print("\n✅ 图像修复完成。")# 5. 最终转码 (调用 M4 硬件加速器 h264_videotoolbox)print("📦 正在进行最终硬件压制...")final_cmd = ['ffmpeg', '-y','-i', temp_processed,'-c:v', 'h264_videotoolbox', # 调用苹果硅片硬编'-b:v', '6000k', # 设置 6Mbps 高比特率确保清晰度output_video]try:# 执行合成并静默日志subprocess.run(final_cmd, check=True, capture_output=True)print(f"✨ 处理成功!输出文件: {output_video}")except subprocess.CalledProcessError as e:print(f"❌ 最终合成失败: {e.stderr.decode()}")finally:# 清理if os.path.exists(temp_processed):os.remove(temp_processed)# --- 运行参数 ---# 请在此处修改你的坐标# x: 水印距离左边多少像素# y: 水印距离顶端多少像素# w: 水印宽度# h: 水印高度remove_watermark_silent(input_video="EP01-6.mp4",output_video="EP01-6_no_wm.mp4",x=5, y=5, w=236, h=40)
下面这个是把视频高清放大的,如果你的视频要同时去除水印和高清放大,先用原始视频去除水印,然后再高清放大。具体参数看注释就行了,如果不是在mac上跑,比如是在英伟达上跑,丢给ai稍微处理一下就行了。整体区别不大,这里因为是mac,所以使用了mac上的mps加速,非mac主要是把这里注释掉就行了。
import osimport sysimport torch# ========================================================# 1. 兼容性补丁:修复 torchvision 找不到 functional_tensor 的问题# ========================================================try:import torchvision.transforms.functional_tensorexcept ImportError:try:import torchvision.transforms.functional as Fsys.modules['torchvision.transforms.functional_tensor'] = Fexcept ImportError:passimport cv2import numpy as npfrom realesrgan import RealESRGANerfrom basicsr.archs.rrdbnet_arch import RRDBNetdef upscale_video_m4(input_path, output_path, target_width=1280, target_height=704):if not os.path.exists(input_path):print(f"❌ 找不到文件: {input_path}")return# --- 模型参数配置 ---# 使用经典 RealESRGAN_x4plus 模型model_name = 'RealESRGAN_x4plus'# 显式指定模型下载地址,防止库内部报 NoneType 错误model_url = 'https://github.com/xinntao/Real-ESRGAN/releases/download/v0.1.0/RealESRGAN_x4plus.pth'# 初始化模型架构 (RRDBNet)model = RRDBNet(num_in_ch=3, num_out_ch=3, num_feat=64, num_block=23, num_grow_ch=32, scale=4)# 强制使用 M4 GPU 加速device = torch.device('mps')print(f"🚀 已激活 M4 GPU 加速 (MPS)")# --- 初始化超分器 ---try:upsampler = RealESRGANer(scale=4,model_path=model_url, # 这里传 URL,库会自动下载到 weights 文件夹model=model,tile=400, # 分块处理,防止 4K 等超大图爆内存tile_pad=10,pre_pad=0,half=True, # M4 支持 FP16 硬件加速,速度翻倍device=device)except Exception as e:print(f"❌ 初始化超分器失败: {e}")return# --- 读取视频 ---cap = cv2.VideoCapture(input_path)fps = cap.get(cv2.CAP_PROP_FPS)total_frames = int(cap.get(cv2.CAP_PROP_FRAME_COUNT))# 设置临时输出temp_avi = "temp_upscaled.avi"fourcc = cv2.VideoWriter_fourcc(*'XVID')out = cv2.VideoWriter(temp_avi, fourcc, fps, (target_width, target_height))print(f"🎬 开始高清处理: {total_frames} 帧")count = 0try:while cap.isOpened():ret, frame = cap.read()if not ret:break# AI 超分处理 (核心计算)# outscale=4 表示 AI 内部放大 4 倍output, _ = upsampler.enhance(frame, outscale=4)# 使用高画质 Lanczos 算法缩放到你要求的 1280x704final_frame = cv2.resize(output, (target_width, target_height), interpolation=cv2.INTER_LANCZOS4)out.write(final_frame)count += 1if count % 5 == 0:print(f"⏳ 进度: {count}/{total_frames} 帧", end='\r')except Exception as e:print(f"\n❌ 运行中出错: {e}")finally:cap.release()out.release()# --- 最终压制 (M4 硬件编码加速) ---print(f"\n📦 正在使用 M4 媒体引擎压制最终视频...")# 这里使用 h264_videotoolbox 是苹果芯片最快的压制方式final_cmd = f'ffmpeg -y -i "{temp_avi}" -c:v h264_videotoolbox -b:v 8000k "{output_path}"'os.system(final_cmd)if os.path.exists(temp_avi):os.remove(temp_avi)print(f"✨ 高清放大完成!输出至: {output_path}")if __name__ == "__main__":# 执行脚本upscale_video_m4("5_no_wm.mp4", "5_hd.mp4")
有问题留言。
如果有什么疑问,或者想进一步交流,可以到知识星球来找我。我每天都会在星球里分享AI相关的内容和回答问题。

本文来自网友投稿或网络内容,如有侵犯您的权益请联系我们删除,联系邮箱:596563534@qq.com 。
