一、Oracle Database 26ai 已于1月28日发布,可以在本地安装了。
1.安装环境要求
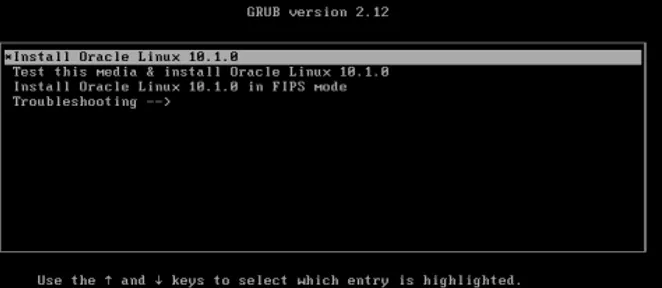
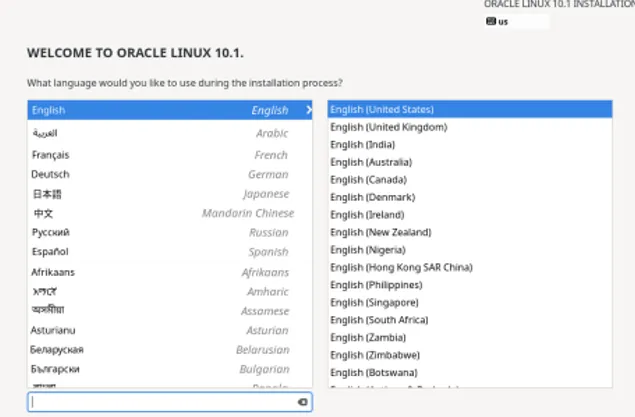
操作系统:Oracle Linux 10.1(见下面)
数据库:Oracle 26ai 23.26.1
l集群的节点(cluster nodes) – 2个到n节点或者主机运行Oracle database server。
l私有网络(Network Interconnect) – RAC之间需要一个私有网络来处理通讯和cache fusion。
l共享存储(Shared Storage) – RAC需要共享存储设备让所有的节点都可以访问数据文件。
l对外服务的网络(Production network) – RAC对外服务的网络。客户端和应用都通过这个网络来访问。
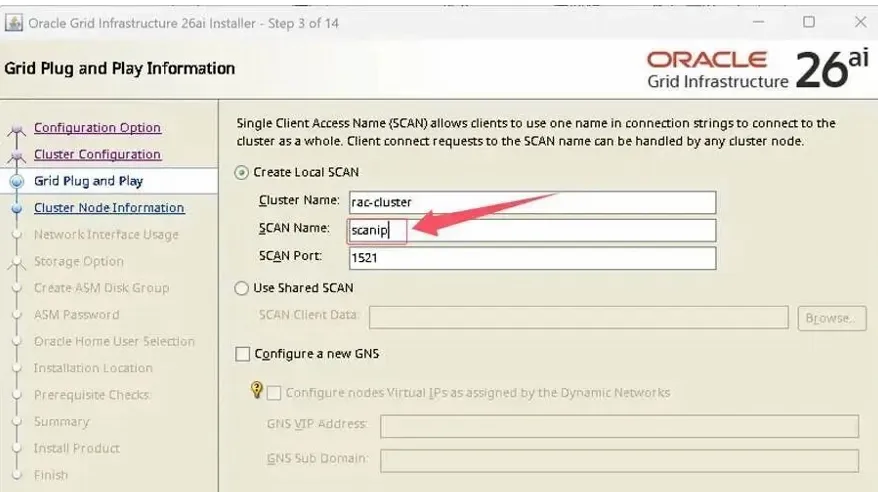
2. IP规划
主机名称 | 网卡IP | VIP | 私网IP | SCANIP |
26ai01 | 192.168.10.10 | 192.168.10.12 | 10.10.0.10 | 192.168.10.15 |
26ai02 | 192.168.10.11 | 192.168.10.13 | 10.10.0.11 |
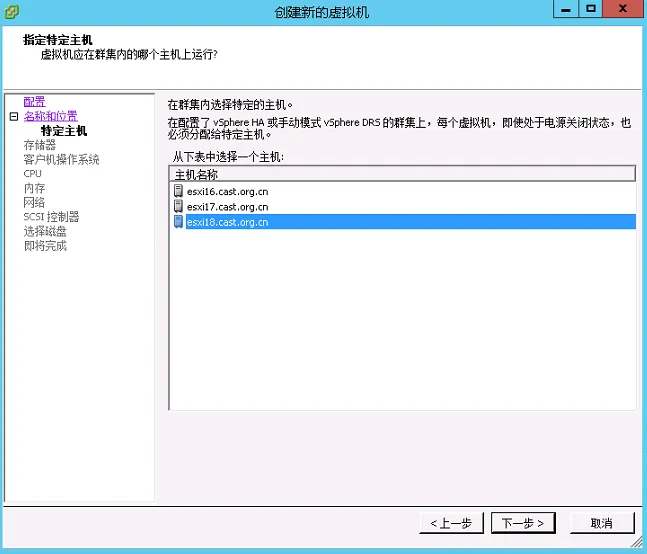
配置虚拟机的安装
提示“安全警告”,点击“忽略”即可
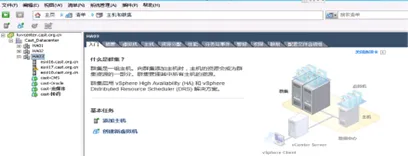
进入虚拟机管理界面
进入虚拟机管理界面

二、Oracle Linux 10.1 介绍
什么是Oracle Linux:
Oracle Linux是Oracle应用程序唯一推荐的Linux发行版,旨在为您的关键任务工作负载提供最安全、可扩展且可靠的解决方案。
搭载Unbreakable Enterprise Kernel的Oracle Linux可提供来自Oracle和主流内核社区的最佳性能及最新功能。
Oracle Linux 10.1新特性和改变:
重要提示:更新版本是Oracle Linux发行版最新支持软件包的滚动快照,并不被视为独立的Oracle Linux版本。请勿尝试将Oracle Linux系统固定至特定更新版本。务必始终将系统更新至操作系统的最新更新版本。否则,您的系统将面临常见安全漏洞及其他软件缺陷的风险。
新特性与变更:
除非特别说明,以下Oracle Linux 10.1中引入的新功能、重大改进、错误修复及其他变更均适用于x86_64与64位Arm(aarch64)平台。
Installation and Boot 安装与启动
Oracle Linux 10.1发行版引入了以下与安装和启动相关的功能、增强及变更。
为ISO安装新增fips=1启动菜单项
一个新的启动菜单项为ISO安装启用fips=1内核选项,以简化FIPS合规性配置。
通过DVD和引导ISO镜像安装时,提供了一个新的启动菜单项用于设置fips=1内核启动选项。在Oracle Linux安装期间启用FIPS模式可确保系统使用FIPS批准的算法生成所有密钥,并执行持续监控测试。使用此启动选项后,系统将携带fips=1内核参数开始安装,以确保系统符合《联邦信息处理标准》(FIPS)140的要求。
/etc/fstab中的逻辑卷使用UUID
使用Oracle Linux 10.1安装后,逻辑卷(LV)设备在/etc/fstab文件的fs_spec字段中会以其UUID的形式写入。此变更使配置更加一致和可靠,特别是在重命名、重新加密或重新配置存储设备时。
(1)支持重命名LV或卷组,无需手动编辑/etc/fstab。
(2)保持挂载配置在不同环境间的可移植性。
(3)在LUKS重新加密或设备映射器路径更改后,仍能保持配置的正确性。
编译器与开发工具
Oracle Linux 10.1引入了以下与编译器和开发工具相关的功能、增强及变更。
dyninst框架更新至13.0.0
dyninst 13.0.0改进了对AMD GPU二进制文件的支持以及x86指令/C++ DWARF解析,以实现更好的运行时插装。
SystemTap更新至版本5.3
SystemTap 5.3具备多线程解析功能,可实现更快的初始化。
更多信息请参见:https://sourceware.org/systemtap/wiki/SystemTapReleases
elfutils更新至版本0.193
elfutils已更新至版本0.193。
valgrind升级至版本3.25.1
valgrind已升级至3.25.1。
更多信息请参见:https://valgrind.org/docs/manual/dist.news.html
Oracle Linux 10.1将valgrind拆分为核心、脚本、GDB集成和文档等子软件包,可按需选择安装所需组件。
这种模块化方法减少了占用空间,并方便了在Oracle Linux开发工作流中专注于特定valgrind功能的用户进行管理。
llvm-toolset更新至LLVM 20
llvm-toolset已升级至LLVM 20。
更多信息请参见:https://releases.llvm.org/20.1.0/docs/ReleaseNotes.html
GCC工具集15现已可用
Oracle Linux 10.1提供gcc-toolset-15,它包含最新的GCC及相关工具,使您能够使用最新的编译器技术构建、测试和部署应用程序。
Networking 网络
Oracle Linux 10.1引入了以下与网络相关的功能、增强及变更。
iproute2更新至版本6.14
Oracle Linux 10.1中的iproute软件包已更新至版本6.14.0。
File Systems and Storage文件系统与存储
Oracle Linux 10.1引入了以下与文件系统和存储相关的功能、增强及变更。
Multipathd支持基于文件的套接字用于容器通信
Multipathd可使用基于文件的套接字,实现从容器的通信到主机守护进程。multipathd守护进程监听位于/run/multipathd.socket的套接字文件以及抽象命名空间套接字。您可以将该套接字绑定挂载到容器中,使其更轻松地与主机的multipathd守护进程交互。
此功能增强了存储管理的容器集成性,让您无需额外网络配置即可从容器内部监控和配置多路径设备。设备路径在容器边界之间保持一致性。
在容器中挂载/run/multipathd.socket,并使用标准多路径工具(例如multipath -ll)从容器内部查询或管理设备。
High Availability and Clusters 高可用性与集群
Oracle Linux 10.1引入了以下与高可用性相关的功能、增强及变更。
IPaddr2资源代理检测接口链路故障
IPaddr2资源代理会检查网络接口的链路状态,并在网络接口宕机时正确处理故障转移,从而提升集群可靠性。此功能默认启用。
管理员可通过在资源配置中设置check_link_status=false来禁用链路监控和自动故障转移。
fence_sbd代理自动检测SBD设备
如果在使用devices参数时未明确指定SBD设备路径,fence_sbd代理可以自动获取SBD设备配置。如果省略该参数,代理将从/etc/sysconfig/sbd文件中的SBD_DEVICE变量获取配置。
此增强功能简化了使用SBD的Pacemaker集群中的隔离设置,减少了配置错误,并简化了标准设置的部署流程。
pcs在移除最后一个隔离设备前警告用户
pcs可防止意外移除集群的最后一个隔离机制,并显示错误消息以避免集群处于不受支持的状态。例如:
如果使用--force选项,可以覆盖此操作的阻止,但会显示警告消息:
pcs alert config提供多种输出格式
pcs alert config子命令提供文本、json和cmd输出格式,可通过--output-format选项控制。JSON和命令输出格式使得告警配置更易于自动化和复制。
pcs cluster rename命令可用于重命名集群
现在可以使用pcs cluster rename <新名称>命令对集群进行重命名,减少了手动操作步骤。该命令会更新所有相关的集群属性,确保重命名后集群继续无缝工作。
pcs node attribute和pcs node utilization命令包含多种输出格式
pcs中的节点属性和利用率报告现在包含文本、json和cmd输出格式,以便于脚本编写和自动化。在使用pcs节点命令时,可通过--output-format选项来设置所需的输出格式。
Kernel and System Libraries 内核与系统库
以下显著特性、增强与变更适用于Oracle Linux 10.1附带的红帽兼容内核(RHCK)。
eBPF子系统更新至版本6.14
RHCK中的eBPF子系统已更新至版本6.14,引入了来自Linux内核v6.14的各项上游增强功能。
Crash工具更新至版本9.0.0
提供针对运行中系统及各类转储文件的内核分析工具的crash软件包已更新至上游版本9.0.0。此版本包含多项修复与增强,包括:
(1)内部gdb数据库更新至版本16.2。
(2)crash工具现已支持交叉编译。
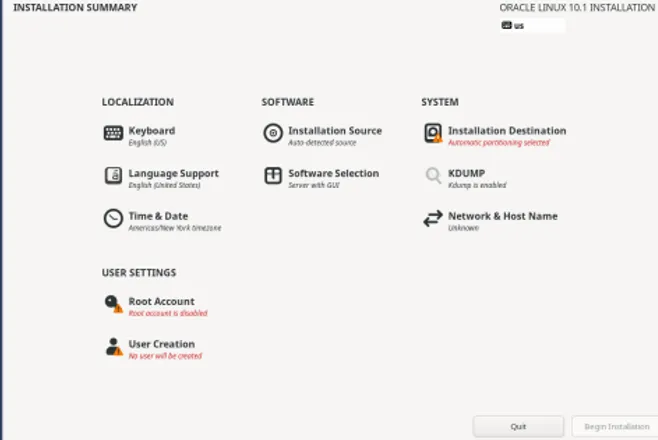
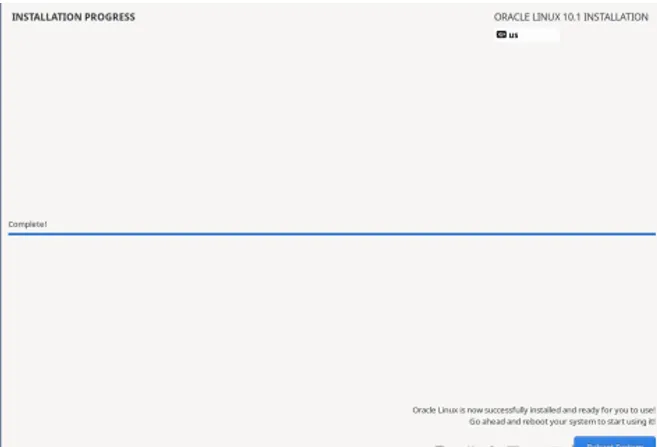
操作系统的安装
1.1操作系统安装
1.1.1 资源配置
4c/8g两块网卡
1.1.2 最小安装
不需要安装图形界面,最小化安装即可,安装结果验证一下:
[root@rac01 ~]# yum grouplist |grep -i install
Installed Environment Groups:
Minimal Install

三、Oracle 26ai 2节点RAC安装步骤
1.操作系统准备
1.1安装版本
[root@26ai01 ~]# cat /etc/oracle-release
Oracle Linux Server release 10.1
1.2关闭防火墙
Systemctl disable --now firewalld
1.3 关闭SELINUX
grubby --update-kernel ALL --args selinux=0
1.4 关闭透明大页
vim /etc/default/grub
GRUB_CMDLINE_LINUX=… transparent_hugepage=never
grub2-mkconfig -o /boot/grub/grub.cfg
1.5创建用户及组
添加用户组:
groupadd -g 4330 oinstall
groupadd -g 4331 dba
groupadd -g 4332 racoper
groupadd -g 4323 asmdba
groupadd -g 4324 asmoper
groupadd -g 4325 asmadmin
groupadd -g 4326 oper
groupadd -g 4327 backupdba
groupadd -g 4328 dgdba
groupadd -g 4329 kmdba
创建用户:
useradd -u 4330 -g oinstall -G asmoper,asmadmin,asmdba grid
useradd -u 4331 -g oinstall -G dba,asmdba,backupdba,dgdba,kmdba,oper,asmadmin oracle
1.6配置用户环境变量
注意节点2 oracle_sid变量需要修改
cat /home/grid/.bash_profile
export ORACLE_BASE=/u01/app/grid
export ORACLE_HOME=/u01/app/26.1.0/grid
export ORACLE_SID=+ASM1
export PATH=$ORACLE_HOME/bin:$PATH
export LD_LIBRARY_PATH=$ORACLE_HOME/lib:$ORACLE_HOME/lib32:$LD_LIBRARY_PATH
cat /home/oracle/.bash_profile
export ORACLE_BASE=/u01/app/oracle
export ORACLE_HOME=$ORACLE_BASE/product/26.1.0/dbhome_1
export ORACLE_SID=orcl1
export PATH=$ORACLE_HOME/bin:$PATH
export LD_LIBRARY_PATH=$ORACLE_HOME/lib:$ORACLE_HOME/lib32:$LD_LIBRARY_PATH
1.7 创建相关目录
创建目录:
mkdir -p /u01/app/26.1.0/grid
mkdir -p /u01/app/grid
mkdir -p /u01/app/oracle/product/26.1.0/dbhome_1
chown -R grid:oinstall /u01/app
chown -R oracle:oinstall /u01/app/oracle
chmod -R 775 /u01/app
1.8 设置用户limit
cat/etc/security/limits.conf
oraclesoftnproc655350
oraclehardnproc655350
oraclesoftnofile655360
oraclehardnofile655360
gridsoftnproc655350
gridhardnproc655350
gridsoftnofile655360
gridhardnofile655360
oraclesoftstack102400
oraclehardstack327680
gridsoftstack102400
gridhardstack327680
oracle soft memlock -1
oracle hard memlock -1
gridsoft memlock -1
gridhard memlock -l
1.9 修改内核参数
在9及以上版本,/etc/sysctl.conf下配置内核参数仍然可以永久生效,但按照推荐修改/etc/sysctl.d/99-oracle.conf文件
执行sysctl -p命令使参数生效
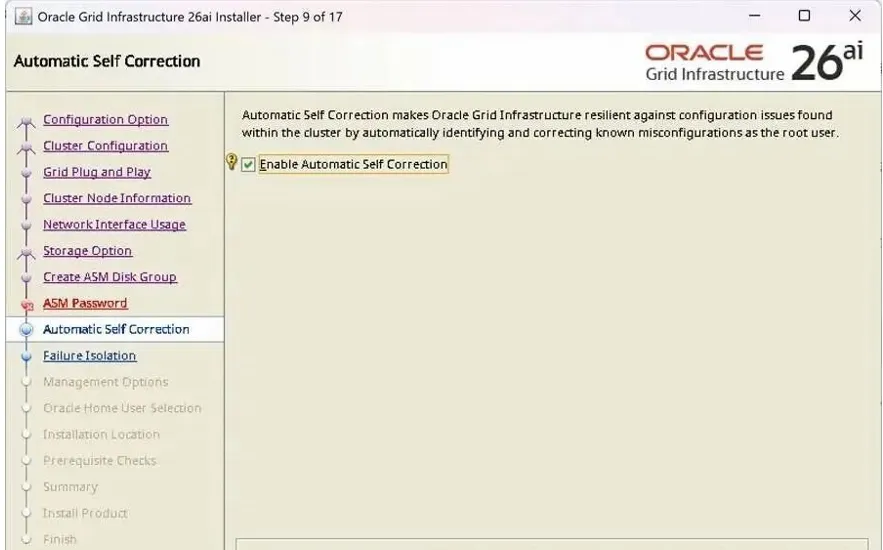
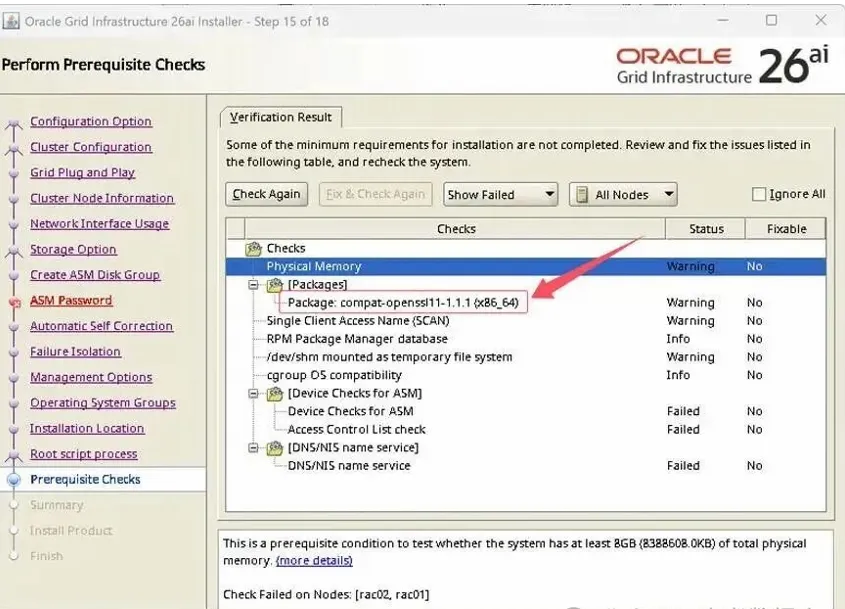
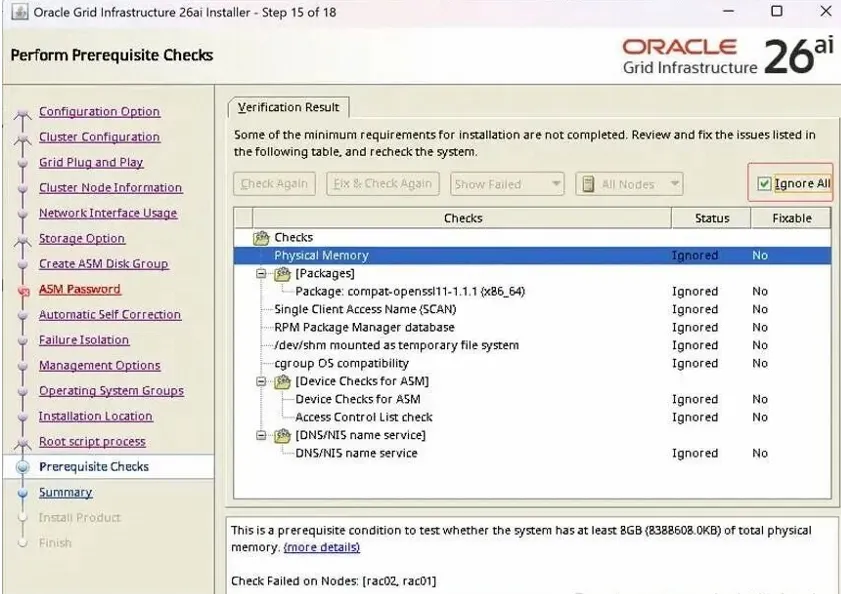
这里可以不设置,26AI,可以帮我们自动修复。Automatic Self Correction
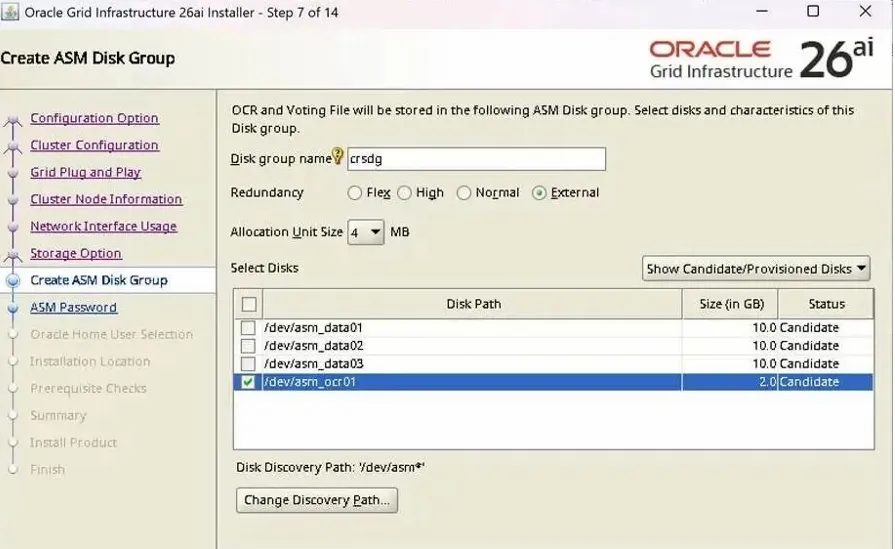
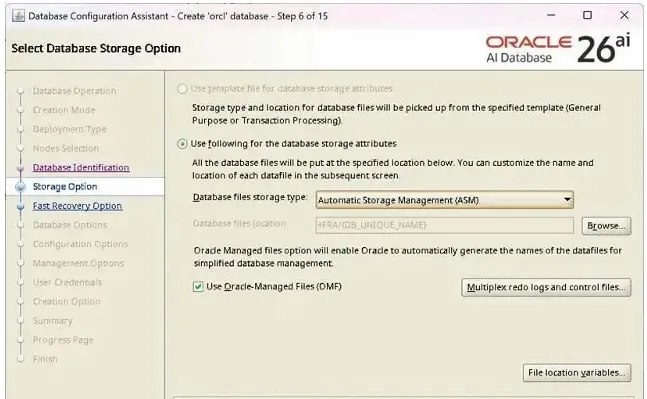
1.10.存储设置
创建共享磁盘创建集群盘
用于验证,使用外部冗余只创建一个盘即可,大小2g
存储组件:创建4个10g大小的盘,两个用于数据. 一个用于归档,一个用于fra,26ai,不再需要GIMR 磁盘
存储组件 | 文件系统 | 卷大小 | ASM卷组名 | ASM冗余 | 磁盘名 |
CR/表决磁盘 | | 2G | CRS | External | OCR_VOTE01 |
数据库区 | | 10G | DATA | External | data-disk1 |
数据库区 | | 10G | DATA | External | data-disk2 |
数据库区 | | 10G | DATA | External | data-disk3 |
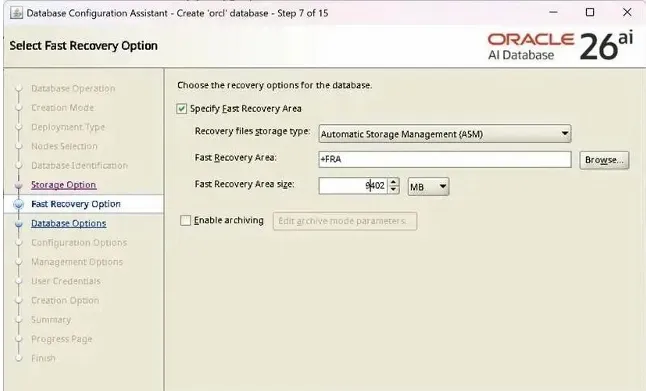
快速恢复区 | | 10G | FRA | External | arc-disk1 |
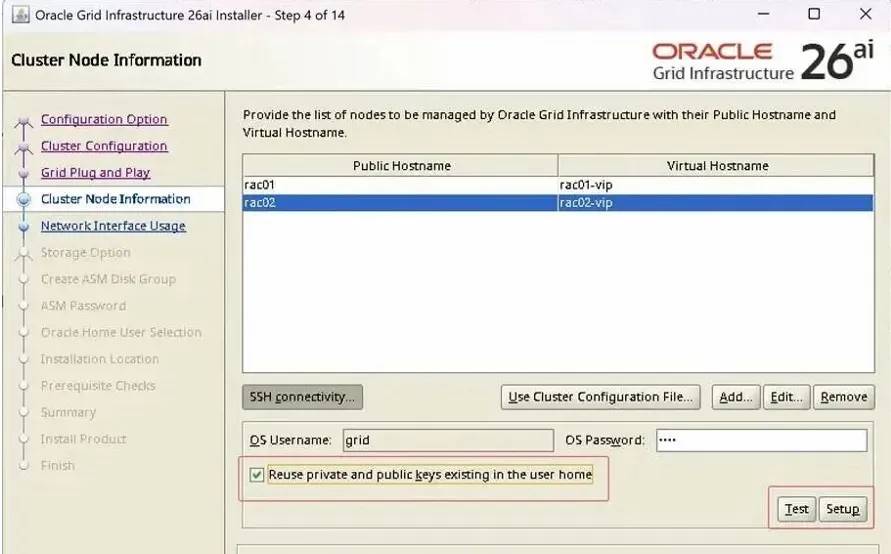
1.11设置ssh节点的互通性
设置ssh 、保证两个节点的互通性
在GridInfrastructure 和Database 安装过程中,Oracle Universal Installer (OUI) 必须能够以grid 的身份自动将软件复制到所有 RAC节点。这里我们通过配置ssh 让
grid用户拥有不输入密码即可访问各节点的能力。
首先两个节点间互ping,要确保都是通的。 节点1PING节点2:
ssh-keygen -t rsa
1.12使用udev方式
cat /etc/udev/rules.d/99-oracle-asmdevices.rules
KERNEL=="sd*", ENV{DEVTYPE}=="disk", SUBSYSTEM=="block", PROGRAM=="/usr/lib/udev/scsi_id -g -u -d $devnode", RESULT=="36000c29880964c565368339d1ace12bf", RUN+="/bin/sh -c 'mknod
/dev/OCR_VOTE01 b $major $minor; chown grid:asmadmin /dev/OCR_VOTE01; chmod 0660 /dev/OCR_VOTE01'"
KERNEL=="sd*", ENV{DEVTYPE}=="disk", SUBSYSTEM=="block", PROGRAM=="/usr/lib/udev/scsi_id -g -u -d $devnode", RESULT=="36000c29c6ca1578b775328fc69808db", RUN+="/bin/sh -c 'mknod /dev/data-disk1 b $major $minor; chown grid:asmadmin /dev/data-disk1 chmod 0660 /dev/data-disk1'"
KERNEL=="sd*", ENV{DEVTYPE}=="disk", SUBSYSTEM=="block", PROGRAM=="/usr/lib/udev/scsi_id -g -u -d $devnode", RESULT=="36000c29e5fa178e0c36ae73183ac88f8", RUN+="/bin/sh -c 'mknod
/dev/data-disk2 b $major $minor; chown grid:asmadmin /dev/data-disk2; chmod 0660 /dev/ data-disk2'"
KERNEL=="sd*", ENV{DEVTYPE}=="disk", SUBSYSTEM=="block", PROGRAM=="/usr/lib/udev/scsi_id -g -u -d $devnode", RESULT=="36000c29c5314e8c23e2c19ff3022d785", RUN+="/bin/sh -c 'mknod /dev/data-disk3 b $major $minor; chown grid:asmadmin /dev/data-disk3; chmod 0660 /dev/data-disk3"
手动加载
/sbin/udevadm trigger --type=devices --action=change
udevadm control --reload-rules
结果:
[root@rac01 ~]# ls -ltr /dev/asm*
brw-rw---- 1 grid asmadmin 8, 32 Jan 29 15:46 /dev/data_disk1
brw-rw---- 1 grid asmadmin 8, 48 Jan 29 15:46 /dev/data_disk2
brw-rw---- 1 grid asmadmin 8, 64 Jan 29 15:46 /dev/ data_disk3
brw-rw---- 1 grid asmadmin 8, 16 Jan29 15:46 /dev/OCR_VOTE01
brw-rw---- 1 grid asmadmin 8, 16 Jan29 15:46 /dev/arc-disk1
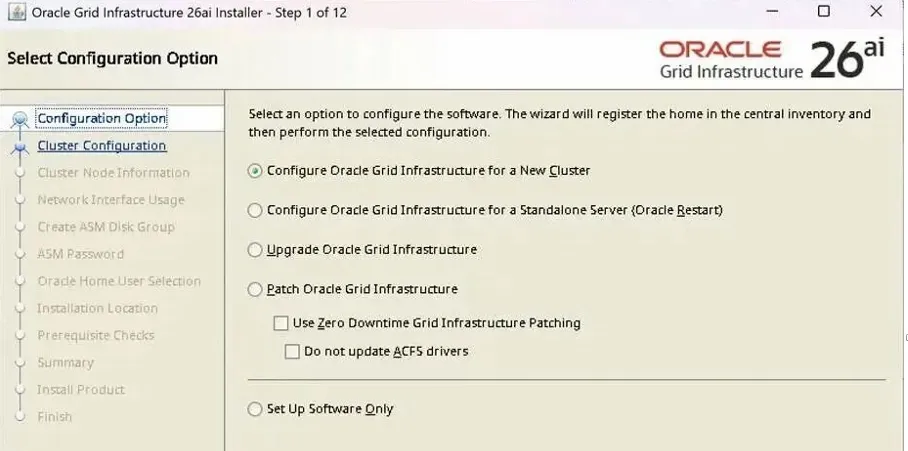
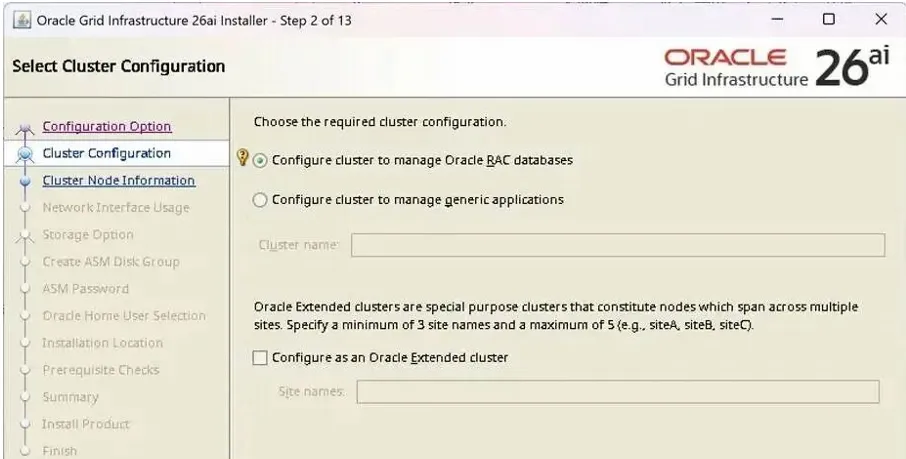
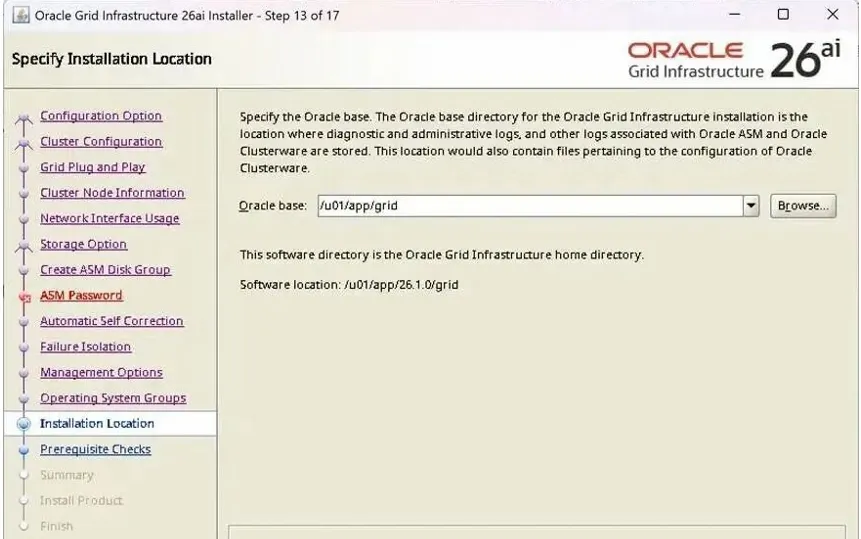
1.13.GI安装
解压安装文件
su – grid
unzip -d $ORACLE_HOME LINUX.X64_2326100_grid_home.zip
安装gi su - grid
cd $ORACLE_HOME
./gridSetup.sh

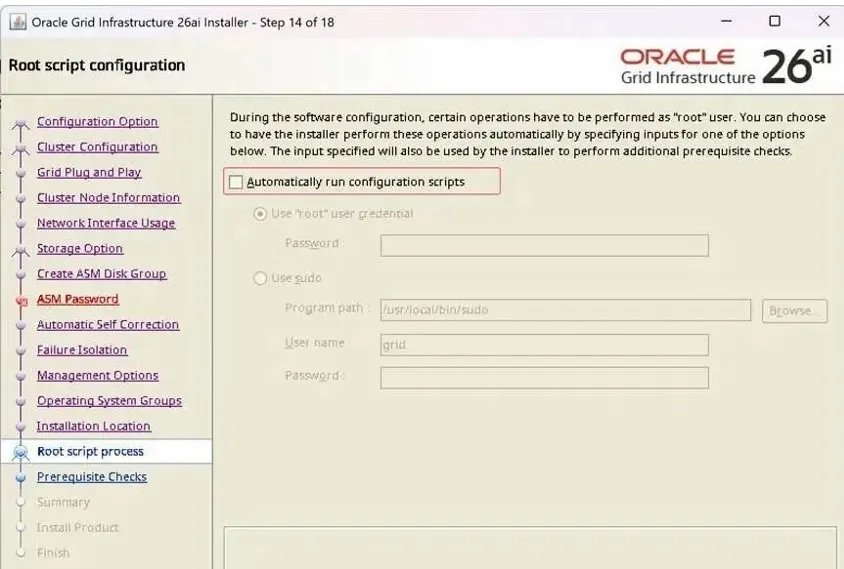
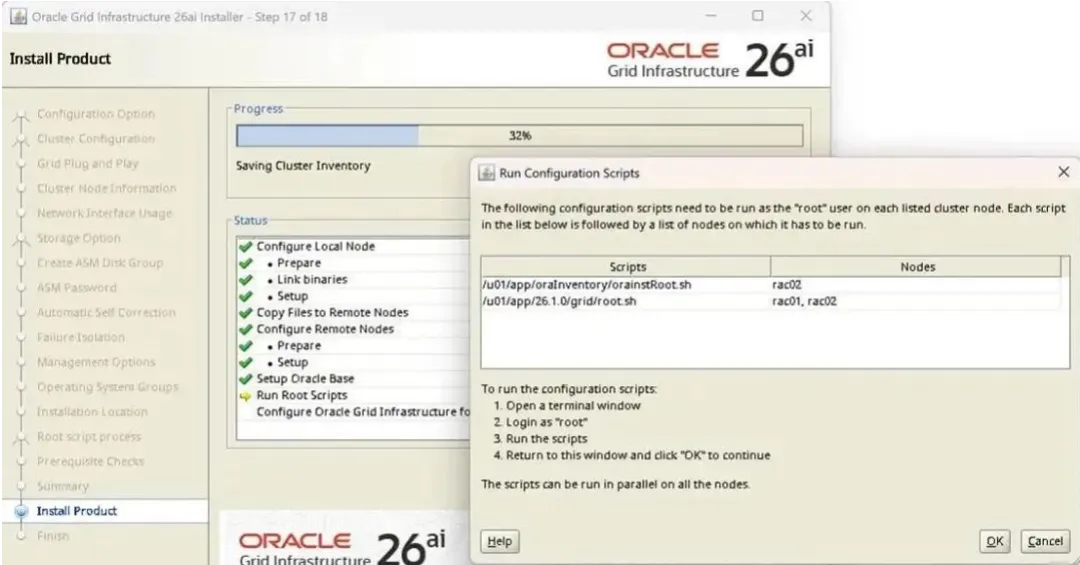
在两个节点的ROOT用户窗口,手工去执行对应的脚本
[root@26ai01 grid]# /u01/app/oraInventory/orainstRoot.sh
Changing permissions of /u01/app/oraInventory.
Adding read,write permissions for group.
Removing read,write,execute permissions for world.
Changing groupname of /u01/app/oraInventory to oinstall.
The execution of the script is complete.
[root@26ai01 grid]# /u01/app/26.1.0/grid/root.sh
Performing root user operation.
The following environment variables are set as:
ORACLE_OWNER= grid
ORACLE_HOME=/u01/app/26.1.0/grid
Enter the full pathname of the local bin directory: [/usr/local/bin]:
The contents of "dbhome" have not changed. No need to overwrite.
The contents of "oraenv" have not changed. No need to overwrite.
The contents of "coraenv" have not changed. No need to overwrite.
Creating /etc/oratab file...
Entries will be added to the /etc/oratab file as needed by
Database Configuration Assistant when a database is created
Finished running generic part of root script.
Now product-specific root actions will be performed.
RAC option enabled on: Linux
Executing command '/u01/app/26.1.0/grid/perl/bin/perl -I/u01/app/26.1.0/grid/perl/lib -I/u01/app/26.1.0/grid/crs/install /u01/app/26.1.0/grid/crs/install/rootcrs.pl '
Using configuration parameter file: /u01/app/26.1.0/grid/crs/install/crsconfig_params
The log of current session can be found at:
/u01/app/grid/crsdata/26ai01/crsconfig/rootcrs_26ai01_2026-01-30_05-15-27PM.log
2026/02/02 10:15:32 CLSRSC-594: Executing installation step 1 of 18: 'ValidateEnv'.
2026/02/02 10:15:33 CLSRSC-594: Executing installation step 2 of 18: 'CheckRootCert'.
2026/02/02 10:15:33 CLSRSC-594: Executing installation step 3 of 18: 'GenSiteGUIDs'.
2026/02/02 10:15:34 CLSRSC-594: Executing installation step 4 of 18: 'SetupOSD'.
Redirecting to /bin/systemctl restart rsyslog.service
2026/02/02 10:15:35 CLSRSC-594: Executing installation step 5 of 18: 'CheckCRSConfig'.
2026/02/02 10:15:35 CLSRSC-594: Executing installation step 6 of 18: 'SetupLocalGPNP'.
2026/02/02 10:15:39 CLSRSC-594: Executing installation step 7 of 18: 'CreateRootCert'.
2026/02/02 10:15:54 CLSRSC-594: Executing installation step 8 of 18: 'ConfigOLR'.
2026/02/02 10:15:57 CLSRSC-594: Executing installation step 9 of 18: 'ConfigCHMOS'.
2026/02/02 10:15:57 CLSRSC-594: Executing installation step 10 of 18: 'CreateOHASD'.
2026/02/02 10:15:58 CLSRSC-594: Executing installation step 11 of 18: 'ConfigOHASD'.
2026/02/02 10:15:58 CLSRSC-330: Adding Clusterware entries to file 'oracle-ohasd.service'
2026/02/02 10:16:09 CLSRSC-594: Executing installation step 12 of 18: 'SetupTFA'.
2026/02/02 10:16:09 CLSRSC-594: Executing installation step 13 of 18: 'InstallACFS'.
2026/02/02 10:16:11 CLSRSC-594: Executing installation step 14 of 18: 'CheckFirstNode'.
2026/02/02 10:16:11 CLSRSC-594: Executing installation step 15 of 18: 'InitConfig'.
CRS-4256: Updating the profile
Successful addition of voting disk 437b597e62964f78bf2e4f997f8a3845.
Successfully replaced voting disk group with +crsdg.
CRS-4256: Updating the profile
CRS-4266: Voting file(s) successfully replaced
## STATEFile Universal IdFile Name Disk group
-- ------------------------------- ---------
1. ONLINE437b597e62964f78bf2e4f997f8a3845 (/dev/asm_ocr01) [CRSDG]
Located 1 voting disk(s).
2026/02/02 10:17:15 CLSRSC-594: Executing installation step 16 of 18: 'StartCluster'.
2026/02/02 10:17:15 CLSRSC-4002: Successfully installed Oracle Autonomous Health Framework (AHF).
2026/02/02 10:17:35 CLSRSC-343: Successfully started Oracle Clusterware stack
2026/02/02 10:17:39 CLSRSC-594: Executing installation step 17 of 18: 'ConfigNode'.
clscfg: EXISTING configuration version 23 detected.
Successfully accumulated necessary OCR keys.
Creating OCR keys for user 'root', privgrp 'root'..
Operation successful.
2026/02/02 10:18:04 CLSRSC-594: Executing installation step 18 of 18: 'PostConfig'.
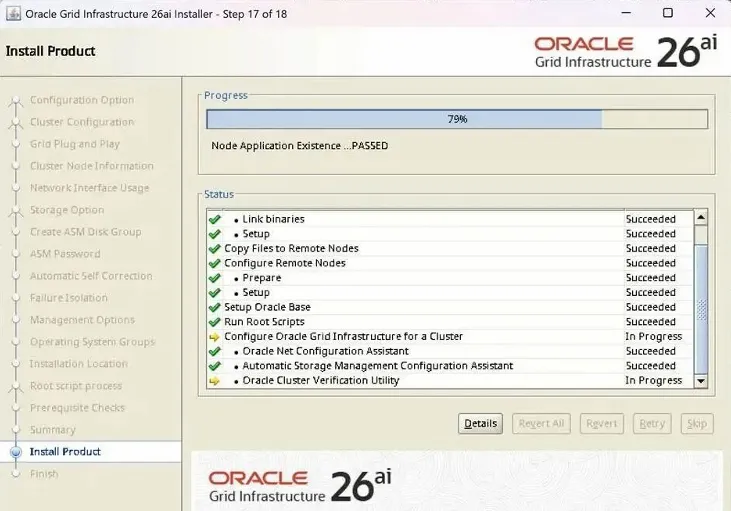
2026/02/02 10:18:18 CLSRSC-325: Configure Oracle Grid Infrastructure for a Cluster ... succeeded
[root@26ai01 grid]#
[root@26ai02 grid]# /u01/app/26.1.0/grid/root.sh
Performing root user operation.
The following environment variables are set as:
ORACLE_OWNER= grid
ORACLE_HOME=/u01/app/26.1.0/grid
Enter the full pathname of the local bin directory: [/usr/local/bin]:
The contents of "dbhome" have not changed. No need to overwrite.
The contents of "oraenv" have not changed. No need to overwrite.
The contents of "coraenv" have not changed. No need to overwrite.
Creating /etc/oratab file...
Entries will be added to the /etc/oratab file as needed by
Database Configuration Assistant when a database is created
Finished running generic part of root script.
Now product-specific root actions will be performed.
RAC option enabled on: Linux
Executing command '/u01/app/26.1.0/grid/perl/bin/perl -I/u01/app/26.1.0/grid/perl/lib -I/u01/app/26.1.0/grid/crs/install /u01/app/26.1.0/grid/crs/install/rootcrs.pl '
Using configuration parameter file: /u01/app/26.1.0/grid/crs/install/crsconfig_params
The log of current session can be found at:
/u01/app/grid/crsdata/rac02/crsconfig/rootcrs_rac02_2026-01-30_05-18-53PM.log
2026/02/02 10:18:59 CLSRSC-594: Executing installation step 1 of 18: 'ValidateEnv'.
2026/02/02 10:19:00 CLSRSC-594: Executing installation step 2 of 18: 'CheckRootCert'.
2026/02/02 10:19:00 CLSRSC-594: Executing installation step 3 of 18: 'GenSiteGUIDs'.
2026/02/02 10:19:00 CLSRSC-594: Executing installation step 4 of 18: 'SetupOSD'.
Redirecting to /bin/systemctl restart rsyslog.service
2026/02/02 10:19:01 CLSRSC-594: Executing installation step 5 of 18: 'CheckCRSConfig'.
2026/02/02 10:19:01 CLSRSC-594: Executing installation step 6 of 18: 'SetupLocalGPNP'.
2026/02/02 10:19:01 CLSRSC-594: Executing installation step 7 of 18: 'CreateRootCert'.
2026/02/02 10:19:01 CLSRSC-594: Executing installation step 8 of 18: 'ConfigOLR'.
2026/02/02 10:19:05 CLSRSC-594: Executing installation step 9 of 18: 'ConfigCHMOS'.
2026/02/02 10:19:05 CLSRSC-594: Executing installation step 10 of 18: 'CreateOHASD'.
2026/02/02 10:19:06 CLSRSC-594: Executing installation step 11 of 18: 'ConfigOHASD'.
2026/02/02 10:19:06 CLSRSC-330: Adding Clusterware entries to file 'oracle-ohasd.service'
2026/02/02 10:19:17 CLSRSC-594: Executing installation step 12 of 18: 'SetupTFA'.
2026/02/02 10:19:17 CLSRSC-594: Executing installation step 13 of 18: 'InstallACFS'.
2026/02/02 10:19:19 CLSRSC-594: Executing installation step 14 of 18: 'CheckFirstNode'.
2026/02/02 10:19:20 CLSRSC-594: Executing installation step 15 of 18: 'InitConfig'.
2026/02/02 10:19:24 CLSRSC-594: Executing installation step 16 of 18: 'StartCluster'.
2026/02/02 10:19:36 CLSRSC-343: Successfully started Oracle Clusterware stack
2026/02/02 10:19:36 CLSRSC-594: Executing installation step 17 of 18: 'ConfigNode'.
2026/02/02 10:19:36 CLSRSC-594: Executing installation step 18 of 18: 'PostConfig'.
2026/02/02 10:19:41 CLSRSC-325: Configure Oracle Grid Infrastructure for a Cluster ... succeeded
[root@26ai02 grid]# 2026/02/02 10:20:17 CLSRSC-4002: Successfully installed Oracle Autonomous Health Framework (AHF).
[root@26ai02 grid]#

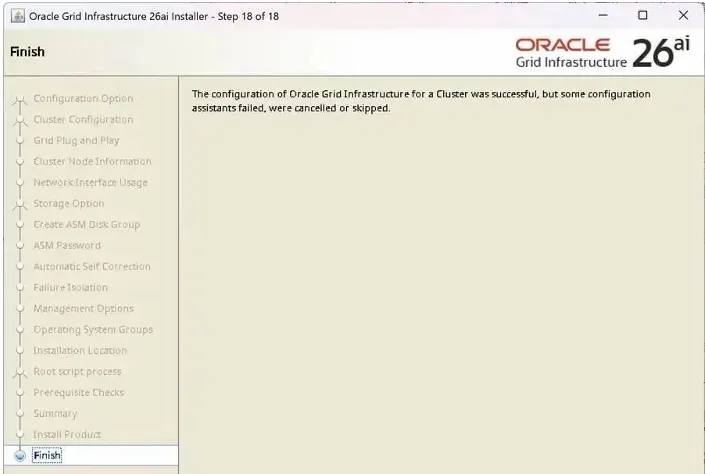
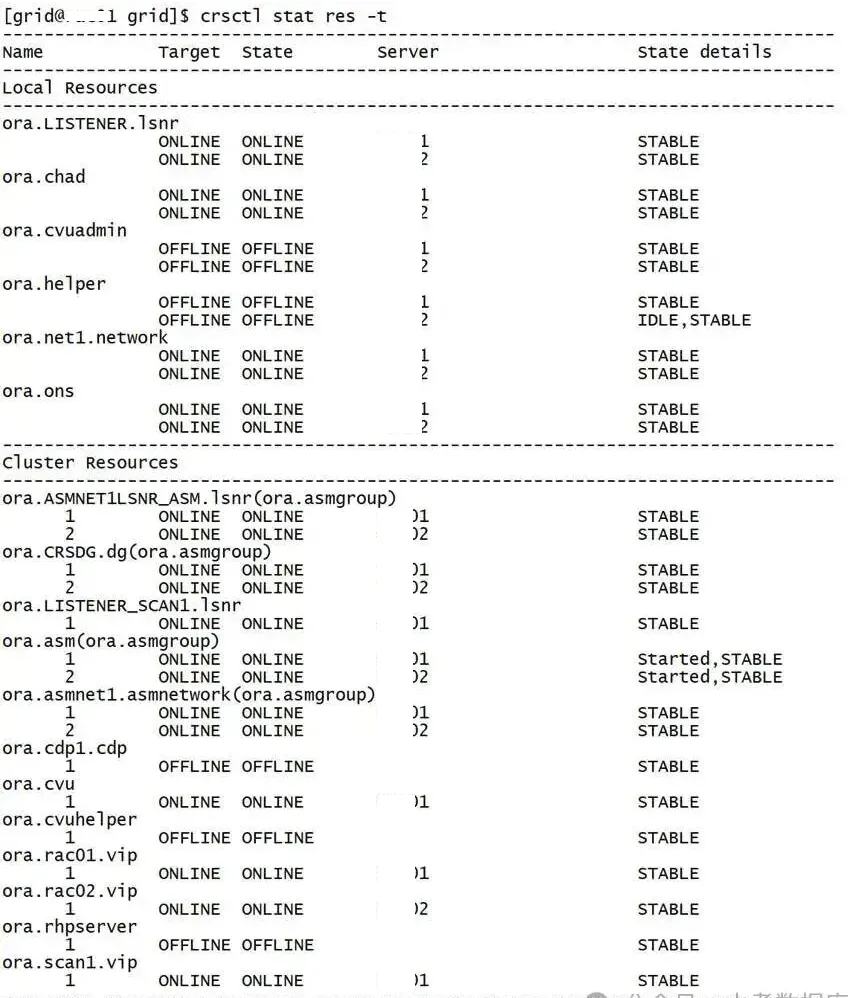
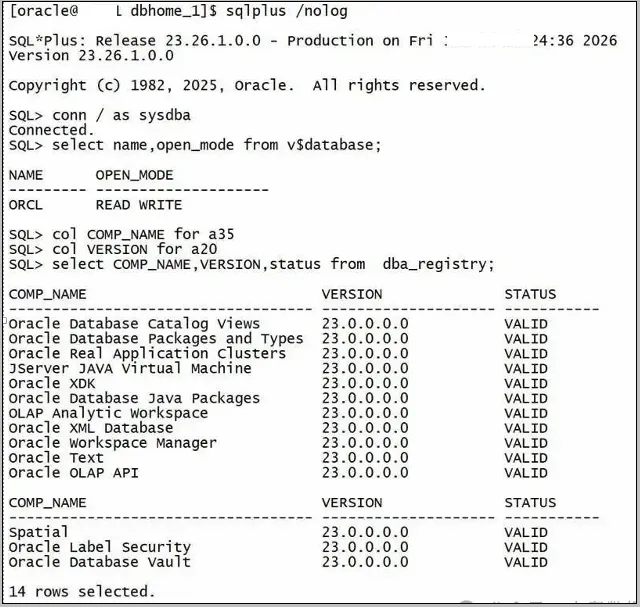
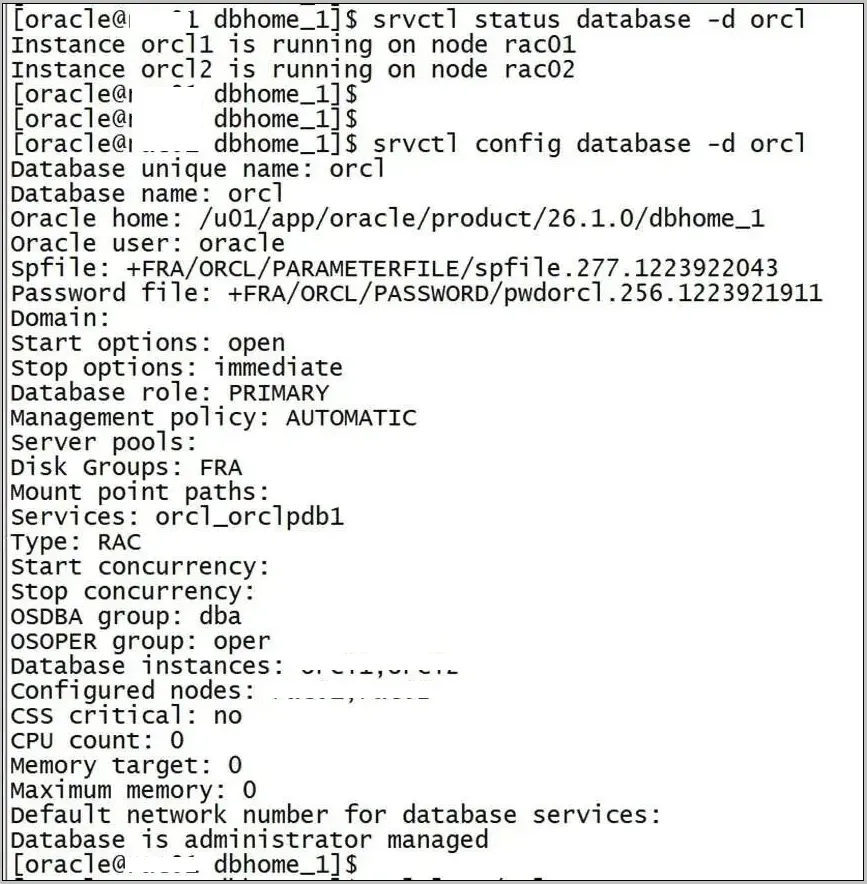
验证一下
1.13 ASM磁盘组创建
[root@26ai01 grid]asmca &
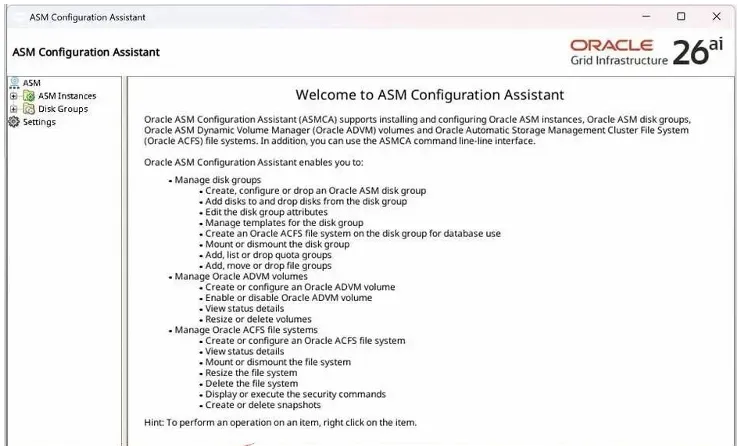
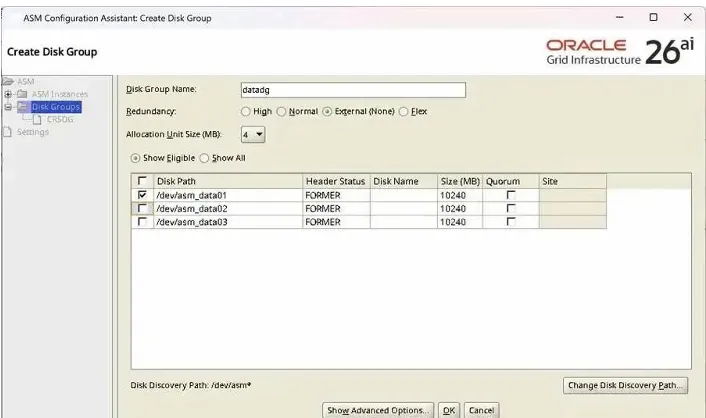
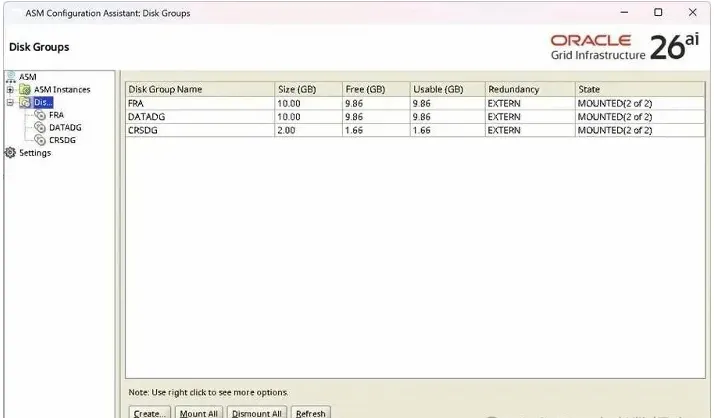
到此,ASM磁盘组创建完。
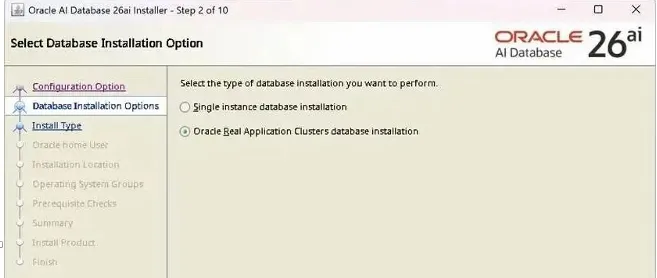
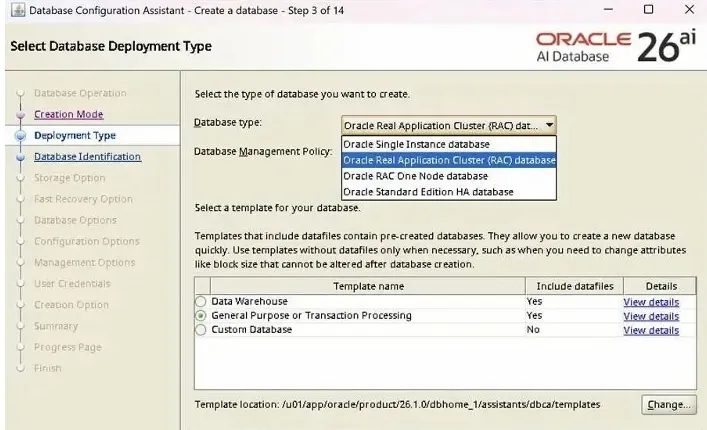
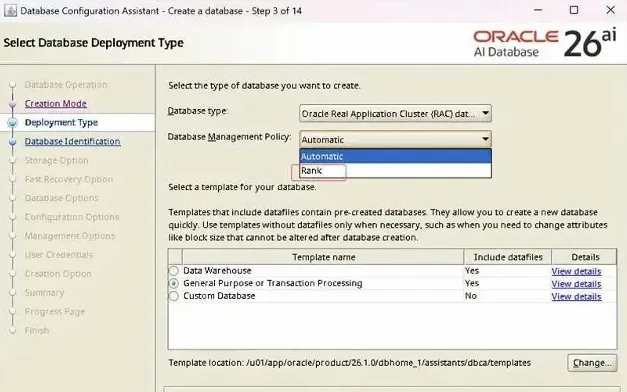
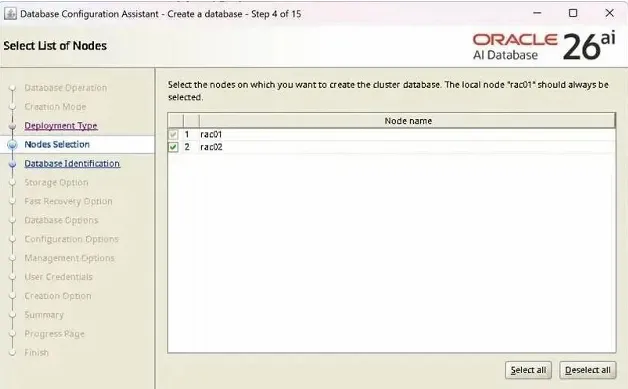
1.14.RAC安装
解压
Su - oracle
unzip -d $ORACLE_HOME LINUX.X64_2326100_db_home.zip
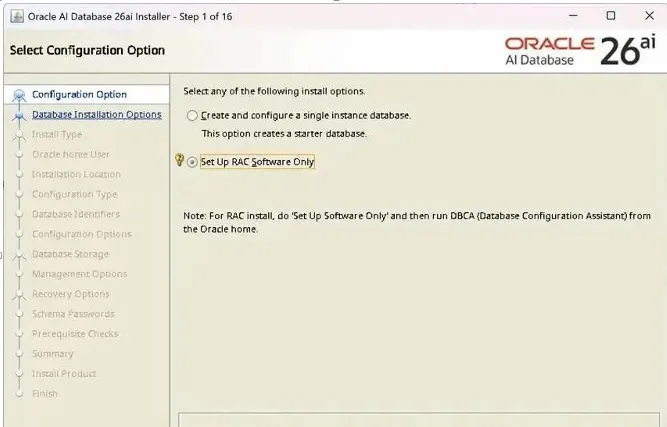
安装RAC
cd $ORACLE_HOME/
[root@26ai01 grid]./runInstaller &
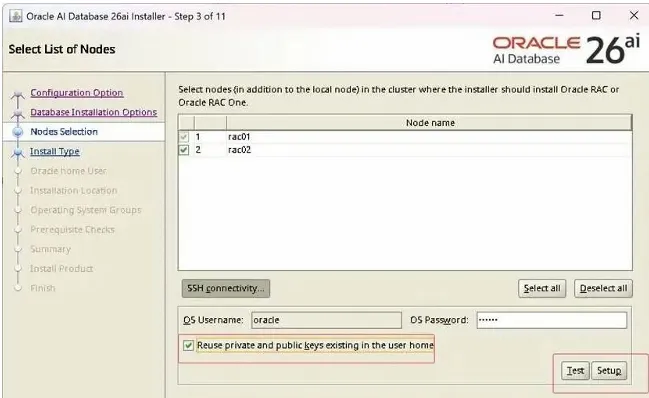
这里和 GI安装一样,使用手工去创建SSH对等性,否则要报错。
这里和GI安装一样,不勾选,手工去执行脚本
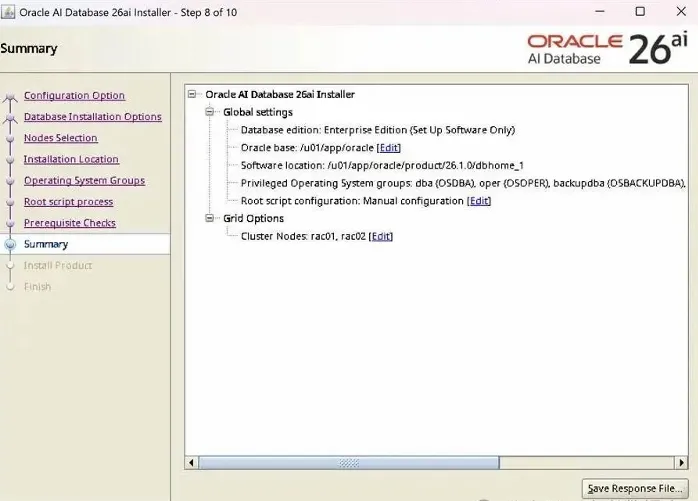
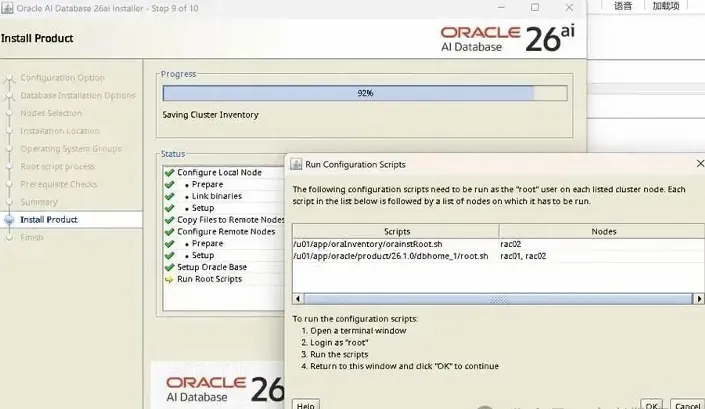
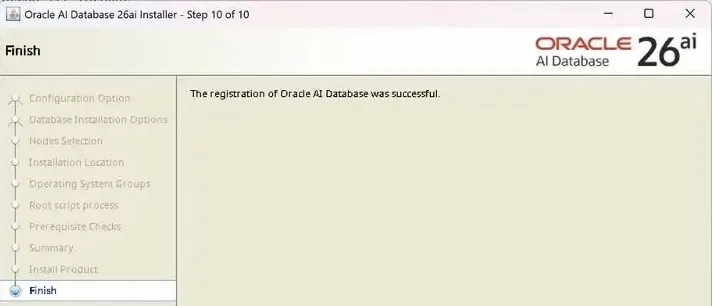
到此,软件安装完成
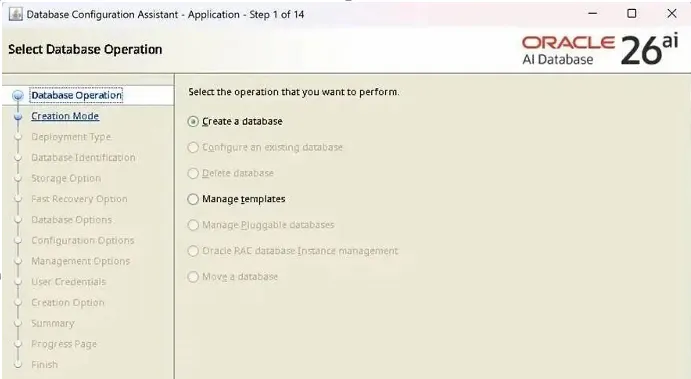
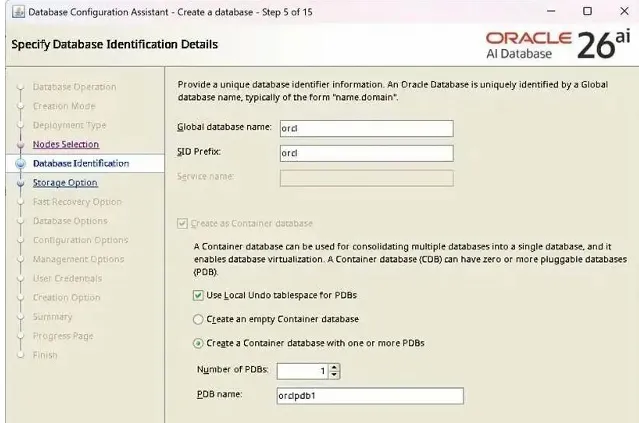
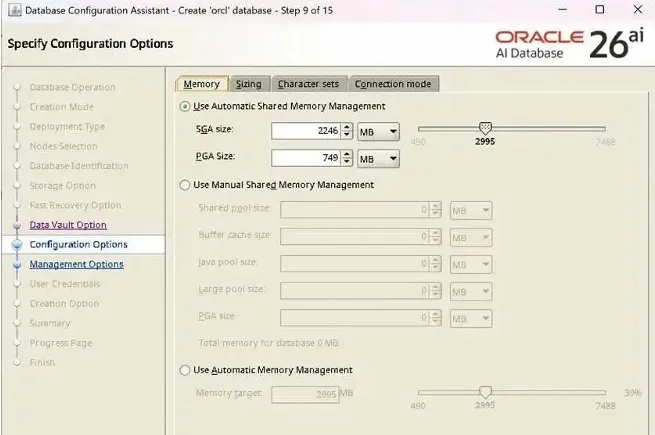
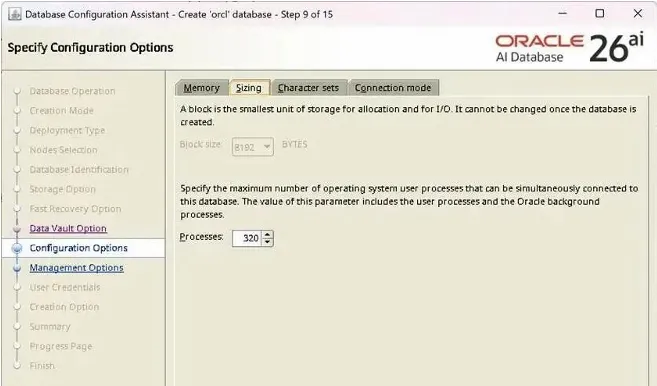
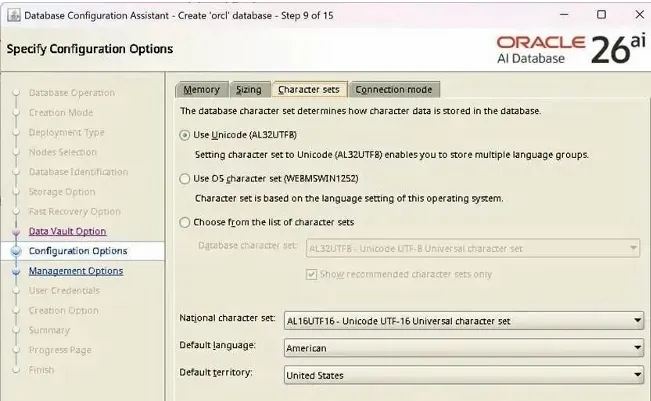
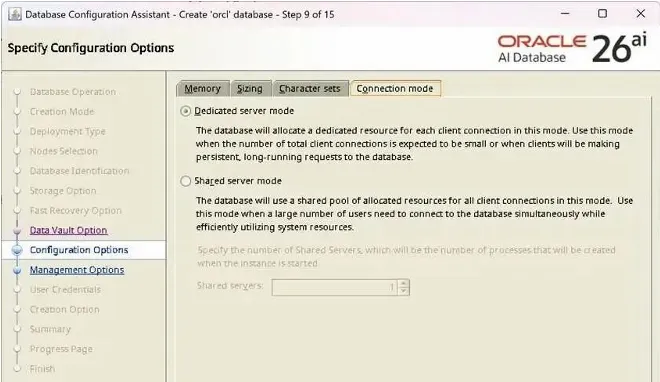
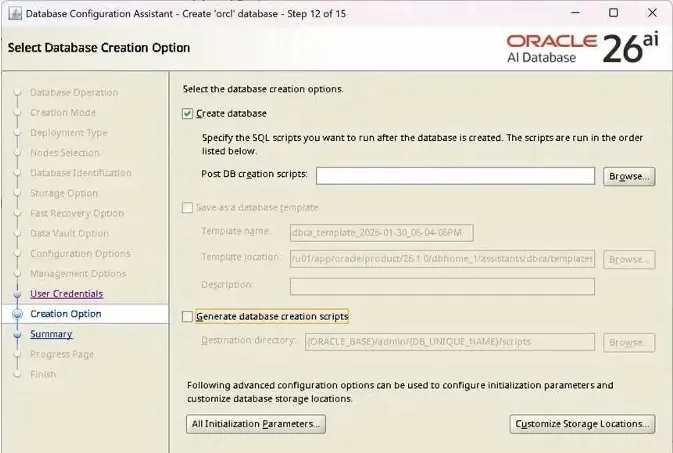
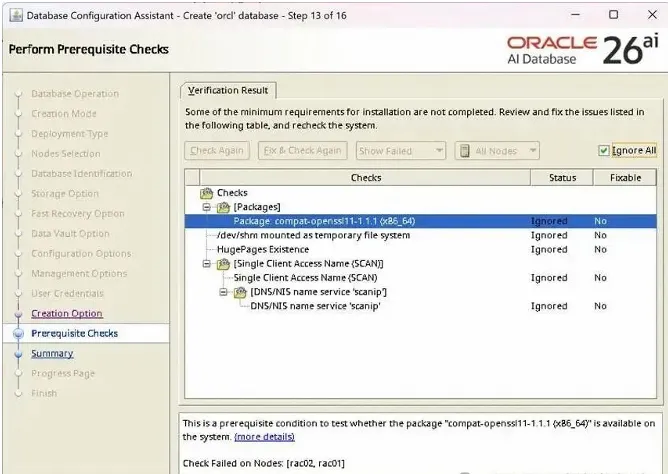
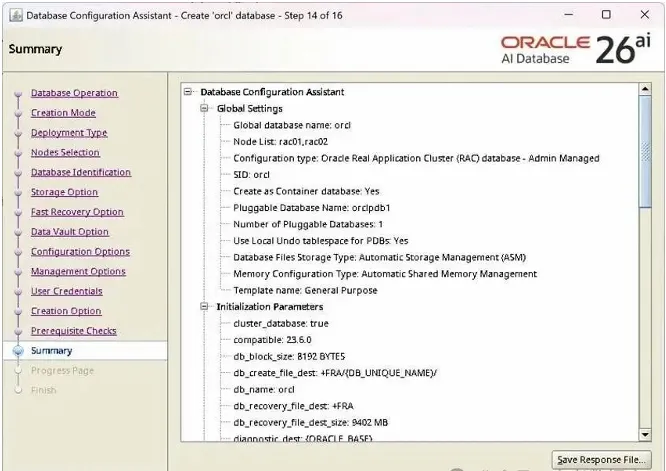
1.15 DB创建
[root@26ai01 grid]dbca &
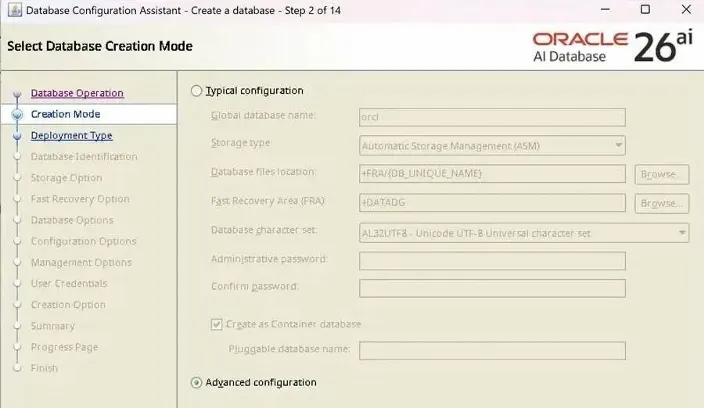
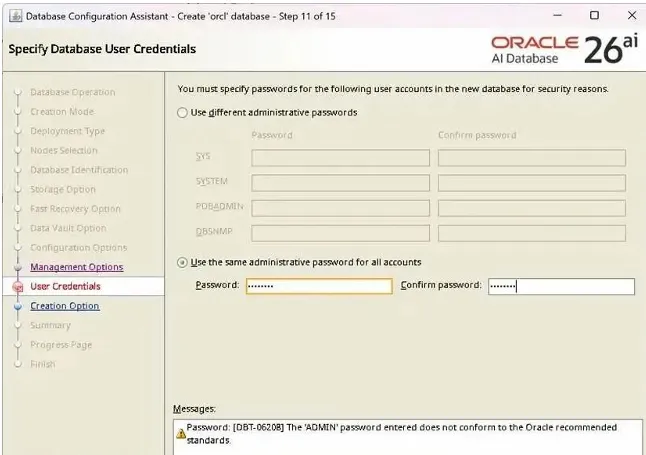
口令不符合标准,可以忽略

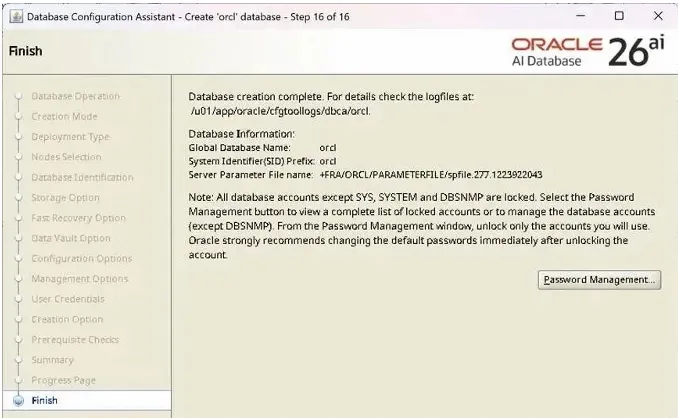
四、Oracle 26ai 2节点RAC安装完成


