引言:为何要混合编程?
在开始技术细节之前,不妨先思考一个根本性的问题:既然 Python 如此简洁、易读、开发效率高,为什么我们还需要去碰触相对复杂的C/C++呢?
答案主要围绕着两个核心:性能 和 生态。
性能(Performance):Python 是一门解释型语言,其执行速度天然比不上编译成本地机器码的 C/C++。对于计算密集型任务(如科学计算、图像处理、大规模数据处理、物理仿真、加密解密等),纯 Python 代码可能成为性能瓶颈。将这些“热点”代码用 C/C++ 重写,可以带来数量级的性能提升。
生态(Ecosystem):世界上存在海量高质量、经过充分测试和优化的 C/C++ 库。它们可能是操作系统 API、硬件驱动、图形渲染引擎(如 OpenGL)、音视频编解码库(如 FFmpeg)、或者某个专业领域的成熟算法库。直接在 Python 中调用这些库,可以避免重复造轮子,并利用其成熟性和稳定性。
以近年来炙手可热的深度学习框架 PyTorch 为例:其核心计算引擎——包括张量(Tensor)操作、自动微分(Autograd)、计算图调度、内存管理、以及 CPU/GPU 设备协调等关键模块,均以 C++(结合 CUDA) 实现,构成了名为 LibTorch 的底层库。Python 层(即我们日常使用的 torch 模块)本质上是通过 PyBind11 等工具对 LibTorch 的封装,提供简洁易用的接口,而真正的“重活”仍由 C++ 完成。
简而言之,Python 负责“大脑”——提供优雅的接口、快速的业务逻辑开发和用户交互;C/C++ 负责“肌肉”——提供底层、高效的计算能力。两者结合,就能构建出既开发迅速又性能卓越的应用程序。
本文作为一篇技术总结,将围绕 Python 3.10 及以上版本,系统梳理并深入剖析调用 C/C++ 代码的几种主流方法,内容遵循由浅入深、理论结合实践的原则,从基础概念入手,逐步过渡到典型应用场景与实战示例,确保即使缺乏底层编程经验的读者也能顺利掌握核心要点并快速上手,为开发者提供一份兼具深度与实用性的年度参考指南。
第一章:理论基石——理解调用背后的机制
在动手之前,我们必须建立一些基础的理论模型。这能帮助我们理解“为什么”要这么做,以及每种方法的优劣所在。
1.1 ABI 与 API:通信的“语言”
想象一下,两个来自不同国家的人要交流。他们需要约定一种共同的语言,或者使用翻译。在计算机世界,Python 和 C/C++ 也需要一种“通用语言”来理解彼此。
API (Application Programming Interface,应用程序编程接口):这是高层次的约定。它定义了“你能做什么”、“你需要提供什么参数”、“它会返回什么”。例如,一个 C 函数 int add(int a, int b) 的 API 就是:它接受两个整数,返回它们的和。API 关注的是功能和契约。
ABI (Application Binary Interface,应用程序二进制接口):这是低层次的、具体的约定。它定义了“在机器码层面如何做”。ABI 规定了:
- 调用约定(Calling Convention):参数如何传递(通过寄存器还是栈?顺序如何?),返回值如何传递,由谁(调用者还是被调用者)清理栈。
- 数据类型的大小和对齐方式(Size and Alignment):
int 在 32 位和 64 位系统上可能大小不同,结构体的成员如何在内存中排列。 - 名称修饰(Name Mangling):C++ 为了支持函数重载等特性,会将函数名在编译时修改成一个包含类型信息的唯一标识符(例如,
add(int, int) 可能变成 _Z3addii)。而 C 语言的函数名则保持不变。
关键点:Python 解释器本身是用 C 写的,并且它提供了一套稳定的 ABI(即Python C API),使得用 C 编写的扩展模块可以无缝地与 Python 解释器交互。当我们用 C/C++ 写扩展时,本质上是在遵守 Python C API 这套 ABI。
1.2 共享库(Shared Libraries)
为了让 Python 能够调用 C/C++ 代码,我们需要将 C/C++ 代码编译成一种特殊的文件格式——共享库(在 Windows 下是 .dll, Linux/macOS 下是 .so 或 .dylib )。
- 共享库是什么? 它是一个包含了可执行代码和数据的文件,可以在程序运行时被动态加载。多个程序可以共享同一个共享库的内存副本,节省资源。
- 为什么用它? Python 解释器在运行时,可以通过操作系统提供的接口(如
dlopen on Linux)动态地加载这些共享库,并找到其中的函数地址,进而调用它们。
1.3 Python 的对象模型
在 C 层面操作 Python,我们必须理解 Python 如何在内存中表示其对象。
- 在 Python C API 中,所有的 Python 对象(无论是整数、字符串、列表还是自定义类实例)在 C 层面都被表示为一个指向
PyObject 结构体的指针。 PyObject 是一个通用的结构,它至少包含一个引用计数(ob_refcnt)和一个指向其类型对象(ob_type)的指针。- 这意味着,当你在 C 函数中处理从 Python 传来的参数时,你拿到的是
PyObject*,你需要使用 C API 提供的函数来检查它的类型、提取其内部值(例如,将 PyObject* 转换成一个 C 的 long 或 char*)。 - 同样,当你想从 C 函数返回一个值给 Python 时,你需要创建一个新的
PyObject* 并返回它。
理解了这些基础概念,我们就可以开始探索具体的实现方法了。我们将从最灵活、最底层的方法开始,逐步过渡到更高级、更便捷的工具。
第二章:原生方法——Python C API
这是最基础、最直接、也是性能最高的方法。你直接使用 Python 提供的 C 头文件(主要是Python.h)来编写 C 代码,并将其编译成一个特殊的共享库——Python 扩展模块。
2.1 环境准备
在开始之前,请确保你的开发环境已安装好编译工具链和 Python 的开发头文件。
- Linux (Ubuntu/Debian):
sudo apt-get install build-essential python3-dev
- macOS
- Windows: 推荐安装 Microsoft C++ Build Tools。你可以通过 Visual Studio Installer 来安装。
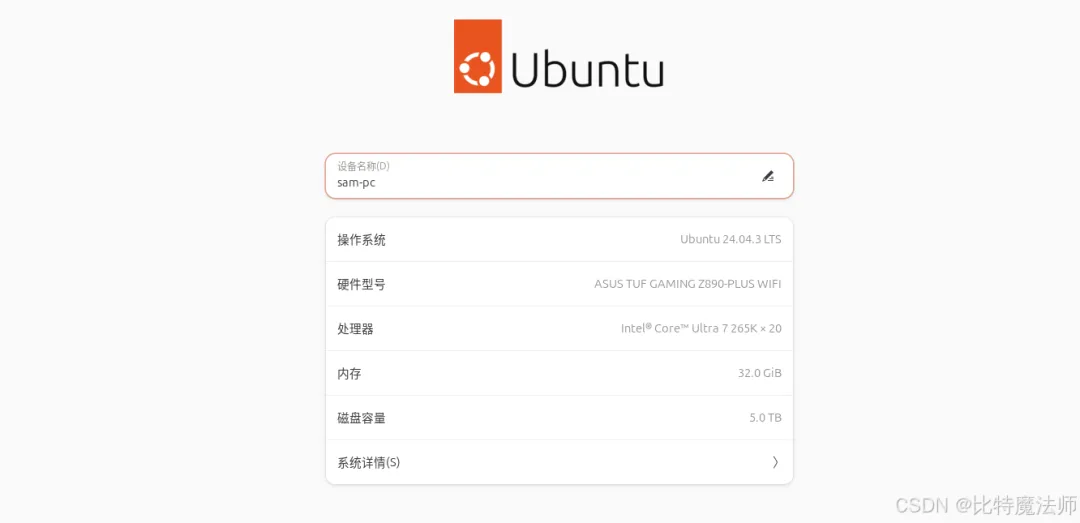
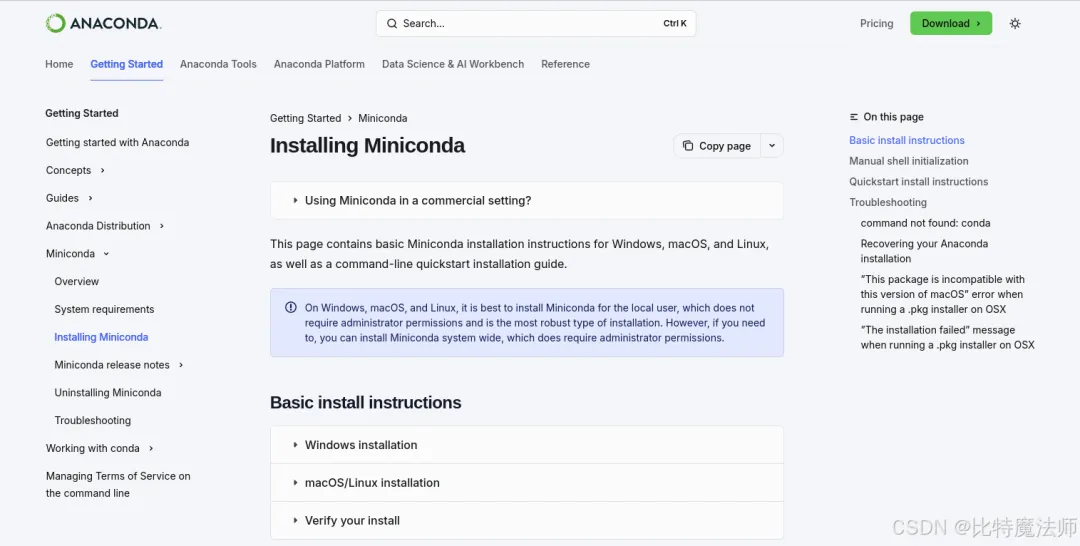
本文开发环境为 Ubuntu 24.04 + MiniConda :
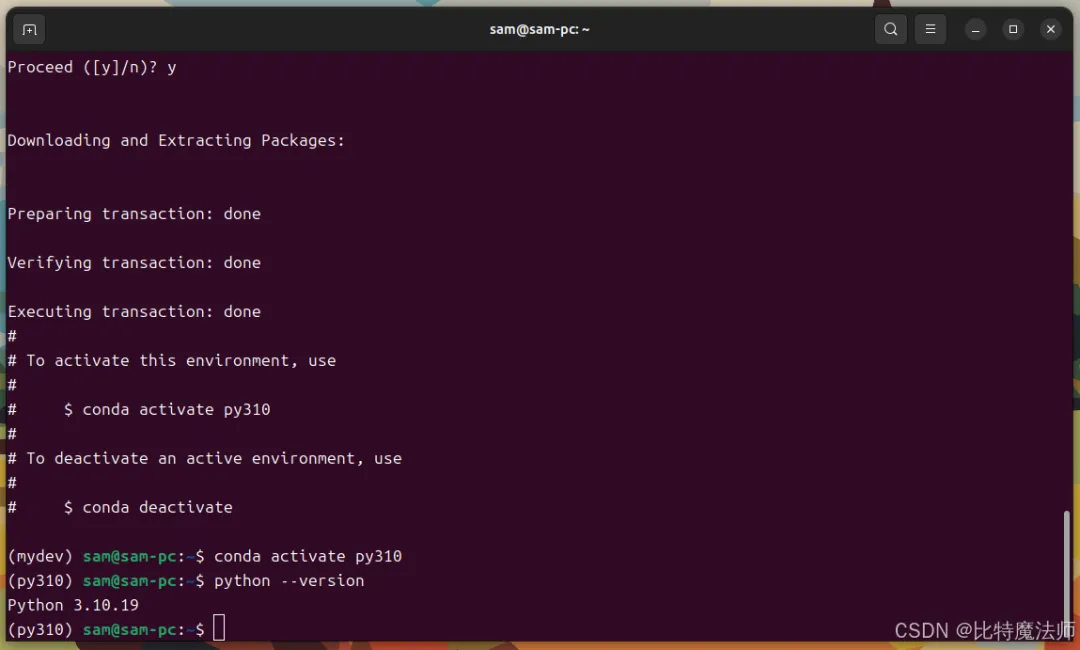
创建一个 Python 3.10 环境:
conda create -n py310 python=3.10conda activate py310
2.2 编写一个简单的C扩展
让我们从经典的 “Hello, World” 和一个简单的加法函数开始。
步骤1:创建C源文件 (hello.c)
// hello.c#define PY_SSIZE_T_CLEAN // 推荐定义,使API更清晰#include<Python.h>// 必须包含的头文件// 定义一个C函数,它将作为Python函数被调用// 所有通过C API暴露给Python的函数都必须是这个签名static PyObject *hello_greet(PyObject *self, PyObject *args){ const char *name; // 解析从Python传来的参数 // "s" 表示期望一个字符串 if (!PyArg_ParseTuple(args, "s", &name)) { return NULL; // 参数解析失败,返回NULL表示抛出异常 } // 创建一个Python字符串对象作为返回值 // PyUnicode_FromFormat类似于C的printf,但返回PyObject* return PyUnicode_FromFormat("Hello, %s!", name);}// 定义一个加法函数static PyObject *hello_add(PyObject *self, PyObject *args){ long a, b; // 使用long来接收Python的int // "ll" 表示期望两个long整数 if (!PyArg_ParseTuple(args, "ll", &a, &b)) { return NULL; } // 将C的long转换回Python的整数对象 return PyLong_FromLong(a + b);}// 方法表:将C函数映射到Python模块中的函数名static PyMethodDef HelloMethods[] = { // { "Python函数名", C函数指针, 参数类型, 文档字符串 } {"greet", hello_greet, METH_VARARGS, "Greet someone by name."}, {"add", hello_add, METH_VARARGS, "Add two integers."}, {NULL, NULL, 0, NULL} // 方法表必须以这个哨兵值结尾};// 模块定义static struct PyModuleDef hellomodule = { PyModuleDef_HEAD_INIT, // 固定宏 "hello", // 模块名 "A simple example module.", // 模块文档 -1, // 模块状态信息,-1表示不支持子解释器 HelloMethods // 上面定义的方法表};// 模块初始化函数// 函数名必须是 PyInit_<模块名>PyMODINIT_FUNCPyInit_hello(void){ return PyModule_Create(&hellomodule);}
代码解析:
PyArg_ParseTuple: 这是处理Python参数的核心函数。"s" 和 "ll" 是格式字符串,告诉它如何解析参数。PyUnicode_FromFormat / PyLong_FromLongPyMethodDef: 这个结构体数组将 C 函数和 Python 中的名字绑定在一起。PyModuleDefPyInit_hello: 这是模块的入口点。当 Python 执行 import hello 时,解释器会寻找并调用这个函数。
步骤2:编译扩展模块
我们有两种编译方式:手动编译和使用 setuptools。
方法A:使用 setuptools (推荐)
创建一个 setup.py 文件,这能让编译过程可跨平台、可重复。
# setup.pyfrom setuptools import setup, Extension# 定义扩展模块hello_module = Extension( 'hello', # 模块名 sources=['hello.c'] # C源文件列表)setup( name='hello', version='1.0', description='A simple example module', ext_modules=[hello_module])
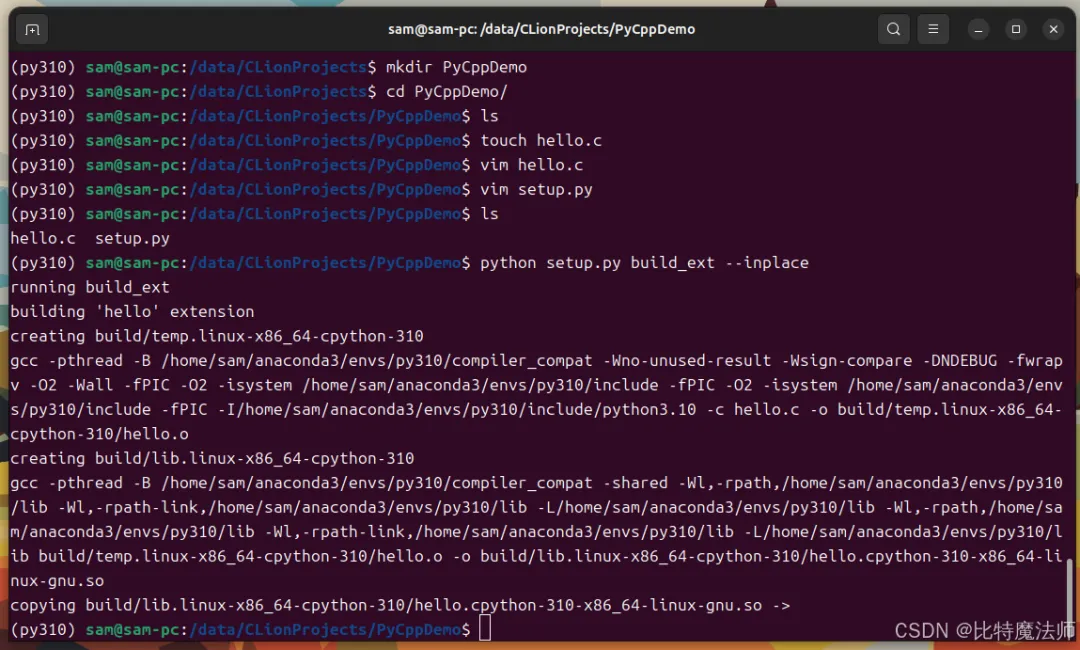
然后在终端运行:
python setup.py build_ext --inplace
--inplace 选项会将编译好的 .so(Linux/macOS)或 .pyd(Windows)文件直接放在当前目录,方便直接导入。
方法B:手动编译 (以Linux为例)
# 首先,找到Python的include目录和库目录python3-config --includespython3-config --ldflags# 输出类似于 -I/usr/include/python3.10 -I/usr/include/python3.10 和 -lpython3.10 -ldl -lexpat ...
(py310) sam@sam-pc:/data/CLionProjects/PyCppDemo$ python3-config --includes-I/home/sam/anaconda3/envs/py310/include/python3.10 -I/home/sam/anaconda3/envs/py310/include/python3.10(py310) sam@sam-pc:/data/CLionProjects/PyCppDemo$ python3-config --ldflags-L/home/sam/anaconda3/envs/py310/lib/python3.10/config-3.10-x86_64-linux-gnu -L/home/sam/anaconda3/envs/py310/lib -lcrypt -lpthread -ldl -lutil -lm -lm
# 然后执行编译gcc -shared -fPIC -o hello.so hello.c (python3-config --ldflags)
步骤3:在Python中测试
编译成功后,当前目录会生成一个hello.cpython-...-x86_64-linux-gnu.so(具体名字取决于你的平台和Python版本)的文件。现在可以像普通模块一样导入它。
# test_hello.pyimport helloprint(hello.greet("Alice")) # 输出: Hello, Alice!print(hello.add(3, 5)) # 输出: 8
2.3 处理更复杂的数据类型
掌握了基础,我们来看看如何处理列表、字典等复杂类型。
示例:计算列表中所有数字的平方和
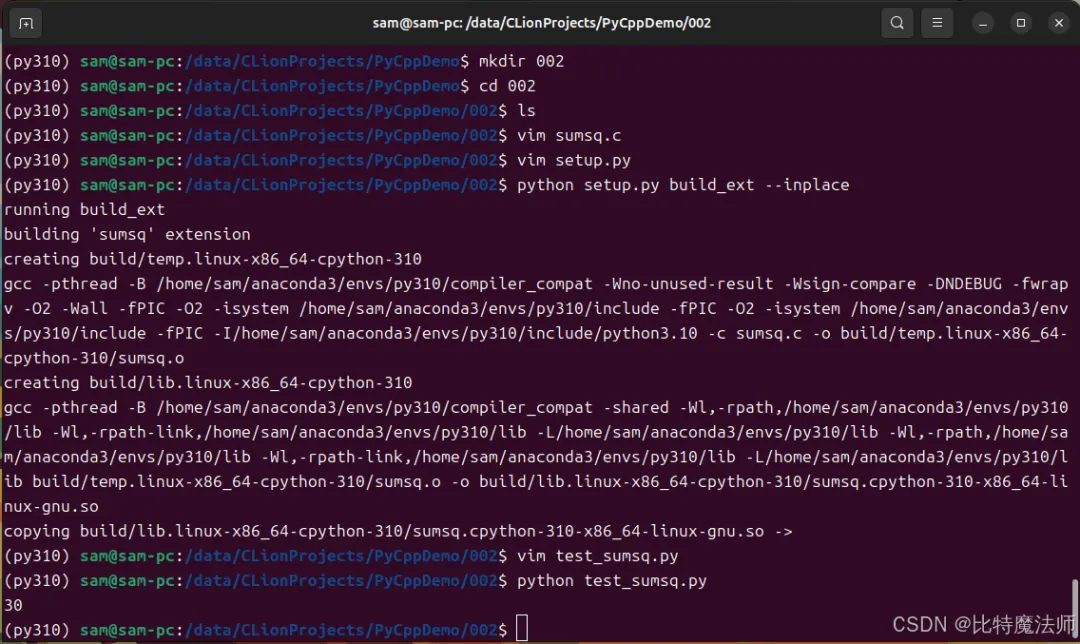
// sumsq.c (片段)static PyObject *sumsq_sum_of_squares(PyObject *self, PyObject *args){ PyObject *input_list; Py_ssize_t list_size, i; long item; long long sum = 0; // 使用更大的类型防止溢出 // 解析参数,期望一个列表对象 if (!PyArg_ParseTuple(args, "O!", &PyList_Type, &input_list)) { return NULL; } list_size = PyList_Size(input_list); // 获取列表长度 // 遍历列表 for (i = 0; i < list_size; i++) { PyObject *list_item = PyList_GetItem(input_list, i); // 注意:PyList_GetItem返回的是借来的引用,不要DECREF // 检查列表项是否为整数 if (!PyLong_Check(list_item)) { PyErr_SetString(PyExc_TypeError, "All items must be integers"); return NULL; } // 提取整数值 item = PyLong_AsLong(list_item); if (PyErr_Occurred()) { // 检查转换是否出错(如溢出) return NULL; } sum += (long long)item * item; } // 返回结果。注意:Python的int可以很大,这里假设sum在long范围内 return PyLong_FromLongLong(sum);}
关键API:
PyArg_ParseTuple with "O!": "O"表示一个PyObject*,"!"后面跟着一个类型对象(&PyList_Type)和一个变量地址,用于类型检查。PyList_Size, PyList_GetItem: 操作列表的API。PyLong_CheckPyErr_SetString
运行效果:
2.4 Python C API 的优缺点
优点:
缺点:
- 学习曲线陡峭:需要深入了解Python对象模型、引用计数、错误处理等。
- 代码冗长且易错:手动管理引用计数(
Py_INCREF/Py_DECREF)很容易出错,导致内存泄漏或崩溃。 - 开发效率低
结论:如果你追求极致性能,并且愿意投入时间学习底层细节,Python C API 是最佳选择。但对于大多数场景,我们有更好的工具。
第三章:便捷工具——ctypes
ctypes 是 Python 标准库的一部分,它提供了一种更高级、更简单的方式来调用动态链接库(.dll/.so/.dylib)中的C函数。它的最大优势是无需编写任何额外的胶水代码(glue code),纯 Python 即可完成。
3.1 ctypes 的工作原理
ctypes 在运行时加载共享库,并允许你通过 Python 代码来描述 C 函数的签名(参数类型和返回值类型)。然后,它会自动处理 Python 对象和C数据类型之间的转换。
重要提示:ctypes只能直接调用 C ABI。对于 C++,你需要通过 extern "C" 来封装你的C++函数,以防止 C++ 的名称修饰(Name Mangling)。
3.2 实践:从头开始
步骤1:编写C代码并编译成共享库
首先,我们写一个简单的C库。
// mathlib.c#include<stdio.h>// 一个简单的加法函数intadd(int a, int b){ return a + b;}// 一个修改传入值的函数voidincrement(int *x){ (*x)++;}// 一个返回结构体的函数typedef struct { int x; int y;} Point;Point make_point(int x, int y){ Point p = {x, y}; return p;}// 一个接受函数指针作为参数的函数intapply_operation(int a, int b, int (*operation)(int, int)){ return operation(a, b);}
编译共享库:
- Linux/macOS:
gcc -shared -fPIC -o libmathlib.so mathlib.c
- Windows:
cl /LD mathlib.c /Fe:mathlib.dll
步骤2:在Python中使用ctypes
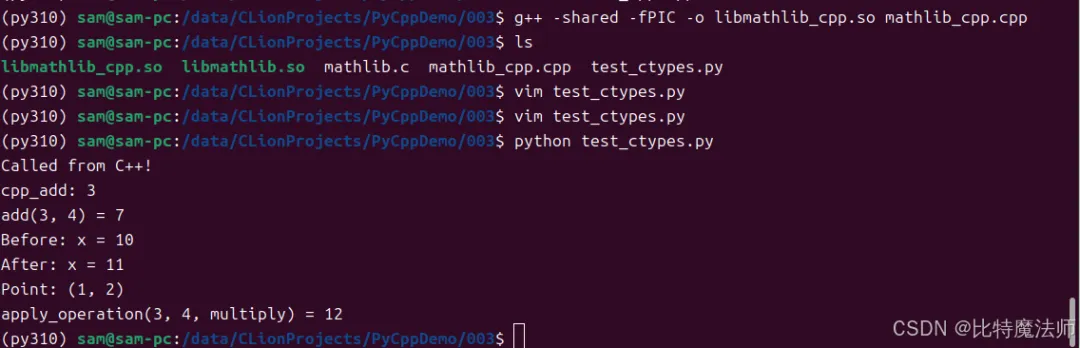
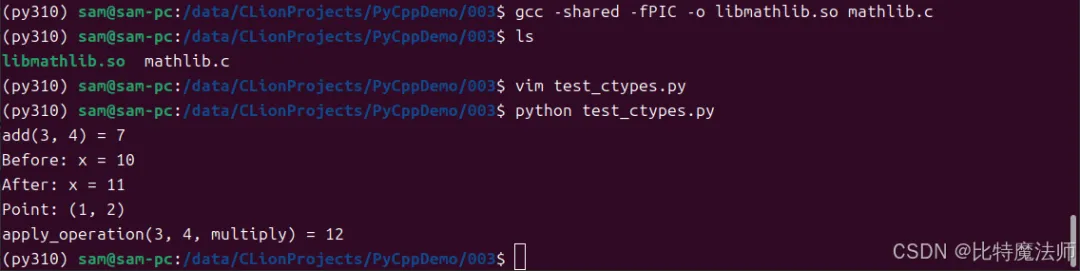
# test_ctypes.pyimport ctypesfrom ctypes import Structure, c_int, POINTER# 1. 加载共享库# Linux/macOSlib = ctypes.CDLL("./libmathlib.so")# Windows# lib = ctypes.CDLL("./mathlib.dll")# 2. 调用简单函数# ctypes会尝试猜测参数和返回类型,但最好显式声明lib.add.argtypes = (c_int, c_int) # 声明参数类型lib.add.restype = c_int # 声明返回类型result = lib.add(3, 4)print(f"add(3, 4) = {result}") # 输出: 7# 3. 处理指针(传引用)x = c_int(10)print(f"Before: x = {x.value}") # 输出: 10lib.increment(ctypes.byref(x)) # byref() 传递引用print(f"After: x = {x.value}") # 输出: 11# 4. 定义和使用结构体class Point(Structure): _fields_ = [("x", c_int), ("y", c_int)]# 告诉ctypes make_point返回一个Point结构体lib.make_point.argtypes = (c_int, c_int)lib.make_point.restype = Pointp = lib.make_point(1, 2)print(f"Point: ({p.x}, {p.y})") # 输出: (1, 2)# 5. 传递函数指针(回调函数)# 首先定义一个Python函数,我们要把它传给Cdef multiply(a, b): return a * b# 创建一个函数指针类型FUNC_TYPE = ctypes.CFUNCTYPE(c_int, c_int, c_int) # 返回int,两个int参数# 将Python函数转换为C函数指针c_multiply = FUNC_TYPE(multiply)lib.apply_operation.argtypes = (c_int, c_int, FUNC_TYPE)lib.apply_operation.restype = c_intresult2 = lib.apply_operation(3, 4, c_multiply)print(f"apply_operation(3, 4, multiply) = {result2}") # 输出: 12
步骤3:调用C++代码
如前所述,我们不能直接调用C++函数。必须用extern "C"来包装。
// mathlib_cpp.cpp#include<iostream>extern "C" { // 这个块内的函数将使用C的ABI,名字不会被修饰 intcpp_add(int a, int b){ // 可以在这里调用任何C++代码 std::cout << "Called from C++!" << std::endl; return a + b; }}
编译(注意是g++):
g++ -shared -fPIC -o libmathlib_cpp.so mathlib_cpp.cpp
Python代码几乎不变,只需加载新的库并调用cpp_add。
cpplib = ctypes.CDLL("./libmathlib_cpp.so")print(f"cpp_add: {cpplib.cpp_add(1,2)}")
3.3 ctypes 的优缺点
优点:
缺点:
- 性能开销:相比于 Python C API,
ctypes 在参数转换和调用时有一定的性能损失。对于被频繁调用的小函数,这个开销可能很明显。 - 安全性:C/C++ 代码中的崩溃(如段错误)会直接导致整个 Python 进程崩溃。
- 类型安全:虽然可以声明类型,但如果声明错误,可能会导致难以调试的问题。
- 不直接支持C++特性:必须通过
extern "C" 封装,不能直接操作 C++ 类、异常、模板等。
结论:ctypes 是快速集成现有 C 库或进行原型验证的理想选择。如果你有一个现成的 C 库,想在 Python 里用,ctypes 通常是最快上手的方案。
第四章:自动化利器——Cython
Cython 是一种编程语言,它既是 Python 的超集,又能直接调用 C/C++ 代码。它的核心思想是:你写一个 .pyx 文件(看起来很像Python),然后 Cython 将其编译成高效的 C 代码,再编译成 Python 扩展模块。Cython 自动为你生成了 Python C API 的胶水代码。
4.1 Cython 的核心优势
- Python-like 语法
- 静态类型:你可以(并且应该)为变量、函数参数和返回值添加 C 类型声明,从而让 Cython 生成高效的 C 代码。
- 无缝混合:可以在同一个文件中混合使用 Python 代码和 C 代码。
- 直接支持C++
4.2 安装与环境
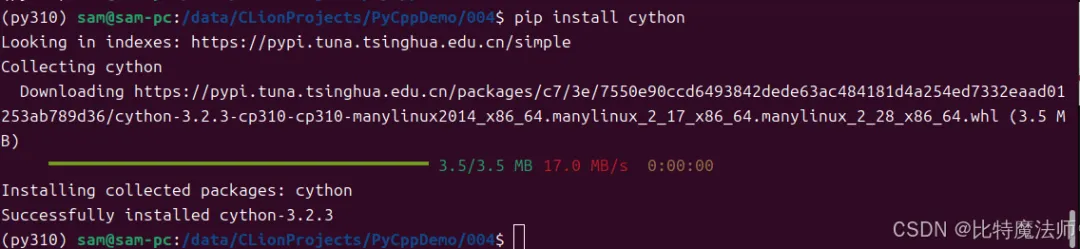
4.3 实践:性能优化示例
假设我们有一个非常慢的纯Python函数,用于计算斐波那契数列。
# fib_python.pydef fib(n): if n < 2: return n return fib(n-1) + fib(n-2)
我们可以用Cython来加速它。
步骤1:创建.pyx文件 (fib_cython.pyx)
# fib_cython.pyx# 声明一个C函数,接受C整数,返回C整数cdef int fib_c(int n): if n < 2: return n return fib_c(n-1) + fib_c(n-2)# 定义一个Python可调用的包装函数def fib(n): # 将Python的int转换为C的int,调用C函数,再将结果转换回来 return fib_c(n)
步骤2:创建setup.py
# setup.pyfrom setuptools import setupfrom Cython.Build import cythonizesetup( ext_modules = cythonize("fib_cython.pyx"))
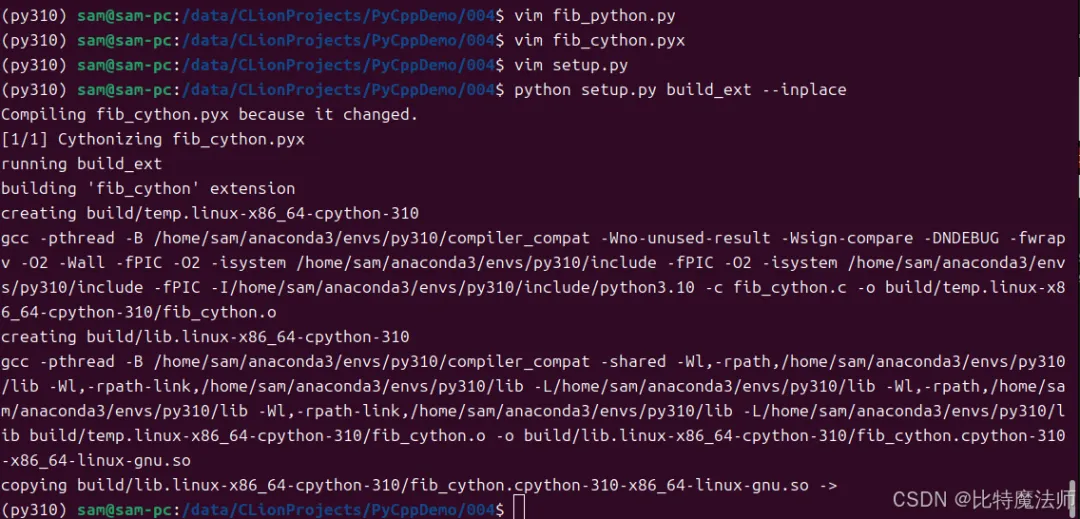
步骤3:编译和测试
python setup.py build_ext --inplace
# test_fib.pyimport timefrom fib_python import fib as py_fibfrom fib_cython import fib as cy_fibn = 35# 测试纯Python版本start = time.time()result_py = py_fib(n)end = time.time()print(f"Python: {result_py}, Time: {end - start:.4f}s")# 测试Cython版本start = time.time()result_cy = cy_fib(n)end = time.time()print(f"Cython: {result_cy}, Time: {end - start:.4f}s")
Python: 9227465, Time: 0.7771sCython: 9227465, Time: 0.0206s
在我的机器上,纯Python版本需要0.7771s,而Cython版本只需要0.0206s,几乎是瞬间完成。这就是静态类型的力量。
4.4 调用外部 C/C++ 库
Cython 可以轻松地包装外部库。
示例:包装我们之前创建的 mathlib.so
步骤1:创建 .pxd 文件 (mathlib.pxd)
.pxd 文件类似于 C 的头文件,用于声明外部 C 函数和类型。
# mathlib.pxd# 声明C函数的签名cdef extern from "mathlib.h": # 如果有头文件 int add(int a, int b)# 或者直接内联声明cdef extern from *: """ int add(int a, int b) { return a + b; } """ int add(int a, int b)
步骤2:在 .pyx 文件中使用
# wrapper.pyx# 导入.pxd中声明的内容from mathlib cimport adddef py_add(int a, int b): return add(a, b)
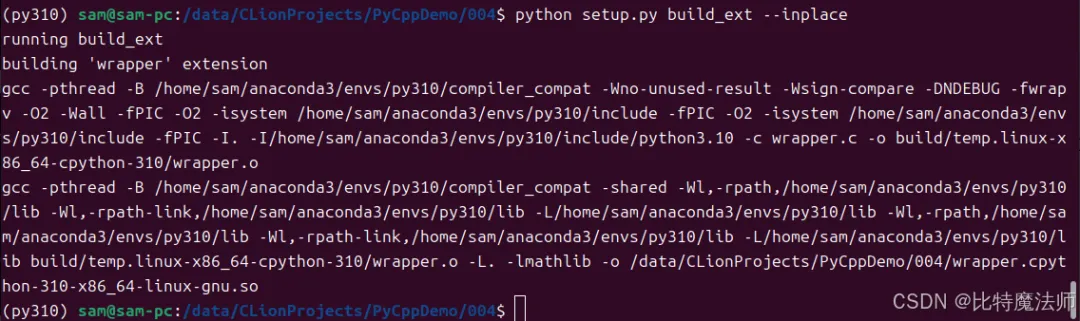
步骤3:修改 setup.py 以链接外部库
from setuptools import setupfrom Cython.Build import cythonizefrom Cython.Distutils import build_extfrom distutils.extension import Extensionext_modules = [ Extension( "wrapper", sources=["wrapper.pyx"], libraries=["mathlib"], # 链接libmathlib.so library_dirs=["."], # 库文件所在目录 include_dirs=["."] # 头文件所在目录(如果有的话) )]setup( cmdclass={'build_ext': build_ext}, ext_modules=cythonize(ext_modules))
4.5 调用 C++
Cython对C++的支持非常强大。
C++代码 (cppclass.h 和 cppclass.cpp)
// cppclass.hclassCalculator{public: int add(int a, int b); int multiply(int a, int b);};
// cppclass.cpp#include"cppclass.h"intCalculator::add(int a, int b){ return a + b;}intCalculator::multiply(int a, int b){ return a * b;}
编译成共享库:
g++ -shared -fPIC -o libcppclass.so cppclass.cpp
Cython包装 (cpp_wrapper.pyx)
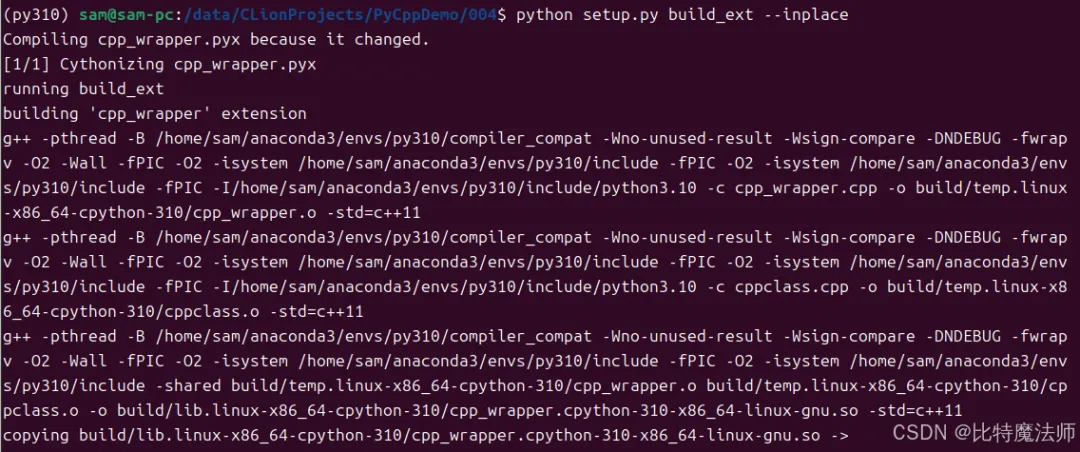
# 声明C++类cdef extern from "cppclass.h": cdef cppclass Calculator: Calculator() # 构造函数 int add(int, int) int multiply(int, int)# 创建一个Python类来包装C++类cdef class PyCalculator: cdef Calculator *thisptr # 保存C++对象的指针 def __cinit__(self): self.thisptr = new Calculator() def __dealloc__(self): del self.thisptr def add(self, int a, int b): return self.thisptr.add(a, b) def multiply(self, int a, int b): return self.thisptr.multiply(a, b)
现在你就可以在Python中像使用普通类一样使用PyCalculator了。
from cpp_wrapper import PyCalculator# 创建计算器实例calc = PyCalculator()# 测试加法result_add = calc.add(5, 3)print(f"5 + 3 = {result_add}") # 输出: 5 + 3 = 8# 测试乘法result_multiply = calc.multiply(4, 7)print(f"4 * 7 = {result_multiply}") # 输出: 4 * 7 = 28# 测试更多操作print(f"10 + 20 = {calc.add(10, 20)}")print(f"6 * 9 = {calc.multiply(6, 9)}")
4.6 Cython 的优缺点
优点:
- 开发效率高
- 性能卓越
- 功能强大:对 C/C++ 的支持全面,包括类、模板、STL 等。
- 调试友好
缺点:
- 需要编译步骤:和 Python C API 一样,需要一个编译过程。
- 学习新语法:虽然像 Python,但需要学习
cdef、类型声明等 Cython 特有的概念。 - 额外的依赖
结论:Cython 是平衡开发效率和执行性能的绝佳选择。如果你需要重写性能瓶颈部分,或者需要深度集成 C++ 库,Cython 应该是你的首选工具。
第五章:高级方法——pybind11
pybind11 是一个轻量级的、仅包含头文件的 C++ 库,用于创建 Python C++ 扩展。它深受 Boost.Python 的影响,但设计更现代、更简洁,并且仅依赖 C++11 标准。
5.1 pybind11 的核心思想
pybind11 允许你直接用 C++ 编写模块,并通过简洁的模板语法将 C++ 的函数、类、枚举等暴露给 Python 。它极大地简化了 Python C API的繁琐操作。
5.2 安装与环境
5.3 实践:从一个简单的函数开始
步骤1:编写C++代码 (example.cpp)
// example.cpp#include<pybind11/pybind11.h>intadd(int i, int j){ return i + j;}// PYBIND11_MODULE宏定义了模块的入口点PYBIND11_MODULE(example, m) { m.doc() = "pybind11 example plugin"; // 模块文档 // 将C++的add函数暴露为Python的add函数 m.def("add", &add, "A function that adds two numbers");}
步骤2:创建setup.py
pybind11提供了一个方便的get_cmake_dir或直接使用pybind11.get_include()来获取头文件路径。
# setup.pyfrom setuptools import setup, Extensionfrom pybind11.setup_helpers import Pybind11Extension, build_extfrom pybind11 import get_cmake_dirimport pybind11# 或者更简单的方式ext_modules = [ Pybind11Extension( "example", ["example.cpp"], # include_dirs=[pybind11.get_include()], # cxx_std=11, # 指定C++标准 ),]setup( name="example", ext_modules=ext_modules, cmdclass={"build_ext": build_ext}, zip_safe=False,)
步骤3:编译和测试
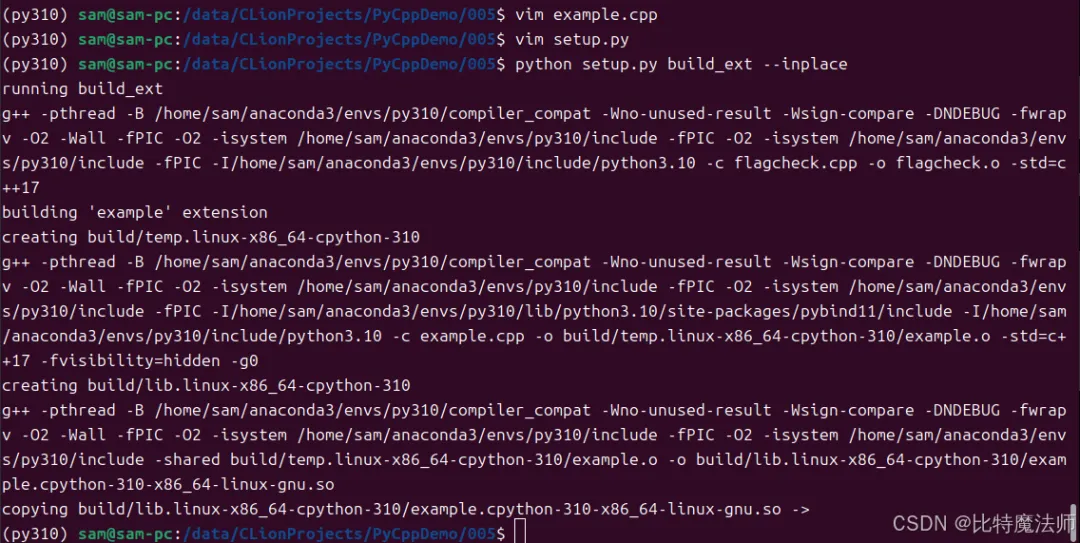
python setup.py build_ext --inplace
import exampleprint(example.add(1, 2)) # 输出: 3
5.4 绑定 C++ 类
这是 pybind11 大放异彩的地方。
C++类 (animal.cpp)
// animal.cpp#include<pybind11/pybind11.h>#include<string>namespace py = pybind11;class Animal {public: Animal(const std::string &name) : name_(name) {} virtual ~Animal() = default; std::string greet()const{ return "My name is " + name_; }protected: std::string name_;};class Dog : public Animal {public: Dog(const std::string &name) : Animal(name) {} std::string bark()const{ return "Woof!"; }};// 绑定PYBIND11_MODULE(animal, m) { py::class_<Animal>(m, "Animal") .def(py::init<const std::string &>()) // 绑定构造函数 .def("greet", &Animal::greet); // 绑定成员函数 py::class_<Dog, Animal>(m, "Dog") // Dog继承自Animal .def(py::init<const std::string &>()) .def("bark", &Dog::bark);}
Python测试
import animald = animal.Dog("Buddy")print(d.greet()) # 输出: My name is Buddy (继承自Animal)print(d.bark()) # 输出: Woof!
pybind11 自动处理了继承、内存管理、STL容器(如std::vector, std::map)到 Python 的转换,功能非常强大。
5.5 处理数组
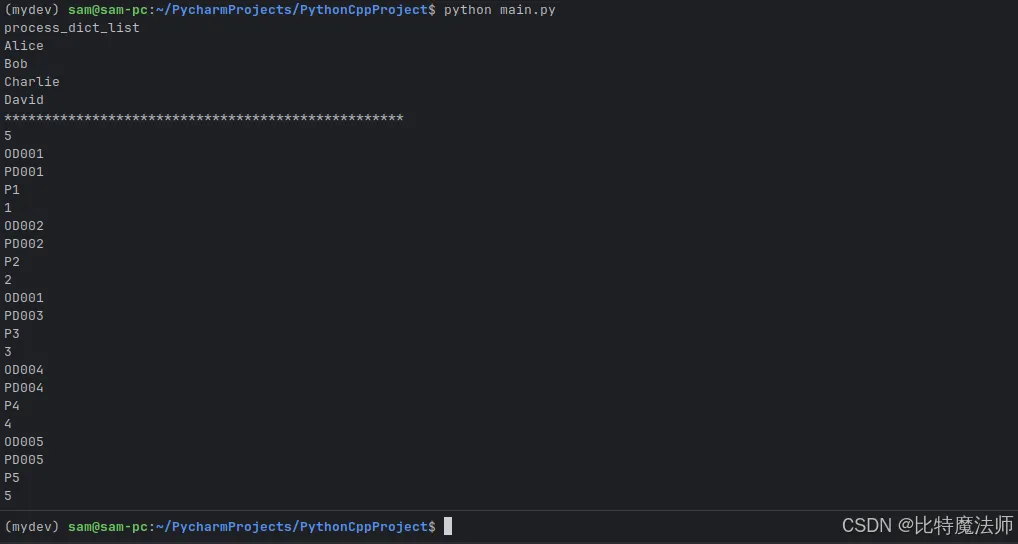
// example.cpp#include<pybind11/pybind11.h>#include<pybind11/stl.h>#include<vector>#include<map>#include<string>#include<iostream>voidprocess_dict_list(pybind11::list dict_list){ std::cout << "process_dict_list" << std::endl; for (auto item : dict_list) { // 将Python对象转换为C++的map auto dict = item.cast<std::map<std::string, pybind11::object>>(); auto it = dict.find("name"); if (it != dict.end()) { auto name = it->second.cast<std::string>(); std::cout << name << std::endl; } }}voidprocess_orders(const pybind11::list &orderList){ size_t numItems = orderList.size(); std::cout << numItems << std::endl; for (size_t i = 0; i < numItems; ++i) { pybind11::dict item = orderList[i]; // 快速解析(使用引用避免拷贝) const auto &itemDict = item; int order_id = itemDict["id"].cast<int>(); const std::string &order_no = itemDict["order_no"].cast<std::string>(); const std::string &product_no = itemDict["product_no"].cast<std::string>(); const std::string &product_name = itemDict["product_name"].cast<std::string>(); int product_count = itemDict["product_count"].cast<int>(); std::cout << order_no << std::endl; std::cout << product_no << std::endl; std::cout << product_name << std::endl; std::cout << product_count << std::endl; }}// PYBIND11_MODULE宏定义了模块的入口点PYBIND11_MODULE(example, m) { m.doc() = "pybind11 example plugin"; // 模块文档 // 将C++函数暴露为Python函数 m.def("process_dict_list", &process_dict_list, "处理python数组"); m.def("process_orders", &process_orders, "处理python数组");}
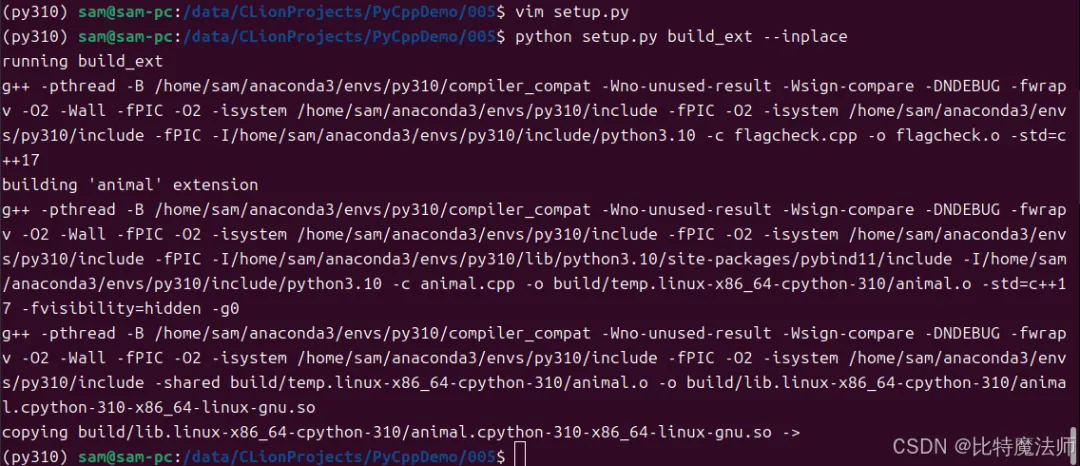
# setup.pyfrom setuptools import setup, Extensionfrom pybind11.setup_helpers import Pybind11Extension, build_extimport pybind11# 或者更简单的方式ext_modules = [ Pybind11Extension( "example", ["cpp11/example.cpp"], include_dirs=[pybind11.get_include()], cxx_std=11, # 指定C++标准 ),]setup( name="example", ext_modules=ext_modules, cmdclass={"build_ext": build_ext}, zip_safe=False,)
import example# 测试数据data = [ {"name": "Alice", "age": 30, "salary": 5000.0}, {"name": "Bob", "age": 25, "salary": 4000.0}, {"name": "Charlie", "age": 35, "salary": 6000.0}, {"name": "David", "age": 28}, # 缺少salary字段 {"age": 40, "salary": 7000.0} # 缺少name字段]orders = [ {"id": 1, "order_no": "OD001", "product_no": "PD001", "product_name": "P1", "product_count": 1 }, {"id": 2, "order_no": "OD002", "product_no": "PD002", "product_name": "P2", "product_count": 2 }, {"id": 3, "order_no": "OD001", "product_no": "PD003", "product_name": "P3", "product_count": 3 }, {"id": 4, "order_no": "OD004", "product_no": "PD004", "product_name": "P4", "product_count": 4 }, {"id": 5, "order_no": "OD005", "product_no": "PD005", "product_name": "P5", "product_count": 5 },]example.process_dict_list(data)print("*"*50)example.process_orders(orders))example.process_orders(orders)
process_dict_listAliceBobCharlieDavid**************************************************5OD001PD001P11OD002PD002P22OD001PD003P33OD004PD004P44OD005PD005P55
5.6 pybind11 的优缺点
优点:
- 简洁优雅
- 对C++支持极佳:原生支持 C++11/14/17/20 的特性,包括智能指针、lambda、移动语义等。
- 性能高
- 头文件库
缺点:
- 仅支持C++
- 需要C++11支持
- 编译依赖:和 Cython、Python C API 一样,需要编译。
结论:如果你的项目是 C++ 为主,并且希望为它提供一个 Python 接口,pybind11 几乎是目前最好的选择,它极大地提升了 C++ 到Python绑定的开发体验。
第六章:方法对比与选型指南
现在,我们已经介绍了四种主要的方法。让我们来做一个全面的对比,帮助你在实际项目中做出选择。
| | | | |
|---|
| 语言 | | | | |
| 是否需要编译 | | | | |
| 学习曲线 | | | | |
| 开发速度 | | 快 | | |
| 运行性能 | 最高 | | 高 | 高 |
| 调用现有C库 | | 最佳 | | |
| 调用C++库 | | | 优秀 | 最佳 |
| 类型安全 | | | | |
| 安全性 | | | | |
| 依赖 | | | | |
选型建议:
- 已有现成C库,想快速用起来
- 需要优化Python热点代码
- C++项目,需要Python绑定
- 追求极致性能,并且有深厚的C功底:可以考虑
Python C API,但通常 Cython 或 pybind11 生成的代码性能已经足够好。
第七章:最佳实践与常见陷阱
无论使用哪种方法,都有一些通用的最佳实践和需要避免的坑。
7.1 内存管理
- Python C API:务必正确使用
Py_INCREF/Py_DECREF 。使用 PyArg_ParseTuple 的"O" 格式时要注意是借来的引用(borrowed reference)还是新引用(new reference)。 - Cython/pybind11:它们会自动管理 Python 对象的引用计数,但对 C/C++ 原生分配的内存(如
new/malloc),你需要在 __dealloc__ (Cython)或析构函数(pybind11)中手动释放。
7.2 异常处理
- C/C++到Python:C/C++ 代码中的异常不应该传播到 Python。你需要在 C/C++ 代码中捕获所有异常,并将其转换为 Python 异常(通过
PyErr_SetString或 pybind11 的异常机制)。 - Python到C/C++:通过
ctypes 或 Cython/pybind11 调用的 Python 回调函数,其内部的 Python 异常会被自动转换和处理。
7.3 线程安全
- Python 有 GIL(全局解释器锁)。如果你的 C/C++ 代码不持有 GIL,它可以并行执行。但如果你的 C/C++ 代码需要调用 Python C API(例如,操作 Python 对象),则必须持有 GIL。
ctypes、Cython 和 pybind11 都提供了释放和重新获取 GIL 的机制。例如,在 Cython 中,你可以使用 with nogil: 块来释放 GIL 执行纯 C 代码。
7.4 调试
- Python C API/Cython/pybind11:编译时添加调试符号(
-g),可以使用 GDB 等调试器。Cython 还可以生成带有 #line 指令的 C 代码,使得 GDB 能跳转到 .pyx 源文件。 - ctypes
7.5 性能剖析
在优化之前,先用 cProfile 等工具确认性能瓶颈真的在你要优化的函数上。不要过早优化。
第八章:实战案例——智能分拣算法
8.1 需求背景
在电商仓储与物流系统中,订单分批是提升分拣效率的关键环节。针对以下业务背景与需求:
- 订单规模:系统需处理至少
 个订单;
个订单; - 商品维度:每个订单平均包含
 种 SKU;
 - 核心目标:将商品组成相似的订单聚合成同一批次,以减少重复分拣操作;
- 优化思路:相似订单往往共享大量商品,通过批量拣选共性商品,可显著提升分拣员作业效率。
基于上述场景,我们需设计一种基于商品相似性的订单分批算法,并使用 C++ 高效实现核心逻辑,最终通过 Python 封装为 API 接口,供上层业务系统调用。
8.2 算法设计
商品相似性度量
采用Jaccard相似系数衡量两个订单之间的商品相似性:
Jaccard(A, B) = |A ∩ B| / |A ∪ B|
其中,A 和 B 分别表示两个订单对应的商品集合。
分批策略
采用贪心聚类算法进行订单分批:
- 当批次达到预设最大容量,或添加订单后相似度低于设定阈值时,则创建新批次。
算法优势
- 时间复杂度可控:可在 O(N²M) 时间内完成相似度预处理,并在 O(N²) 时间内完成聚类;
- 内存效率高
- 可配置性强
8.3 算法实现
// OrderBatching.h#ifndef ORDER_BATCHING_H#define ORDER_BATCHING_H#include<vector>#include<unordered_set>#include<string>class Order {public: int id; std::vector<bool> items; // items[i] = true 表示包含 SKU i Order(int orderId, int skuCount); voidaddItem(int skuId); doublejaccardSimilarity(const Order& other)const;};class OrderBatching {private: std::vector<Order> orders; int maxBatchSize; // 每批次最大订单数 double minSimilarity; // 最小相似度阈值 doublecalculateBatchSimilarity(const std::vector<int>& batch)const; doublecalculateOrderToBatchSimilarity(int orderId, const std::vector<int>& batch)const;public: OrderBatching(const std::vector<Order>& inputOrders, int maxBatch = 20, double minSim = 0.3); std::vector<std::vector<int>> createBatches(); intcalculateTotalPicks(const std::vector<std::vector<int>>& batches)const;};// 工具函数(用于测试)std::vector<Order> generateTestData(int numOrders, int numSKUs, double density = 0.3);#endif// ORDER_BATCHING_H
// OrderBatching.cpp#include"OrderBatching.h"#include<iostream>#include<algorithm>#include<random>#include<cmath>// Order 类实现Order::Order(int orderId, int skuCount) : id(orderId), items(skuCount, false) {}voidOrder::addItem(int skuId){ if (skuId >= 0 && static_cast<size_t>(skuId) < items.size()) { items[skuId] = true; }}doubleOrder::jaccardSimilarity(const Order& other)const{ int intersection = 0, unionSize = 0; for (size_t i = 0; i < items.size(); ++i) { if (items[i] && other.items[i]) { ++intersection; ++unionSize; } else if (items[i] || other.items[i]) { ++unionSize; } } return unionSize == 0 ? 0.0 : static_cast<double>(intersection) / unionSize;}// OrderBatching 类实现OrderBatching::OrderBatching(const std::vector<Order>& inputOrders, int maxBatch, double minSim) : orders(inputOrders), maxBatchSize(maxBatch), minSimilarity(minSim) {}doubleOrderBatching::calculateBatchSimilarity(const std::vector<int>& batch)const{ if (batch.size() <= 1) return 1.0; double totalSim = 0.0; int count = 0; for (size_t i = 0; i < batch.size(); ++i) { for (size_t j = i + 1; j < batch.size(); ++j) { totalSim += orders[batch[i]].jaccardSimilarity(orders[batch[j]]); ++count; } } return count > 0 ? totalSim / count : 0.0;}doubleOrderBatching::calculateOrderToBatchSimilarity(int orderId, const std::vector<int>& batch)const{ if (batch.empty()) return 0.0; double totalSim = 0.0; for (int batchOrderId : batch) { totalSim += orders[orderId].jaccardSimilarity(orders[batchOrderId]); } return totalSim / batch.size();}std::vector<std::vector<int>> OrderBatching::createBatches() { std::vector<std::vector<int>> batches; std::vector<bool> processed(orders.size(), false); while (true) { int nextOrder = -1; for (size_t i = 0; i < orders.size(); ++i) { if (!processed[i]) { nextOrder = static_cast<int>(i); break; } } if (nextOrder == -1) break; std::vector<int> currentBatch; currentBatch.push_back(nextOrder); processed[nextOrder] = true; while (currentBatch.size() < static_cast<size_t>(maxBatchSize)) { int bestOrder = -1; double bestSimilarity = minSimilarity; for (size_t i = 0; i < orders.size(); ++i) { if (processed[i]) continue; double simToBatch = calculateOrderToBatchSimilarity(static_cast<int>(i), currentBatch); if (simToBatch > bestSimilarity) { bestSimilarity = simToBatch; bestOrder = static_cast<int>(i); } } if (bestOrder == -1) break; currentBatch.push_back(bestOrder); processed[bestOrder] = true; } batches.push_back(currentBatch); } return batches;}intOrderBatching::calculateTotalPicks(const std::vector<std::vector<int>>& batches)const{ int totalPicks = 0; for (const auto& batch : batches) { std::unordered_set<int> uniqueItems; for (int orderId : batch) { const auto& order = orders[orderId]; for (size_t i = 0; i < order.items.size(); ++i) { if (order.items[i]) { uniqueItems.insert(static_cast<int>(i)); } } } totalPicks += static_cast<int>(uniqueItems.size()); } return totalPicks;}// 工具函数实现std::vector<Order> generateTestData(int numOrders, int numSKUs, double density){ std::vector<Order> orders; std::random_device rd; std::mt19937 gen(rd()); std::uniform_real_distribution<> dis(0.0, 1.0); for (int i = 0; i < numOrders; ++i) { Order order(i, numSKUs); for (int j = 0; j < numSKUs; ++j) { if (dis(gen) < density) { order.addItem(j); } } orders.push_back(order); } return orders;}
算法测试函数:
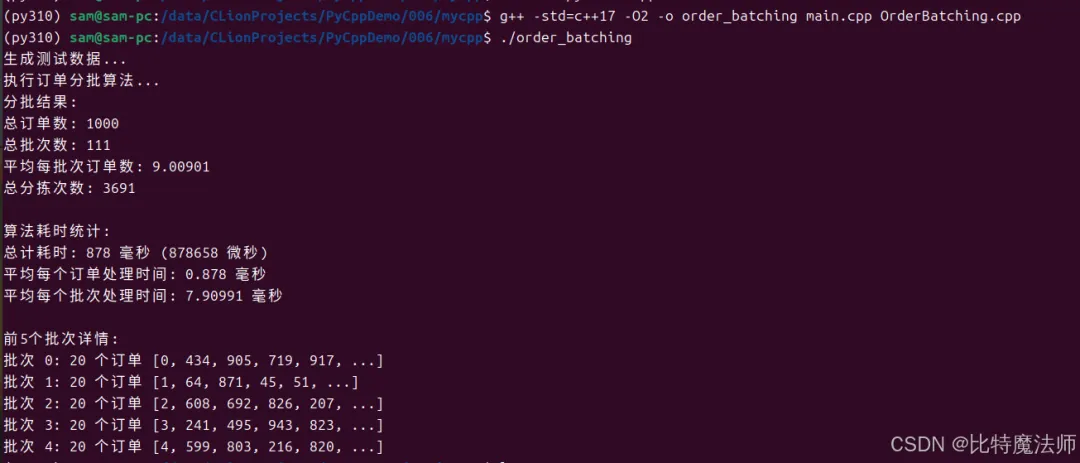
#include"OrderBatching.h"#include<iostream>#include<algorithm>#include<chrono>intmain(){ const int NUM_ORDERS = 1000; const int NUM_SKUS = 50; const int MAX_BATCH_SIZE = 20; const double MIN_SIMILARITY = 0.25; std::cout << "生成测试数据...\n"; auto orders = generateTestData(NUM_ORDERS, NUM_SKUS); std::cout << "执行订单分批算法...\n"; // 开始计时 auto start = std::chrono::high_resolution_clock::now(); OrderBatching batcher(orders, MAX_BATCH_SIZE, MIN_SIMILARITY); auto batches = batcher.createBatches(); // 结束计时 auto end = std::chrono::high_resolution_clock::now(); // 计算耗时 auto duration = std::chrono::duration_cast<std::chrono::milliseconds>(end - start); auto duration_micro = std::chrono::duration_cast<std::chrono::microseconds>(end - start); std::cout << "分批结果:\n"; std::cout << "总订单数: " << NUM_ORDERS << "\n"; std::cout << "总批次数: " << batches.size() << "\n"; std::cout << "平均每批次订单数: " << static_cast<double>(NUM_ORDERS) / batches.size() << "\n"; std::cout << "总分拣次数: " << batcher.calculateTotalPicks(batches) << "\n"; // 添加耗时统计 std::cout << "\n算法耗时统计:\n"; std::cout << "总计耗时: " << duration.count() << " 毫秒 (" << duration_micro.count() << " 微秒)\n"; // 计算平均每个订单的处理时间 double avg_per_order_ms = static_cast<double>(duration.count()) / NUM_ORDERS; std::cout << "平均每个订单处理时间: " << avg_per_order_ms << " 毫秒\n"; // 计算平均每个批次的处理时间 if (!batches.empty()) { double avg_per_batch_ms = static_cast<double>(duration.count()) / batches.size(); std::cout << "平均每个批次处理时间: " << avg_per_batch_ms << " 毫秒\n"; } std::cout << "\n前5个批次详情:\n"; size_t showCount = std::min(batches.size(), size_t(5)); for (size_t i = 0; i < showCount; ++i) { std::cout << "批次 " << i << ": " << batches[i].size() << " 个订单 ["; size_t printLimit = std::min(batches[i].size(), size_t(5)); for (size_t j = 0; j < printLimit; ++j) { std::cout << batches[i][j]; if (j < printLimit - 1) std::cout << ", "; } if (batches[i].size() > 5) std::cout << ", ..."; std::cout << "]\n"; } return 0;}
运行效果:
g++ -std=c++17 -O2 -o order_batching main.cpp OrderBatching.cpp./order_batching
生成测试数据...执行订单分批算法...分批结果:总订单数: 1000总批次数: 111平均每批次订单数: 9.00901总分拣次数: 3691算法耗时统计:总计耗时: 878 毫秒 (878658 微秒)平均每个订单处理时间: 0.878 毫秒平均每个批次处理时间: 7.90991 毫秒前5个批次详情:批次 0: 20 个订单 [0, 434, 905, 719, 917, ...]批次 1: 20 个订单 [1, 64, 871, 45, 51, ...]批次 2: 20 个订单 [2, 608, 692, 826, 207, ...]批次 3: 20 个订单 [3, 241, 495, 943, 823, ...]批次 4: 20 个订单 [4, 599, 803, 216, 820, ...]
8.4 Python 绑定
修改头文件:
// OrderBatching.h#ifndef ORDER_BATCHING_H#define ORDER_BATCHING_H#include<pybind11/pybind11.h>#include<pybind11/stl.h>#include<vector>#include<unordered_set>#include<string>class Order {public: int id; std::vector<bool> items; // items[i] = true 表示包含 SKU i Order(int orderId, int skuCount); voidaddItem(int skuId); doublejaccardSimilarity(const Order& other)const;};class OrderBatching {private: std::vector<Order> orders; int maxBatchSize; // 每批次最大订单数 double minSimilarity; // 最小相似度阈值 doublecalculateBatchSimilarity(const std::vector<int>& batch)const; doublecalculateOrderToBatchSimilarity(int orderId, const std::vector<int>& batch)const;public: OrderBatching(const std::vector<Order>& inputOrders, int maxBatch = 20, double minSim = 0.3); std::vector<std::vector<int>> createBatches(); intcalculateTotalPicks(const std::vector<std::vector<int>>& batches)const;};// 工具函数(用于测试)std::vector<Order> generateTestData(int numOrders, int numSKUs, double density = 0.3);#endif// ORDER_BATCHING_H// 绑定PYBIND11_MODULE(order_batching, m) { m.doc() = "pybind11 order batching plugin"; // 模块文档 // 将C++函数暴露为Python函数 m.def("generate_test_data", &generateTestData, "生成模拟数据"); pybind11::class_<Order>(m, "Order") .def(pybind11::init<int, int>()) // 绑定构造函数 .def("add_item", &Order::addItem).def("jaccard_similarity", &Order::jaccardSimilarity); pybind11::class_<OrderBatching>(m, "OrderBatching") .def(pybind11::init<const std::vector<Order> &, int, float>()) // 绑定构造函数 .def("create_batches", &OrderBatching::createBatches) .def("calculate_total_picks", &OrderBatching::calculateTotalPicks); }
创建 setup.py:
from setuptools import setup, Extensionfrom pybind11.setup_helpers import Pybind11Extension, build_extfrom pybind11 import get_cmake_dirimport pybind11# 或者更简单的方式ext_modules = [ Pybind11Extension( "order_batching", ["core/OrderBatching.cpp"], include_dirs=[pybind11.get_include(),"core/"], cxx_std=11, # 指定C++标准 ),]setup( name="order_batching", ext_modules=ext_modules, cmdclass={"build_ext": build_ext}, zip_safe=False,)
编译与测试:
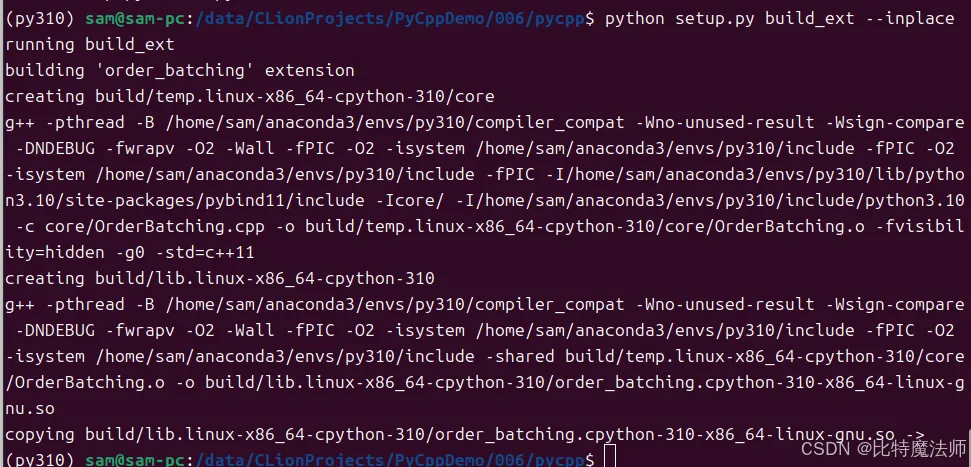
python setup.py build_ext --inplace
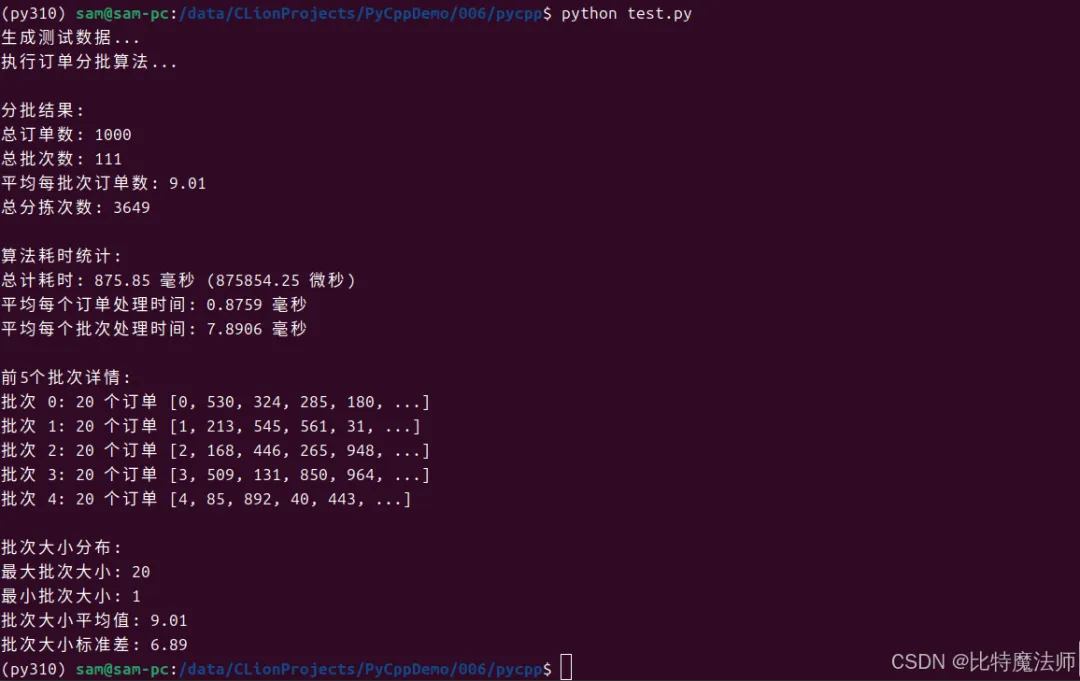
import order_batchingimport timeNUM_ORDERS = 1000NUM_SKUS = 50MAX_BATCH_SIZE = 20MIN_SIMILARITY = 0.25print("生成测试数据...")orders = order_batching.generate_test_data(NUM_ORDERS, NUM_SKUS, 0.3)print("执行订单分批算法...")# 开始计时start_time = time.perf_counter()batcher = order_batching.OrderBatching(orders, MAX_BATCH_SIZE, MIN_SIMILARITY)batches = batcher.create_batches()# 结束计时end_time = time.perf_counter()# 计算耗时(毫秒和微秒)elapsed_time_seconds = end_time - start_timeelapsed_time_ms = elapsed_time_seconds * 1000elapsed_time_micros = elapsed_time_seconds * 1000000print("\n分批结果:")print(f"总订单数: {NUM_ORDERS}")print(f"总批次数: {len(batches)}")if len(batches) > 0: print(f"平均每批次订单数: {NUM_ORDERS / len(batches):.2f}")print(f"总分拣次数: {batcher.calculate_total_picks(batches)}")# 添加耗时统计print("\n算法耗时统计:")print(f"总计耗时: {elapsed_time_ms:.2f} 毫秒 ({elapsed_time_micros:.2f} 微秒)")# 计算平均每个订单的处理时间avg_per_order_ms = elapsed_time_ms / NUM_ORDERSprint(f"平均每个订单处理时间: {avg_per_order_ms:.4f} 毫秒")# 计算平均每个批次的处理时间if len(batches) > 0: avg_per_batch_ms = elapsed_time_ms / len(batches) print(f"平均每个批次处理时间: {avg_per_batch_ms:.4f} 毫秒")# 显示前5个批次详情print("\n前5个批次详情:")show_count = min(len(batches), 5)for i in range(show_count): batch = batches[i] print_limit = min(len(batch), 5) batch_preview = ", ".join(map(str, batch[:print_limit])) if len(batch) > 5: batch_preview += ", ..." print(f"批次 {i}: {len(batch)} 个订单 [{batch_preview}]")# 如果批次数量大于0,显示更多统计信息if len(batches) > 0: # 计算批次大小的分布 batch_sizes = [len(batch) for batch in batches] max_size = max(batch_sizes) min_size = min(batch_sizes) print(f"\n批次大小分布:") print(f"最大批次大小: {max_size}") print(f"最小批次大小: {min_size}") # 计算批次大小的平均值和标准差 avg_batch_size = sum(batch_sizes) / len(batch_sizes) import math variance = sum((size - avg_batch_size) ** 2 for size in batch_sizes) / len(batch_sizes) std_dev = math.sqrt(variance) print(f"批次大小平均值: {avg_batch_size:.2f}") print(f"批次大小标准差: {std_dev:.2f}")
8.5 api 封装与测试
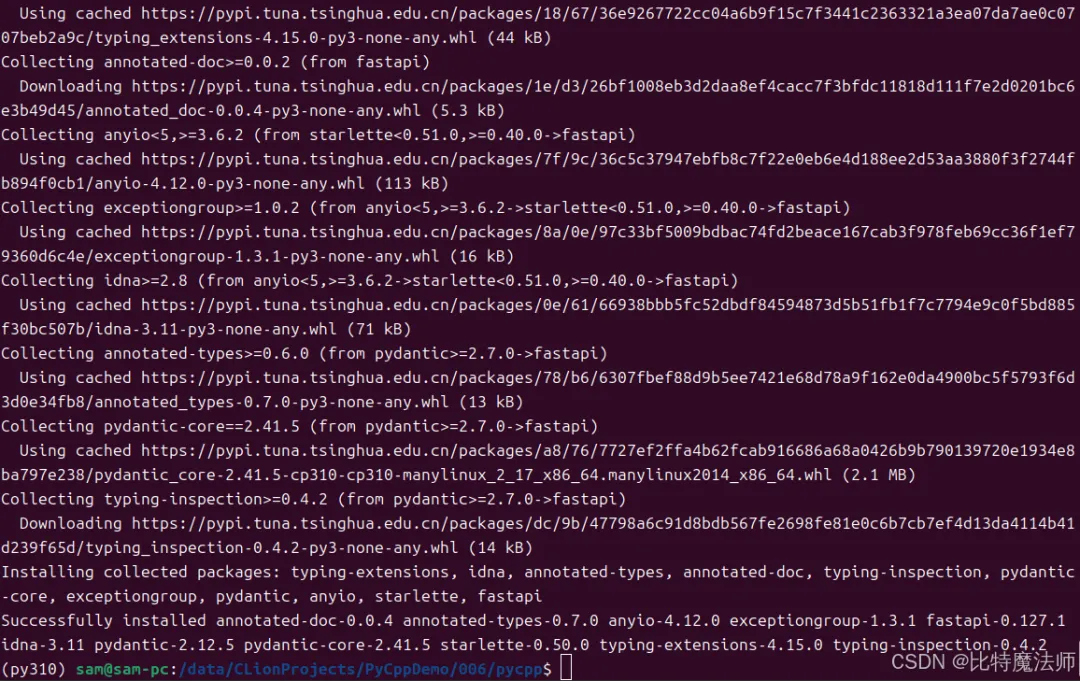
pip install fastapi uvicorn
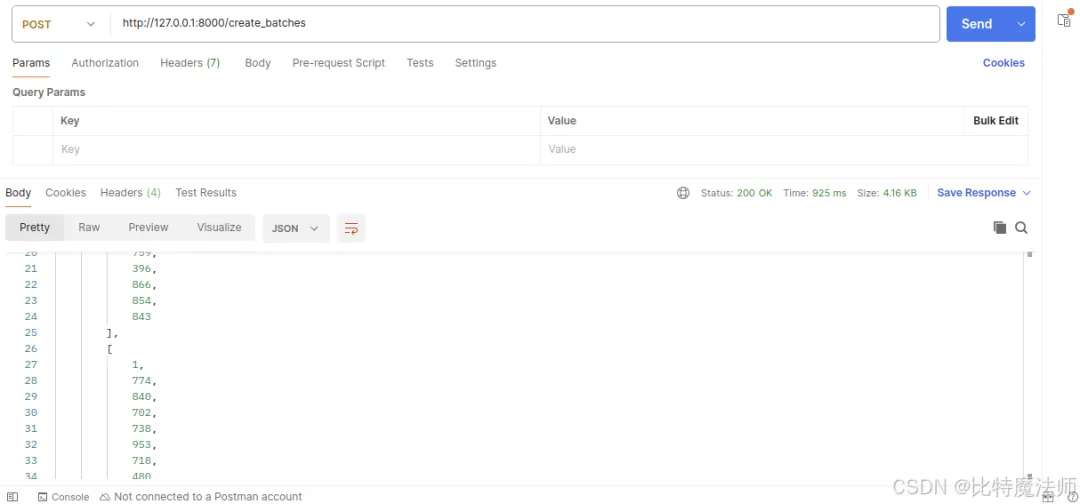
# main.pyimport order_batchingfrom fastapi import FastAPIapp = FastAPI()NUM_ORDERS = 1000NUM_SKUS = 50MAX_BATCH_SIZE = 20MIN_SIMILARITY = 0.25@app.post("/create_batches")def create_batches(): # 模拟sql查询 orders = order_batching.generate_test_data(NUM_ORDERS, NUM_SKUS, 0.3) # 执行算法 batcher = order_batching.OrderBatching(orders, MAX_BATCH_SIZE, MIN_SIMILARITY) batches = batcher.create_batches() return { "code": 1, "data": batches }
运行api服务:
uvicorn main:app --reload
api 测试:
至此,我们已经实现了使用 C++ 基于商品相似性的订单分批算法,最终通过 Python 封装为 API 接口,可供上层业务系统调用。系统性能如下:
生成测试数据...执行订单分批算法...分批结果:总订单数: 1000总批次数: 111平均每批次订单数: 9.01总分拣次数: 3649算法耗时统计:总计耗时: 875.85 毫秒 (875854.25 微秒)平均每个订单处理时间: 0.8759 毫秒平均每个批次处理时间: 7.8906 毫秒前5个批次详情:批次 0: 20 个订单 [0, 530, 324, 285, 180, ...]批次 1: 20 个订单 [1, 213, 545, 561, 31, ...]批次 2: 20 个订单 [2, 168, 446, 265, 948, ...]批次 3: 20 个订单 [3, 509, 131, 850, 964, ...]批次 4: 20 个订单 [4, 85, 892, 40, 443, ...]批次大小分布:最大批次大小: 20最小批次大小: 1批次大小平均值: 9.01批次大小标准差: 6.89
总结
本文系统梳理了在 Python 3.10+ 环境中集成 C/C++ 代码的四大主流技术路径,并对各自的适用场景、技术特点与工程实践进行深入剖析。我们重点围绕 原生 Python C API、轻量级 ctypes、高效静态编译器 Cython 以及 现代 C++ 绑定库 pybind11 展开论述,并结合 基于 pybind11 的智能分拣算法实战案例,展现混合编程在真实场景下的应用与效能提升。
核心要义:
- 明确目标
- 评估技术栈
- 权衡利弊:在开发速度、运行性能、维护成本之间找到最佳平衡点。
Python 与 C/C++ 的混合编程不仅是性能提升的手段,更是扩展 Python 生态边界的战略路径。通过合理选用上述工具,开发者能够在保持 Python 敏捷开发体验的同时,有效突破性能瓶颈,构建出兼具开发效率与执行效能的高性能应用系统,从容应对复杂计算与高频调用场景下的工程挑战。