
当前位置:首页>Linux>linux工具集合和问题处理

linux工具集合和问题处理

  • 2026-10-11 06:54:04
linux工具集合和问题处理

QUOTE

好用的工具分享和使用

本文看点

01

1. 使用SCL来安装不同版本的py

02

2. Linux环境崩溃生成core文件

03

3.Linux端口转发的几种常用方法

01

INSTALL

1. 使用SCL来安装不同版本的py

1

安装scl

...shell

   yum install centos-release-scl

   yum install scl-utils-build

1

设置仓库地址

...shell

   yum-config-manager --enable rhel-server-rhscl-7-rpms

1

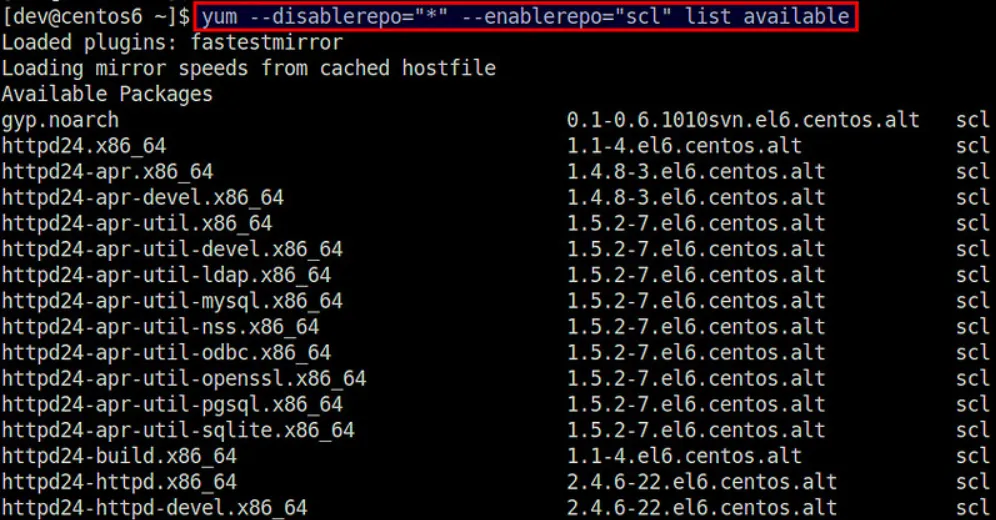
查看 SCL 中可用包的完整列表

...shell

   yum --disablerepo="*" --enablerepo="scl" list available

1

搜索 SCL 中的包

...shell

   yum --disablerepo="*" --enablerepo="scl" search <keyword>

1

假设你要安装 Python 3.5,直接使用yum install即可

...shell

   yum install rh-python35

1

安装后默认是不生效的

...shell

   python --version

   Python 2.6.6

1

使用前需要激活

...shell

   scl enable rh-python35 bash

1

验证一下是否生效

...shell

   python -V

02

CHAPTER

2. Linux环境崩溃生成core文件

1

首先需要确认当前会话的ulimit –c,若为0,则不会产生对应的coredump,需要进行修改和设置

...shell

   # 临时,可以产生coredump且不受大小限制

   ulimit -c unlimited

   # 永久生效,加到配置文件中

   vim /etc/profile

1

更改core dump生成路径

默认会生成在程序的工作目录,但是有些程序存在切换目录的情况,导致core dump生成的路径没有规律

...shell

   mkdir -p  /data/coredump

   echo /data/coredump/core.%e.%p> /proc/sys/kernel/core_pattern

   %e表示程序名, %p表示进程id

03

FORWARD

3.Linux端口转发的几种常用方法

1

SSH端口转发

...shell

   #本地端口转发

   ssh -fgN -L 2222:localhost:22 localhost

   #远程端口转发

   ssh -fgN -R 2222:host1:22 localhost

   #动态转发

   ssh -fgN -D 12345 root@host1

1

iptables 端口转发

...shell

   1.开启数据转发功能

   vi /etc/sysctl.conf  

     #增加一行

     net.ipv4.ip_forward=1

   2.使数据转发功能生效

   sysctl -p

   3.将本地的端口转发到本机端口

   iptables -t nat -A PREROUTING -p tcp --dport 2222 -j REDIRECT --to-port 22

   4.将本机的端口转发到其他机器

   iptables -t nat -A PREROUTING -d 192.168.172.130 -p tcp --dport 8000 -j DNAT --to-destination 192.168.172.131:80

   iptables -t nat -A POSTROUTING -d 192.168.172.131 -p tcp --dport 80 -j SNAT --to 192.168.172.130

   5.清空nat表的所有链

   iptables -t nat -F PREROUTING

1

firewall 端口转发

...shell

   1.开启伪装IP

   firewall-cmd --permanent --add-masquerade

   2.配置端口转发,将到达本机的12345端口的访问转发到另一台服务器的22端口。

   firewall-cmd --permanent --add-forward-port=port=12345:proto=tcp:toaddr=192.168.172.131:toport=22

   3.重新载入,使其失效。

   firewall-cmd --reload

1

rinetd 端口转发

...shell

   1.源码下载

   wget https://li.nux.ro/download/nux/misc/el7/x86_64/rinetd-0.62-9.el7.nux.x86_64.rpm

   2.安装rinetd

   rpm -ivh rinetd-0.62-9.el7.nux.x86_64.rpm

   3.编辑配置文件

   vi /etc/rinetd.conf

   0.0.0.0 1234 127.0.0.1 22

   4.启动转发

   rinetd -c /etc/rinetd.conf

1

ncat 端口转发

...shell

   1.安装ncat

   yum install nmap-ncat -y

   2.监听本机 9876 端口,将数据转发到 192.168.172.131的 80 端口

   ncat --sh-exec "ncat 192.168.172.131 80" -l 9876  --keep-open

1

socat 端口转发

...shell

   1.socat安装

   yum install -y socat

   2.在本地监听12345端口,并将请求转发至192.168.172.131的22端口。

   socat TCP4-LISTEN:12345,reuseaddr,fork TCP4:192.168.172.131:22

1

portmap 端口转发

...shell

   1.下载地址:

   http://www.vuln.cn/wp-content/uploads/2016/06/lcx_vuln.cn_.zip

   2.监听本地1234端口,转发给192.168.172.131的22端口

   ./portmap -m 1 -p1 1234 -h2 192.168.172.131 -p2 22

04

CHAPTER

4.修改SSH的默认端口

1

修改配置项

...shell

   vi /etc/ssh/sshd_config

   Port 22  # 先不要去掉

   Port 6666 # 增加一个端口,这样做是为了确保6666端口不能正常连接的情况下依然能保持22端口连接

1

重启服务,并确认服务没有问题

...shell

   #重启服务

   systemctl restart sshd.service

   #确认服务没有问题

   systemctl status sshd.service

1

使用6666端口,确认可以正常连接

1

再次编辑配置,将22端口注释掉,然后重启服务

05

CONFIG

5. 配置禁止root用户直接登录

1

先确认有普通用户,或者创建一个普通用户

...shell

   [root@CentOS ~]# useradd test

   #使用passwd命令即可给相应账户设置或修改密码。

   [root@CentOS ~]# passwd test

   #根据图示,设置或修改密码需要填写两次,第二次为效验密码,输入完毕后请回车确认。

   Changing password for user test.

   New password:

   Retype new password:

   passwd: all authentication tokens updated successfully.

1

修改配置文件

...shell

   vi /etc/ssh/sshd_config

   查找 #PermitRootLogin yes”

   将“#”去掉,末尾“Yes”改为“No”

1

重启服务

...shell

   systemctl restart sshd

1

确认已经无法用root用户登录

1

普通用户可以登录

...shell

   # 登录后切换root

   su -

06

CHAPTER

6.解决 SSH 连接速度慢

一个个试,不行就还原了,再试下一个

1

关闭DNS反向解析

...shell

   vi /etc/ssh/sshd_config

   UseDNS=no

   重启验证,不行的话要改回来!!!

   service sshd restart

1

关闭GSS认证

...shell

   # vi /etc/ssh/sshd_config

   GSSAPIAuthentication no

   重启验证,不行的话要改回来!!!

   service sshd restart

07

CHAPTER

7. fzf-模糊查找神器

...shell

apt install fzf

根据readme添加环境变量

more /usr/share/doc/fzf/README.Debian

Bash

====

Append this line to ~/.bashrc to enable fzf keybindings for Bash:

   source /usr/share/doc/fzf/examples/key-bindings.bash

END

我是 小梦同学,一个爱折腾技术的测试工程师,专注分享踩坑经验。

如果你觉得今天这篇有收获,欢迎点赞、在看、转发三连,我们下篇见。

最新文章

随机文章