Python|SAM2多目标动物追踪
- 2026-09-23 13:26:52

科研图像处理

在上一期教程中,我们介绍了怎样安装 SAM2,以及SAM2运用于单张图像分割,例如细胞分割:
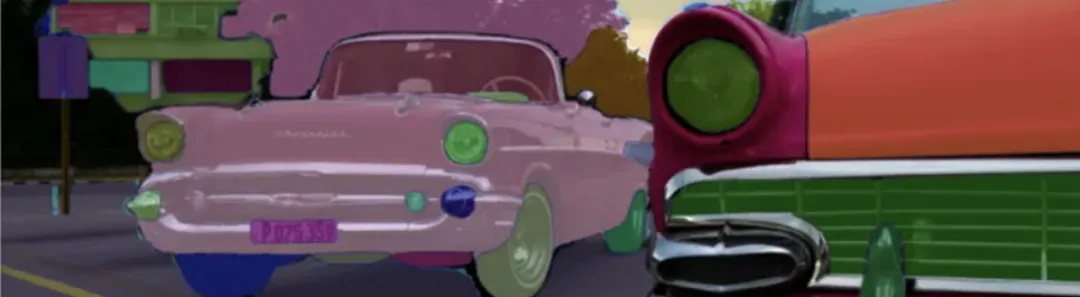 点击跳转《Python|SAM2安装与图像》
仅仅对每一帧单独进行分割不仅效率低下,而且会导致结果在时间轴上闪烁不定。
SAM2 的核心是视频物体追踪(Video Object Tracking)。不仅适用于自然图像,也适用于科研图像,例如动物追踪以及细胞追踪:
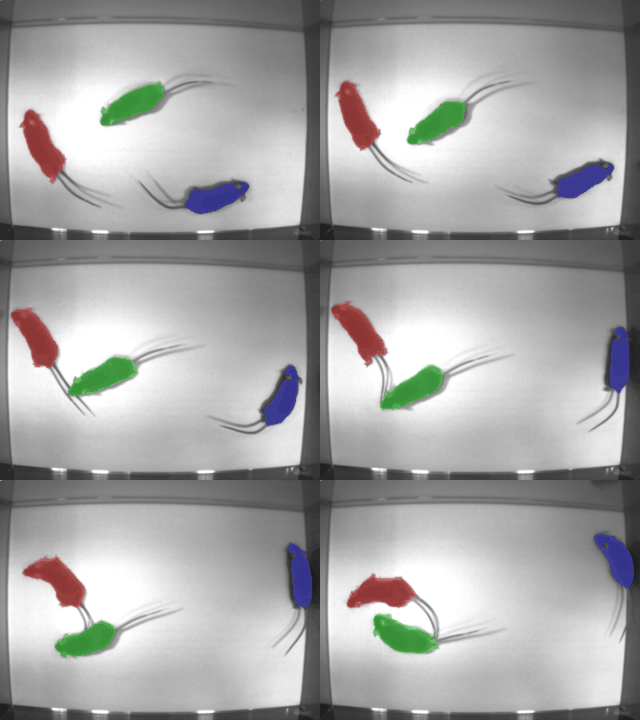
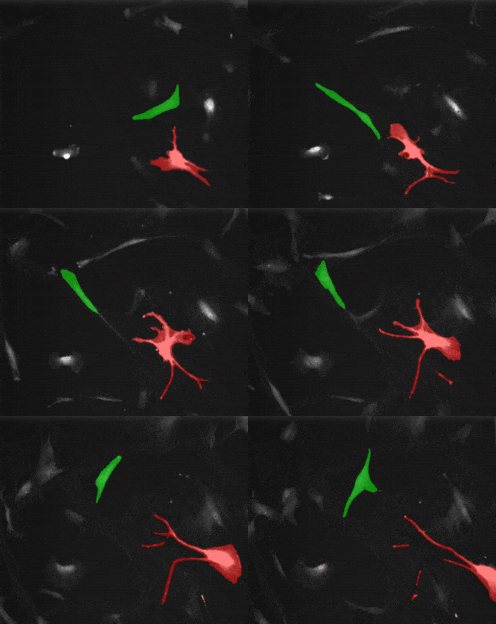
这篇文章会介绍:怎样利用 SAM2 ,仅凭第一帧的简单标注,就能在后续的视频流中持续、稳定地追踪目标。
这里以追踪三只小鼠的运动轨迹为例:
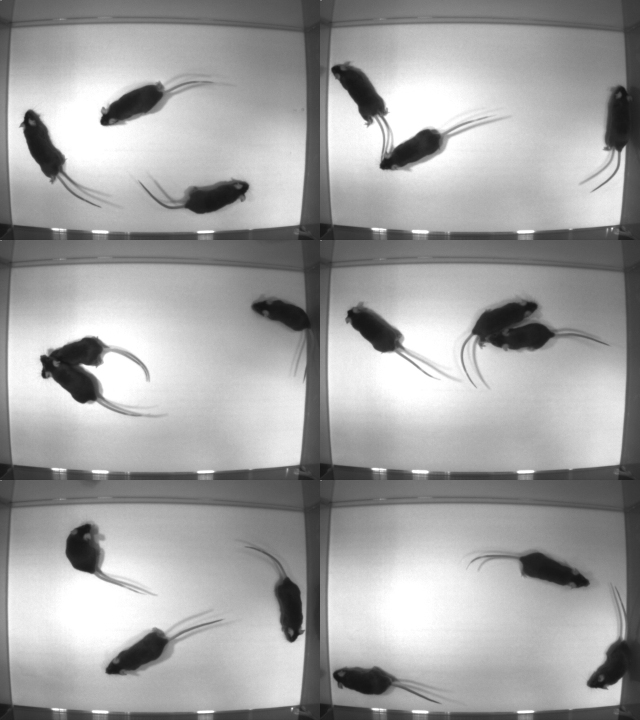
一、SAM2的安装
SAM2的安装参考之前的这篇文章:
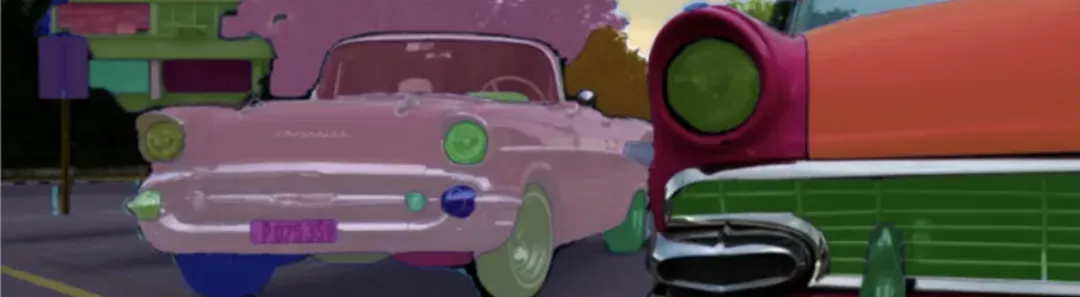 点击跳转《Python|SAM2安装与图像》
二、视频转JPG图像
SAM2的输入是图像序列,我们需要先把视频存成jpg格式,有两种方法可以进行转换:
1、FFMPEG
首先下载FFMPEG:https://ffmpeg.org/,然后使用Command line
ffmpeg -i <your_video>.mp4 -q:v 2 -start_number 0 <output_dir>/'%05d.jpg'2、Python脚本
首先安装需要的包:
pip install opencv-python numpy tqdm视频转图像序列:
import cv2import os# Pathsvideo_path = r"input_video.mp4" # mp4 / avi / movout_dir = r"input_video_frames" # output folderos.makedirs(out_dir, exist_ok=True)# Open videocap = cv2.VideoCapture(video_path)if not cap.isOpened():raise IOError(f"Cannot open video: {video_path}")frame_idx = 0# Read & save frameswhile True:ret, frame = cap.read()if not ret:break# Save as JPG (Unicode-safe)frame_name = f"{frame_idx:06d}.jpg"save_path = os.path.join(out_dir, frame_name)ok, buf = cv2.imencode(".jpg", frame, [cv2.IMWRITE_JPEG_QUALITY, 95])buf.tofile(save_path)frame_idx += 1cap.release()print(f"✅ Saved {frame_idx} frames to: {out_dir}")
三、SAM2多物体追踪
1、环境设置
激活SAM2环境:
conda activate SAM2Load SAM2:
import torchimport numpy as npimport matplotlib.pyplot as pltfrom sam2.build_sam import build_sam2_video_predictor# 1) devicedevice = "cuda" if torch.cuda.is_available() else "cpu"print("device =", device)# 2) build predictorckpt = "../checkpoints/sam2.1_hiera_large.pt"cfg = "configs/sam2.1/sam2.1_hiera_l.yaml"predictor = build_sam2_video_predictor(cfg, ckpt, device=device)# 3) simple visualization helpersdef show_mask(mask, ax, obj_id=0, alpha=0.6):cmap = plt.get_cmap("tab10")color = np.array([*cmap(obj_id % 10)[:3], alpha])h, w = mask.shape[-2:]ax.imshow(mask.reshape(h, w, 1) * color.reshape(1, 1, 4))def show_points(points, labels, ax, s=200):p = points[labels == 1]n = points[labels == 0]if len(p): ax.scatter(p[:,0], p[:,1], c="lime", marker="*", s=s, edgecolors="white", linewidths=1.0)if len(n): ax.scatter(n[:,0], n[:,1], c="red", marker="*", s=s, edgecolors="white", linewidths=1.0)
2、加载图像
设置图像序列的路径,并将图像加载到SAM2中:
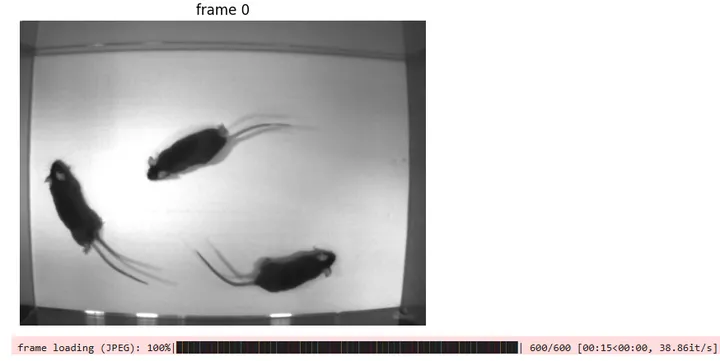
import osfrom PIL import Imageimport matplotlib.pyplot as plt# folder of frames: 000000.jpg, 000001.jpg, ...video_dir = r"G:\SAM\trimice_demo"frame_names = sorted([f for f in os.listdir(video_dir) if f.lower().endswith((".jpg", ".jpeg"))],key=lambda f: int(os.path.splitext(f)[0]))# show the first frame (quick sanity check)img0 = Image.open(os.path.join(video_dir, frame_names[0])).convert("RGB")plt.imshow(img0); plt.title("frame 0"); plt.axis("off"); plt.show()# init SAM2 video state from the frame folderinference_state = predictor.init_state(video_path=video_dir)predictor.reset_state(inference_state)
运行后会显示视频的第一帧,加载完成:
3、定义特征点选择分割物体
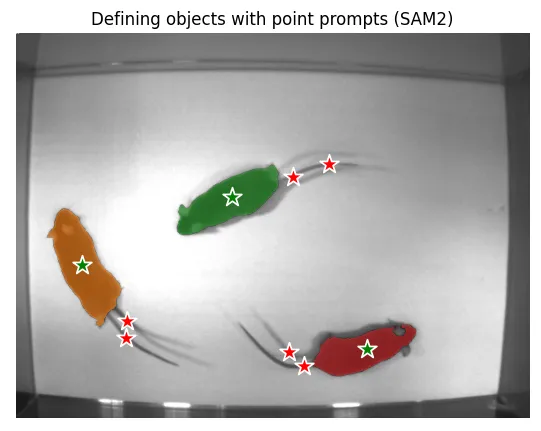
SAM2需要通过选点,定义需要追踪的物体以及背景。
这里举的例子中,每只小鼠定义了三个点,一个点位于小鼠的身体,另外两个点位于小鼠的尾巴:
import numpy as npimport matplotlib.pyplot as pltfrom PIL import Imageimport os# frame to annotateann_frame_idx = 0img = Image.open(os.path.join(video_dir, frame_names[ann_frame_idx]))# predefined prompts (from manual selection)points = np.array([[ 82., 288.5], [136.5, 380.], [138.5, 359.], # object 1[269., 204.5], [345., 178.5], [389.5, 163. ], # object 2[437., 393.5], [358., 414.5], [340., 397. ], # object 3], np.float32)labels = np.array([1,0,0, 1,0,0, 1,0,0], np.int32) # 1=FG, 0=BGobj_ids = np.array([1,1,1, 2,2,2, 3,3,3], np.int32) # object identity# add prompts object by objectfor obj_id in [1, 2, 3]:idx = obj_ids == obj_id_, out_obj_ids, out_mask_logits = predictor.add_new_points_or_box(inference_state,ann_frame_idx,obj_id,points[idx],labels[idx],)# visualize prompts and segmentationplt.figure(figsize=(8, 5))plt.imshow(img)ax = plt.gca()show_points(points, labels, ax)for oid, logit in zip(out_obj_ids, out_mask_logits):show_mask((logit > 0).cpu().numpy(), ax, obj_id=oid)plt.title("Defining objects with point prompts (SAM2)")plt.axis("off")plt.show()
得到的三只小鼠的分割结果:
4、追踪整个视频
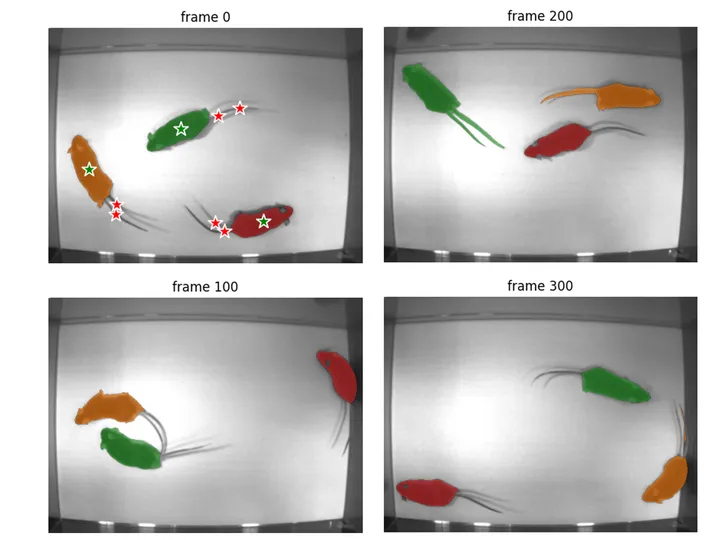
如果选择特征点后追踪效果不错,可以开始追踪整个视频:
# propagate masks through the whole videovideo_segments = {}for out_frame_idx, out_obj_ids, out_mask_logits in predictor.propagate_in_video(inference_state):video_segments[out_frame_idx] = {int(out_obj_id): (out_mask_logits[i] > 0.0).cpu().numpy()for i, out_obj_id in enumerate(out_obj_ids)}# quick visualization (every N frames)stride = 100for f in range(0, len(frame_names), stride):plt.figure(figsize=(6, 4))plt.imshow(Image.open(os.path.join(video_dir, frame_names[f])))ax = plt.gca()for oid, m in sorted(video_segments.get(f, {}).items()):show_mask(m, ax, obj_id=oid)if f == ann_frame_idx: # show clicks only on the annotated frameshow_points(points, labels, ax)plt.title(f"frame {f}")plt.axis("off")plt.show()
追踪完成后,可以进行快速的分割结果的检查:
如果有某一帧分割错误,可以再进行Label:
fix_frame = 200 # <- choose the frame with an errorobj_id = 1 # <- choose which object to refine# add refinement clicks (edit these for your demo)points = np.array([[500, 140], [400, 135]], np.float32) # (x,y) clickslabels = np.array([1, 0], np.int32) # 1=FG, 0=BG_, out_obj_ids, out_mask_logits = predictor.add_new_points_or_box(inference_state, fix_frame, obj_id, points, labels)# get mask for this obj_id (don't assume index 0!)mask = next(( (logit > 0).cpu().numpy()for oid, logit in zip(out_obj_ids, out_mask_logits)if int(oid) == obj_id ), None)plt.figure(figsize=(6, 4))plt.imshow(Image.open(os.path.join(video_dir, frame_names[fix_frame])))ax = plt.gca()show_points(points, labels, ax)show_mask(mask, ax, obj_id=obj_id)plt.title(f"Refined | frame {fix_frame} | object {obj_id}")plt.axis("off")plt.show()
然后可以查看修正后的分割结果:
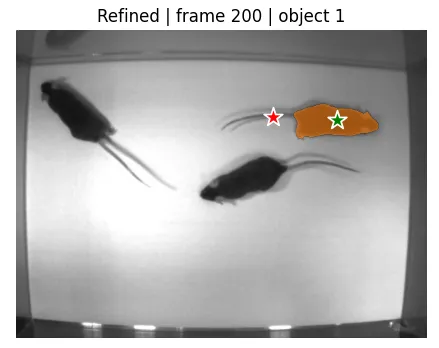
如果分割效果不错,可以再次追踪整个视频,不断迭代。
5、注意事项
在选点的时候需要注意,如果点选错了,并且通过predictor.add_new_points_or_box,加入到模型中,会导致分割效果下降。
可以先通过show_points,确认选点是正确的,然后再加入到模型中。
如果选点有问题,可以通过predictor.reset_state(inference_state)进行初始化。
后面会介绍怎样利用SAM3,利用文本Prompt,交互进行图像分割与追踪。
希望对大家有帮助~
往期推荐

点赞在看哦~
随机文章
-
 10个月宝宝每天需要喝多少奶粉?
- 10个Python 自动化脚本,办公效率起飞
- 800 行代码,从零到 Plan Agent.不用框架,我给 Agent 加上了计划能力
- 《噬血代码 2》篝火评测:肉眼可见的贫穷
- 数控cnc加工中心分度圆编程:从原理到实例,一次吃透等分加工!
- 零代码亲子实验:10分钟DIY智能灭火装置,娃秒懂传感器逻辑!
- python自动化系列:轻松找出两份表格间的细微差别
- 蓝屏代码“DRIVER_IRQL_NOT_LESS_OR_EQUAL” 该怎么办?
- 编程花了十几万,对深圳中考自招有用吗?一个扎心真相(7)
- 平凡•亦光芒丨把青春写进每一行代码
- 截图即代码!Kimi K2.5 发布,超级个体时代真的来了