在进行 Abaqus 二次开发,开发者常面临一个棘手的问题:脚本的稳定性(Robustness)。 当修改了几何尺寸或调整了网格种子密度后,模型的拓扑结构会发生改变。此时,节点(Node)和单元(Element)的 ID 往往会重新排列。如果脚本中依然使用 nodes[10] 这样基于索引的方式来选取对象,极易导致边界条件施加错误,甚至直接引发 IndexError。
Abaqus 提供了 getByBoundingBox 这一核心接口。它的逻辑简单而强大:将按编号找对象转变为按位置找对象。 本文将通过两个经典场景——选取表面和选取特定点,记录getByBoundingBox 的用法。
一、 示例:从“切片”到“靶心”
getByBoundingBox 的核心在于定义一个三维空间中的“包围盒”。根据目标对象的不同,我们需要构建不同形状的盒子。
场景 1:选取顶面
目标:在一个参数化长方体(长L、宽W、高H)中,选取顶面(z=H)的所有节点。
策略:构建一个无限宽广、但厚度极薄的“切片”盒子。
代码逻辑解释: 将 X 和 Y 的范围设得非常大 ,确保覆盖整个截面;将 Z 的范围设得非常小 ,仅包含顶面这一层节点。
# -*- coding: mbcs -*-from abaqus import mdbfrom abaqusConstants import *defcreate_surface_set(part_name, dims):""" Scenario 1: Selecting a Surface (Slice Strategy) Target: All nodes on the top face (z = height). """if part_name notin mdb.models['Model-1'].parts:return p = mdb.models['Model-1'].parts[part_name] H = dims['height']# [Explanation]# We use 'eps' (epsilon) to create a search volume.# To select a plane, we create a "Thin Slice". eps = 1e-4# Bounding Box:# X/Y: Huge range to cover the whole width/length.# Z: Very narrow range centered at H. top_nodes = p.nodes.getByBoundingBox( xMin=-1e6, yMin=-1e6, zMin=H - eps, xMax= 1e6, yMax= 1e6, zMax=H + eps )iflen(top_nodes) > 0: p.Set(nodes=top_nodes, name='Set-Top-Surface')print("Surface Set Created: {} nodes selected.".format(len(top_nodes)))
效果如下: 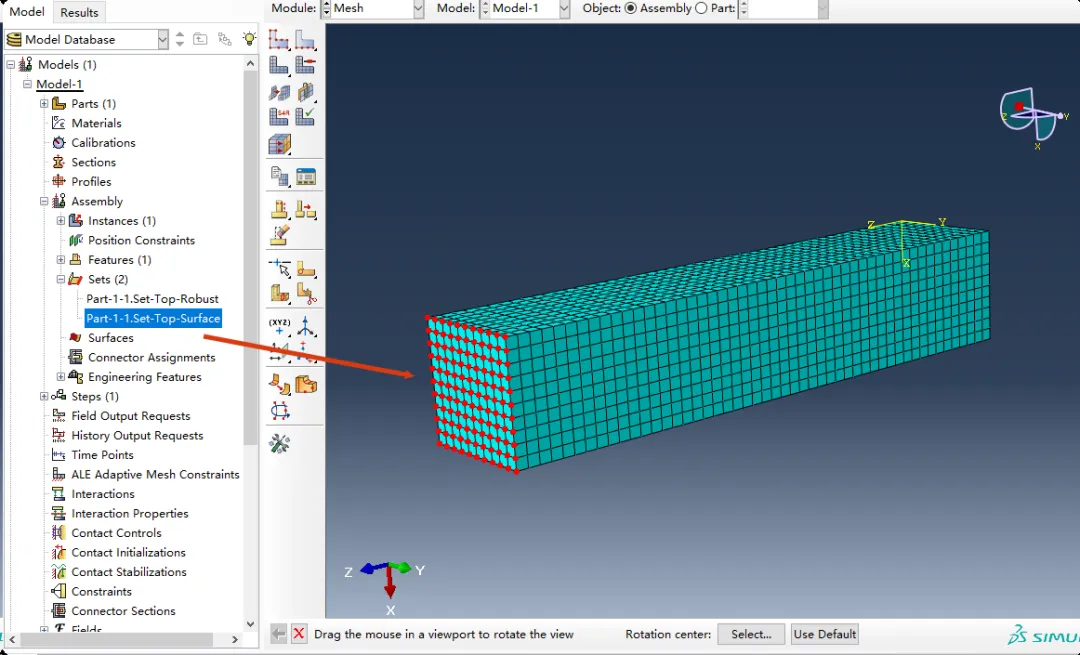
场景 2:选取特定点
目标:对于一个底面为 1x1,高度为 5的柱体,选取底部中心点(即重心位置)。 假设:柱体角点位于原点 (0,0,0),因此底部中心坐标为 (0.5, 0.5, 0.0)。 策略:构建一个长宽高都极小的“微型立方体”包裹住目标坐标,就像瞄准靶心一样。
代码逻辑解释: 与取面不同,取点要求 X、Y、Z 三个方向都必须精确限制。围绕目标坐标 (x, y, z)$生成一个微小的范围,排除了周围其他干扰节点。
defcreate_centroid_set(part_name):""" Scenario 2: Selecting a Single Point (Target Strategy) Target: Bottom centroid node of a 1x1x5 prism. Assumed Geometry: Corner at (0,0,0), so centroid is at (0.5, 0.5, 0.0). """ p = mdb.models['Model-1'].parts[part_name]# 1. Define Target Coordinates# These should be calculated based on parameters in a real script target_x = 0.5 target_y = 0.5 target_z = 0.0# 2. Define Tolerance# A point has no volume, so we must search a tiny area around it. eps = 1e-4# 3. Create a "Tiny Cube" around the target# [Explanation]# Unlike the "Slice" strategy, here we restrict X, Y, and Z rigidly.# This ensures we only catch the specific node at this location. target_node = p.nodes.getByBoundingBox( xMin=target_x - eps, yMin=target_y - eps, zMin=target_z - eps, xMax=target_x + eps, yMax=target_y + eps, zMax=target_z + eps )# 4. Create Set (Robust Check)# Even though we expect 1 node, getByBoundingBox always returns a sequence.iflen(target_node) == 1: p.Set(nodes=target_node, name='Set-Bottom-Centroid')print("Success: Centroid node captured exactly.")eliflen(target_node) > 1:print("Warning: Tolerance too large! Captured {} nodes.".format(len(target_node)))else:print("Warning: No node found! Check coordinates or mesh density.")# --- Execution Entry ---if __name__ == "__main__":# Example for a 1x1x5 prism dims = {'length': 1.0, 'width': 1.0, 'height': 5.0}# Run both strategies create_surface_set('Part-1', dims) create_centroid_set('Part-1')
选取底部中点: 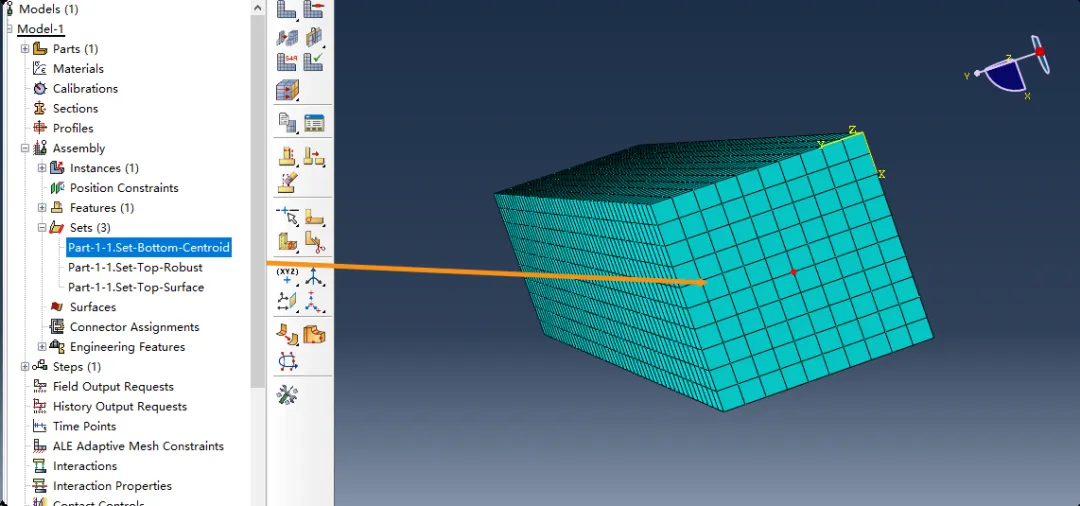
二、 关键技术细节
在实际工程应用中,要用好这两个策略,有三个关键点需要注意:
1. 必须引入“容差”
切记计算机中的浮点数是不精确的。 如果你写 zMax = 0.0,那些实际坐标为 0.000000001 的节点就会被漏选。因此,不要试图去切一个完美的平面,而要去切一个有厚度的薄片。通常 1e-4 到 1e-6 是比较合适的容差范围。
2. “切片”与“靶心”的区别
- 取面(切片):只限制法向坐标(如 Z),放开切向坐标(X, Y)。
- 取点:同时限制 X, Y, Z。好比用一个微小的盒子去罩住特定的点。
3. 区分局部坐标与全局坐标
- Part 模块:
p.nodes.getByBoundingBox 使用的是部件自身的局部坐标系。这是推荐的做法,因为无论该部件在装配体中如何移动,Part 内部的逻辑坐标是不变的。 - Assembly 模块:如果你必须在 Assembly 级别搜索,使用的是全局坐标系。这时你需要考虑 Instance 的平移和旋转矩阵,计算会变得非常复杂且容易出错。
结语
从“硬编码 ID”转向“基于几何的空间搜索”,是 Abaqus 脚本开发从入门走向专业的必经之路。 掌握 getByBoundingBox,可让代码更容易适应模型参数变化。
👉推荐阅读