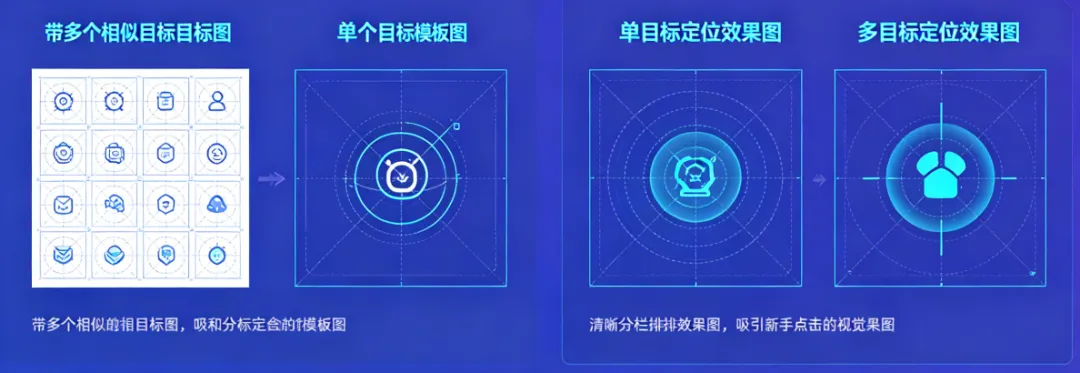
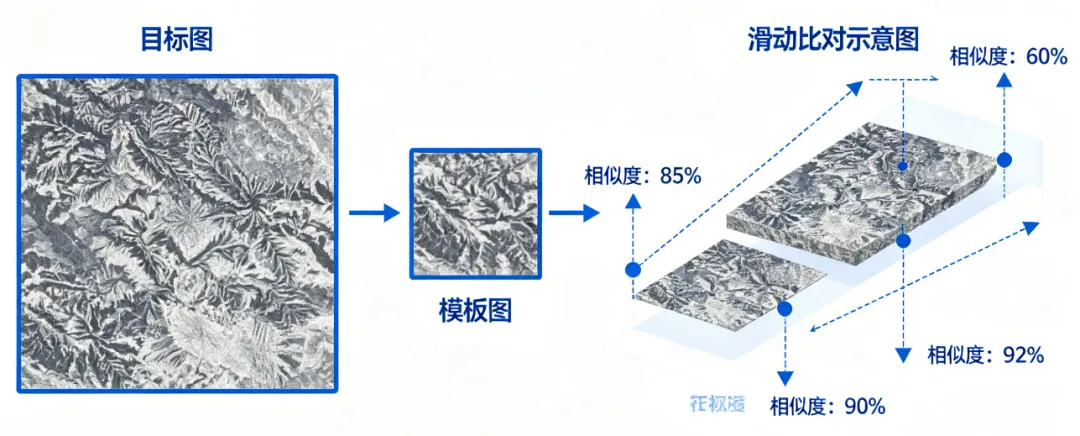
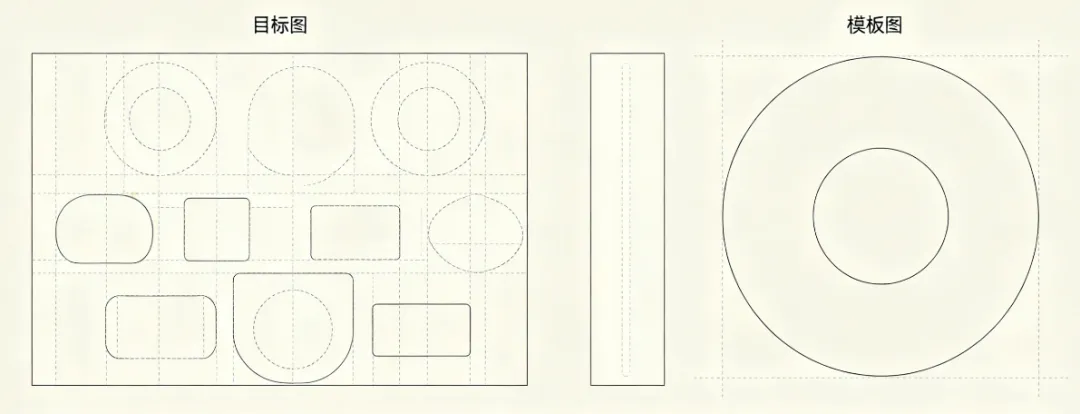
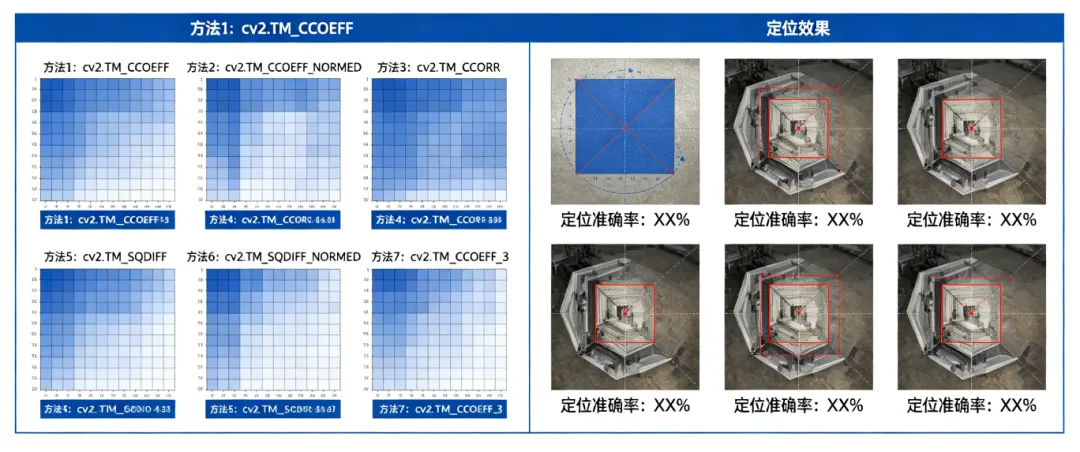
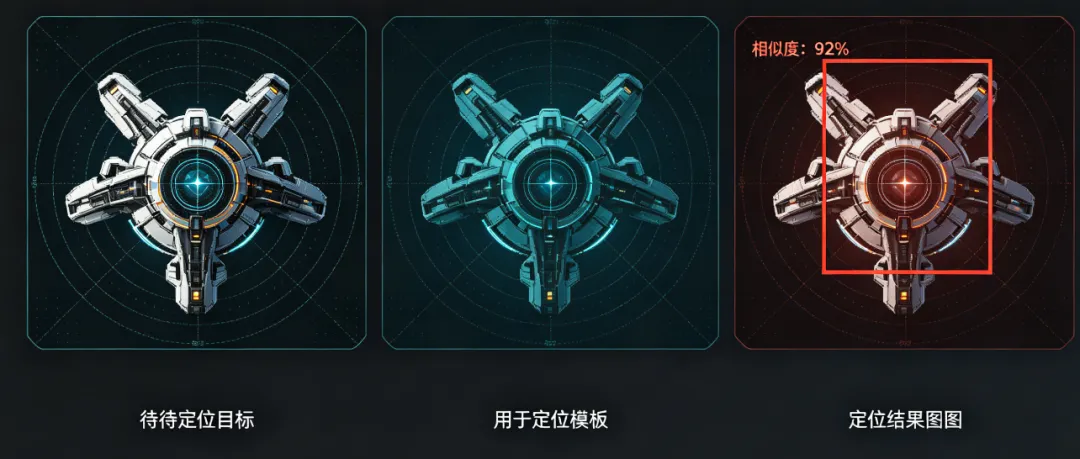
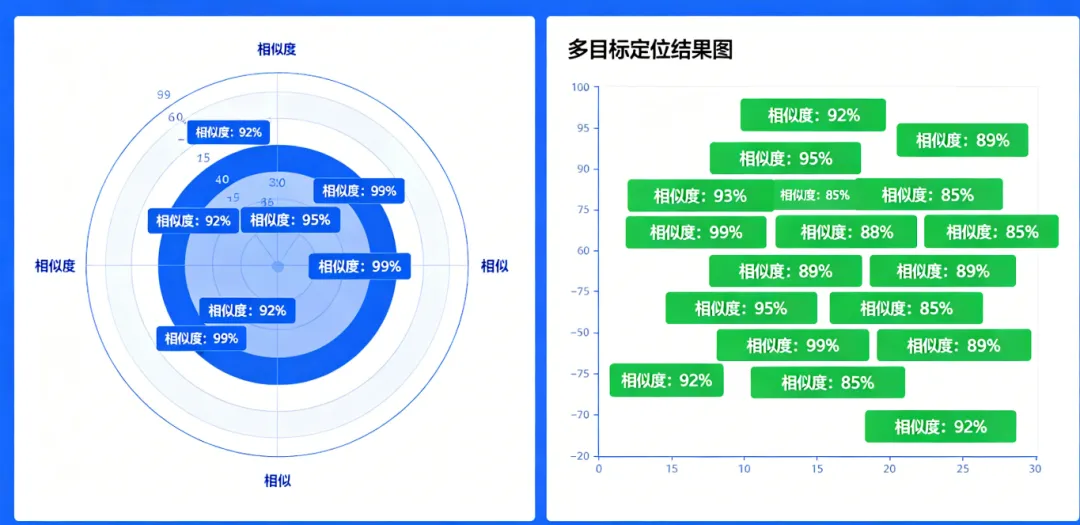
pythonimport cv2import numpy as npimport matplotlib.pyplot as plt# 1. 环境验证(可选)print("OpenCV版本:", cv2.__version__)# 2. 辅助函数(加噪、亮度调整、预处理)def add_noise_and_adjust_brightness(img, noise_var=0.001, brightness=50):# 添加高斯噪声img = np.array(img/255, dtype=np.float32)noise = np.random.normal(0, noise_var**0.5, img.shape)img_noise = img + noiseimg_noise = np.clip(img_noise, 0, 1)img_noise = np.uint8(img_noise*255)# 调整亮度img_noise = cv2.addWeighted(img_noise, 1, np.zeros_like(img_noise), 0, -brightness)return img_noisedef preprocess_image(img):# 图像预处理:高斯平滑+灰度拉伸img_blur = cv2.GaussianBlur(img, (3, 3), sigmaX=1)img_processed = cv2.equalizeHist(img_blur)return img_processed# 3. 读取图像(替换为自己的图像路径)target = cv2.imread("target.jpg", 0)template = cv2.imread("template.jpg", 0)h, w = template.shapeif h > target.shape[0] or w > target.shape[1]:print("错误:模板图尺寸大于目标图,请更换模板图!")else:# 4. 单目标定位result_single = cv2.matchTemplate(target, template, cv2.TM_CCOEFF_NORMED)threshold_single = 0.8locations_single = np.where(result_single >= threshold_single)target_single = cv2.cvtColor(target, cv2.COLOR_GRAY2BGR)if len(locations_single[0]) > 0:x, y = zip(*locations_single[::-1])[0]cv2.rectangle(target_single, (x, y), (x+w, y+h), (0, 0, 255), 2)cv2.putText(target_single, f"Match: {result_single[y, x]:.2f}", (x, y-10), cv2.FONT_HERSHEY_SIMPLEX, 0.8, (0, 0, 255), 2)# 5. 多目标定位result_multi = cv2.matchTemplate(target, template, cv2.TM_CCOEFF_NORMED)threshold_multi = 0.8locations_multi = np.where(result_multi >= threshold_multi)target_multi = cv2.cvtColor(target, cv2.COLOR_GRAY2BGR)x_list, y_list = zip(*locations_multi[::-1]) if len(locations_multi[0]) > 0 else ([], [])used = []for i in range(len(x_list)):x, y = x_list[i], y_list[i]if not any(abs(x - ux) < w/2 and abs(y - uy) < h/2 for ux, uy in used):cv2.rectangle(target_multi, (x, y), (x+w, y+h), (0, 255, 0), 2)cv2.putText(target_multi, f"{result_multi[y, x]:.2f}", (x, y-10), cv2.FONT_HERSHEY_SIMPLEX, 0.6, (0, 255, 0), 2)used.append((x, y))# 6. 抗干扰匹配(带噪声、亮度变化)target_noisy = add_noise_and_adjust_brightness(target)target_processed = preprocess_image(target_noisy)result_anti = cv2.matchTemplate(target_processed, template, cv2.TM_CCOEFF_NORMED)threshold_anti = 0.75locations_anti = np.where(result_anti >= threshold_anti)target_anti = cv2.cvtColor(target_noisy, cv2.COLOR_GRAY2BGR)x_anti_list, y_anti_list = zip(*locations_anti[::-1]) if len(locations_anti[0]) > 0 else ([], [])used_anti = []for i in range(len(x_anti_list)):x, y = x_anti_list[i], y_anti_list[i]if not any(abs(x - ux) < w/2 and abs(y - uy) < h/2 for ux, uy in used_anti):cv2.rectangle(target_anti, (x, y), (x+w, y+h), (255, 0, 0), 2)cv2.putText(target_anti, f"{result_anti[y, x]:.2f}", (x, y-10), cv2.FONT_HERSHEY_SIMPLEX, 0.6, (255, 0, 0), 2)used_anti.append((x, y))# 7. 统一显示所有效果plt.figure(figsize=(15, 10))# 第一行:目标图、模板图、单目标定位plt.subplot(2, 3, 1)plt.imshow(target, cmap="gray")plt.title("目标图")plt.axis("off")plt.subplot(2, 3, 2)plt.imshow(template, cmap="gray")plt.title("模板图")plt.axis("off")plt.subplot(2, 3, 3)plt.imshow(cv2.cvtColor(target_single, cv2.COLOR_BGR2RGB))plt.title("单目标定位")plt.axis("off")# 第二行:多目标定位、带噪声图、抗干扰定位plt.subplot(2, 3, 4)plt.imshow(cv2.cvtColor(target_multi, cv2.COLOR_BGR2RGB))plt.title(f"多目标定位({len(used)}个目标)")plt.axis("off")plt.subplot(2, 3, 5)plt.imshow(target_noisy, cmap="gray")plt.title("带噪声+亮度变化图")plt.axis("off")plt.subplot(2, 3, 6)plt.imshow(cv2.cvtColor(target_anti, cv2.COLOR_BGR2RGB))plt.title(f"抗干扰定位({len(used_anti)}个目标)")plt.axis("off")plt.tight_layout()plt.show()# 8. 保存结果(可选)cv2.imwrite("template_single.jpg", target_single)cv2.imwrite("template_multi.jpg", target_multi)cv2.imwrite("template_anti.jpg", target_anti) |