OS30.【Linux】文件IO (1) open、write和close系统调用
- 2026-10-11 05:39:33
目录
1.复习
2.区分C语言的字符串和文件中的字符串
3.三个默认打开的流
示例代码
使用系统调用操作文件
open
宏的组合
原理解释
使用方法
第3个参数mode
mode_t的类型解释
使用
方法1:使用系统调用临时设置umask+0666
方法2:使用系统调用临时设置umask+S开头的宏
close
write
ssize_t类型的解释
使用
write默认从文件起始位置写入
截断写入
追加写入
4.回顾C语言fopen的第二个参数
mode和宏的对应
1.复习
1.在OS2.【Linux】基本指令入门(1)[1]文章讲过: 文件=文件内容+文件属性
2.文件可以按是否打开进行分类 1.打开的文件 2.未打开的文件(在磁盘上)
文件打开需要借助进程,因此研究打开的文件必定研究进程和文件的关系
那么未打开的文件需要借助进程转为打开的文件,需要先找到文件,然后将文件载入内存(这是冯依诺曼体系结构规定的)让进程处理
3.C语言的文件操作参见以下文章回顾:
74.【C语言】文件操作(1)[2]
75.【C语言】文件操作(2)[3]
77.【C语言】文件操作(3)[4]
79.【C语言】文件操作(4)[5]
88.【C语言】文件操作(5)[6]
89.【C语言】文件操作(6)[7]
提醒: 使用fopen()打开文件的路径和文件名,默人在当前路径下新建一个文件,之前讲过当前路径可以在进程的cwd中获取,也可以通过修改cwd(比如chdir系统调用)来修改文新建的位置
4.由之前的C语言的文件操作知识可知: 一个进程可打开多个文件,而操作系统上有大量进程,这些进程多多少少都需要打开一些文件,那么操作系统内部一定有大量打开的文件
5.为了管理好这些打开的文件,需要先描述再组织,"描述"可以使用结构体,结构体中可以填写文件的属性(具体细节后面会讲),"组织"可以用各种数据结构
6.输出重定向和输入重定向符: 参见OS3.【Linux】基本指令入门(2)[8]文章
注意:单个的输出重定向符号>会先清空文件,而不是追加
从文件打开的模式来看:重定向符号>以w( 截断 )模式写入,即清空文件并从头开始写入,而>>以a(追加)模式写入
2.区分C语言的字符串和文件中的字符串
例如以下代码:
#include <stdio.h>
#include <string.h>
int main()
{
const char* str="teststring";
//FILE * fopen ( const char * filename, const char * mode );
    FILE* fptr=fopen("test.txt","w");//w选项会先清空文件
if (fptr==NULL)
    {
perror("fopen fail");
return -1;
    }
//size_t fwrite ( const void * ptr, size_t size, size_t count, FILE * stream );
fwrite(str,strlen(str)+1,1,fptr);
fclose(fptr);
return 0;
}
运行结果:使用HxD打开test.txt

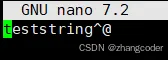
Ubuntu服务器下用nano打开:
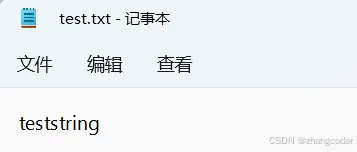
Win11的记事本打开:
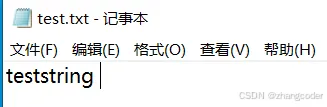
Win10的记事本打开:
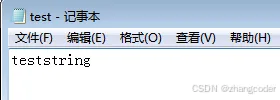
Win7的记事本打开:
WinXP的记事本打开:
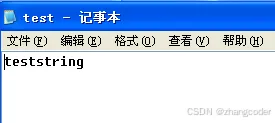
Win2003的记事本打开:
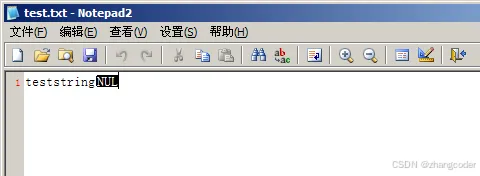
可以看到:如果文本的字符串加了\0,\0对于用户来说是不可见字符,但却被某些系统解释为了乱码,
Linux操作系统上的文件写入null(\0)以后就会乱码,而windows能正常检查到null的
因此不建议使用strlen(str)+1向文本文件写入格式化的字符串!
结论: C语言的字符串会以\0结尾,但是文件中的字符串并没有规定要以\0结尾
3.三个默认打开的流
如果C程序有stdio库,那么在运行时会默认打开3个流,它们的类型都是FILE*,则stdin、stdout和stderr都指向文件)
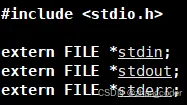
stdin指向键盘文件
stdout:指向显示器文件
stderr:指向显示器文件
示例代码
向终端写入字符可以向stdout写入,可以借助fprintf:
int fprintf(FILE *restrict stream,const char *restrict format, ...);
除了第一个参数是文件指针,其余的参数和printf相同
例如以下代码:
#include <stdio.h>
int main()
{
fprintf(stdout,"Hello World!\n");
return 0;
}
运行结果:

使用系统调用操作文件
前面讲过: 未打开的文件是放在磁盘上的,想要打开文件就要访问磁盘,而磁盘属于硬件
回顾之前在OS16.【Linux】冯依诺曼体系结构和操作系统的浅层理解[9]文章提到的图:
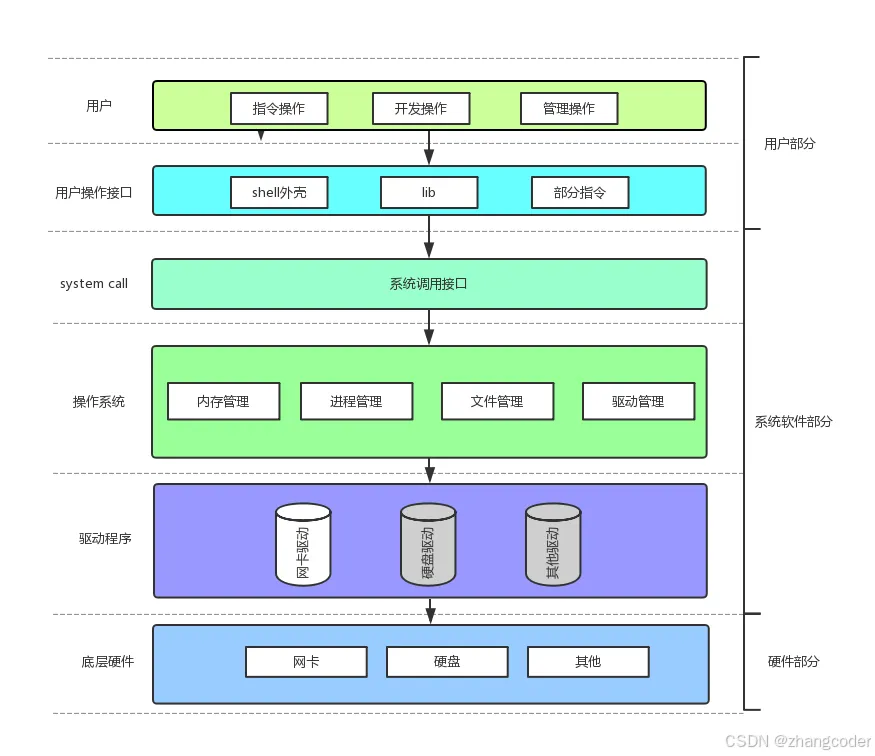
程序不能直接访问硬件 ,因为操作系统不能让用户访问硬件,防止破坏系统,那么打开文件需要系统调用的帮忙
open
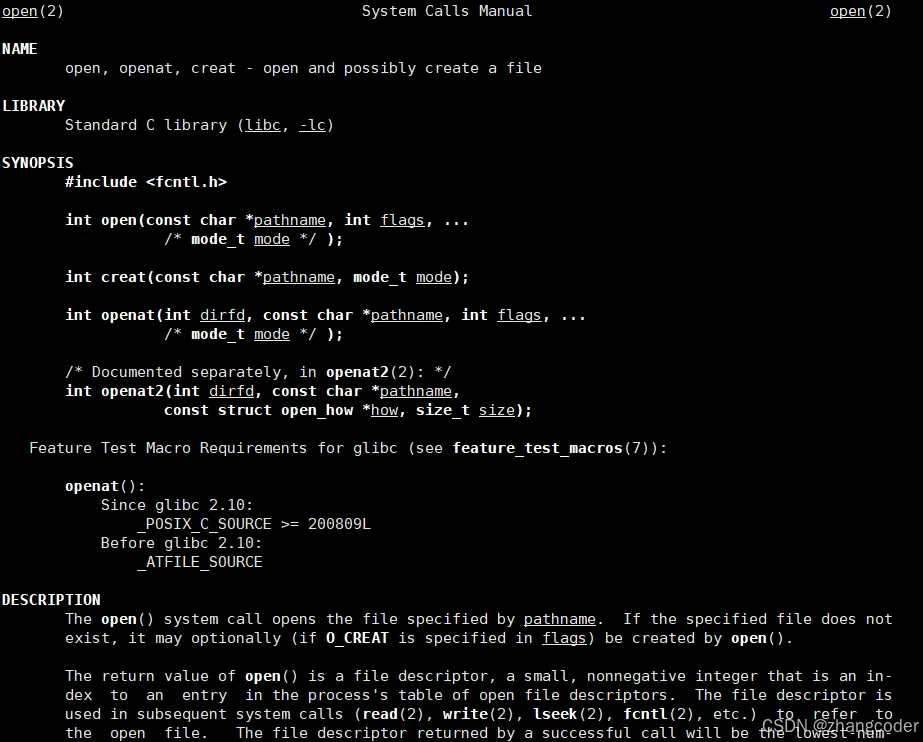
需要包含<fcntl.h>
open系统调用作用: 打开或创建文件,返回值为文件描述符(含义后面讲),如果open系统调用失败,返回-1
建议:
如果文件已经存在,建议用int open(const char *pathname, int flags);
如果要新建文件再打开,建议用int open(const char *pathname, int flags, mode_t mode);
注:
1.pathname是文件路径
2.flags可以选 O_ASYNC、O_CLOEXEC、O_CREAT、O_DIRECT、......
本文讲O_RDONLY、O_WRONLY、 O_RDWR、O_CREAT、O_TRUNC、O_APPEND用法
O_RDONLY全称Open_ReaDONLY(只读)
O_WRONLY全称Open_WriteONLY(只写)
O_RDWR全称Open_ReaDWRite(读+写)
O_CREAT全称Open_CREAT(新建文件)
上面大写的其实是宏,可以在glibc-2.4.2的bits/fcntl.h中找到
/* File access modes for `open' and `fcntl'.  */
#define  O_RDONLY  0  /* Open read-only.  */
#define  O_WRONLY  1  /* Open write-only.  */
#define  O_RDWR    2  /* Open read/write.  */


/* Bits OR'd into the second argument to open.  */
#define  O_CREAT    0x0200  /* Create file if it doesn't exist.  */
#define  O_EXCL    0x0800  /* Fail if file already exists.  */
#define  O_TRUNC    0x0400  /* Truncate file to zero length.  */
#define  O_NOCTTY  0x8000  /* Don't assign a controlling terminal.  */
#define  O_ASYNC    0x0040  /* Send SIGIO to owner when data is ready.  */
#define  O_FSYNC    0x0080  /* Synchronous writes.  */
#define  O_SYNC    O_FSYNC
#ifdef  __USE_MISC
#define  O_SHLOCK  0x0010  /* Open with shared file lock.  */
#define  O_EXLOCK  0x0020  /* Open with shared exclusive lock.  */
#endif
#ifdef __USE_XOPEN2K8
# define O_DIRECTORY  0x00200000  /* Must be a directory.   */
# define O_NOFOLLOW  0x00000100  /* Do not follow links.   */
# define O_CLOEXEC  0x00400000      /* Set close_on_exec.  */
#endif
#if defined __USE_POSIX199309 || defined __USE_UNIX98
# define O_DSYNC  0x00010000  /* Synchronize data.  */
# define O_RSYNC  0x00020000  /* Synchronize read operations.   */
#endif
宏 的组合
例如定义以下宏:
#define ONE (1)
#define TWO (2)
#define FOUR (4)
#define EIGHT (8)
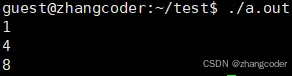
可以使用或运算符组合这些宏(比特方式传递标志位),例如以下代码:
int main()
{
int flags=ONE|FOUR|EIGHT;
if (flags&ONE)
printf("1\n");
if (flags&TWO)
printf("2\n");
if (flags&FOUR)
printf("4\n");
if (flags&EIGHT)
printf("8\n");
return 0;
}
运行结果:
原理解释
上方代码定义的宏都有一个特点,都是从1左移而来的
1==1<<0
2==1<<1
4==1<<2
8==1<<3
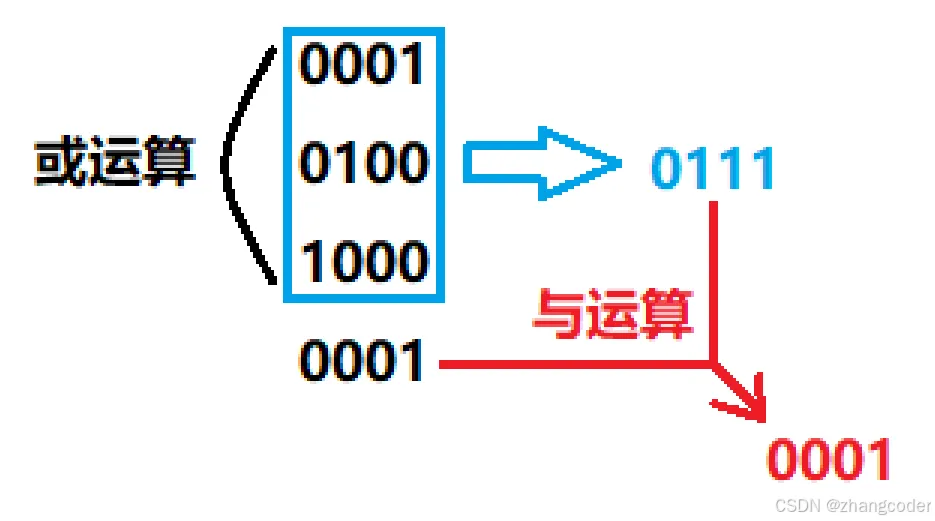
当flags=ONE|FOUR|EIGHT时,执行到if (flags&ONE)时,有:
   ONE|FOUR|EIGHT&ONE
==(1<<0)|(1<<2)|(1<<3)&(1<<0)
bits/fcntl.h也有这样使用或运算组合的定义:
/* Mask for file access modes.  This is system-dependent in case
   some system ever wants to define some other flavor of access.  */
#define  O_ACCMODE  (O_RDONLY|O_WRONLY|O_RDWR)//组合了3个功能
注:宏必须是2的次方才可以使用位运算组合宏,bits/fcntl.h中的flags宏也是这样定义的,不是2的次方的情况可以自行验证
使用方法
例如以只读形式打开:
int fd=open("test.txt",O_RDONLY);
if (fd==-1)
{
perror("open failed");
return -1;
}
例如以读+写的形式打开:
既可以用或运算组合功能:
int fd=open("test.txt",O_RDONLY|O_WRONLY);
if (fd==-1)
{
perror("open failed");
return -1;
}
也可以直接使用单个宏:
int fd=open("test.txt",O_RDWR);
if (fd==-1)
{
perror("open failed");
return -1;
}
例如创建文件:
int fd=open("test.txt",O_CREAT);
if (fd==-1)
{
perror("open failed");
return -1;
}
使用上面的方法在某些情况下会出问题,文件权限有问题:

这就要谈谈mode的作用了
第3个参数mode
mode_t的类型解释
mode的类型是mode_t,后者是被重定义的,真正的类型见下方在glibc-2.42中的查找过程:
在posix/bits/types.h中:
#ifndef __mode_t_defined
typedef __mode_t mode_t;
# define __mode_t_defined
#endif
在posix/bits/types.h中:
__STD_TYPE __MODE_T_TYPE __mode_t; /* Type of file attribute bitmasks. */
在bits/types.h中:
#define __MODE_T_TYPE __U32_TYPE
在posix/bits/types.h中:
#define __U32_TYPE unsigned int
结论:mode_t是无符号整型
使用
新建文件必须告知权限,要写open系统调用的第3个参数mode,如果不临时设置umask,第3个参数mode会和mask进行位运算得到文件真正的权限(位运算具体方法参见OS9.【Linux】基本权限(下)[10]文章)
#include <stdio.h>
#include <fcntl.h>
int main()
{
int fd=open("test.txt",O_CREAT,0666);
if (fd==-1)
    {
perror("open failed");
return -1;
    }
return 0;
}
运行结果:新建的文本文件的权限仍然不正确,不是-rw-rw-rw-

两种解决方法:
方法1:使用系统调用临时设置umask+0666
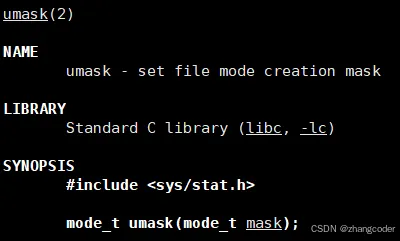
umask系统调用返回曾经的umask值
让实际的文件权限变成666:
#include <stdio.h>
#include <fcntl.h>
#include <sys/stat.h>
int main()
{
umask(0);
int fd=open("test.txt",O_CREAT,0666);//必须是八进制,有前导0!
if (fd==-1)
    {
perror("open failed");
return -1;
    }
return 0;
}
注:根据就近原则,代码中设置了umask(0),那么不考虑系统的umask值,而且umask(0)不影响系统的umask值,可以看看手册中的具体描述:
umask() sets the calling process's file mode creation mask (umask) to mask & 0777 (i.e., only the file permission bits of mask are used), and returns the previous value of the mask.
运行结果:

方法2:使用系统调用临时设置umask+S开头的宏
当然也可以用其他方法,参见https://linuxvox.com/blog/linux-open-system-call/[11]网站的摘抄:
mode: This parameter is only used when theO_CREATflag is specified. It specifies the permissions to be set for the newly created file. The permissions are specified using a combination of the following constants:S_IRUSR(read permission for the owner),S_IWUSR(write permission for the owner),S_IXUSR(execute permission for the owner),S_IRGRP(read permission for the group),S_IWGRP(write permission for the group),S_IXGRP(execute permission for the group),S_IROTH(read permission for others),S_IWOTH(write permission for others), andS_IXOTH(execute permission for others).
解释:mode模式仅当指定O_CREAT才使用,mode是设置新建文件的权限的,具体可以见S开头
POSIX标准(见https://pubs.opengroup.org/onlinepubs/9799919799/basedefs/sys\_stat.h.html[12])给了一张表:
宏开头的S指Symbolic,即adj.符号的
那么要创建rw-rw-rw-的文件可以用或运算组合宏:
#define S_FILE S_IRUSR | S_IWUSR | S_IRGRP | S_IWGRP | S_IROTH | S_IWOTH
#include <stdio.h>
#include <fcntl.h>
#include <sys/stat.h>
int main()
{
umask(0);
int fd=open("test.txt",O_CREAT,S_FILE);
if (fd==-1)
    {
perror("open failed");
return -1;
    }
return 0;
}
注意: S_FILE仍然要和umask做位运算得到真正的文件权限
close
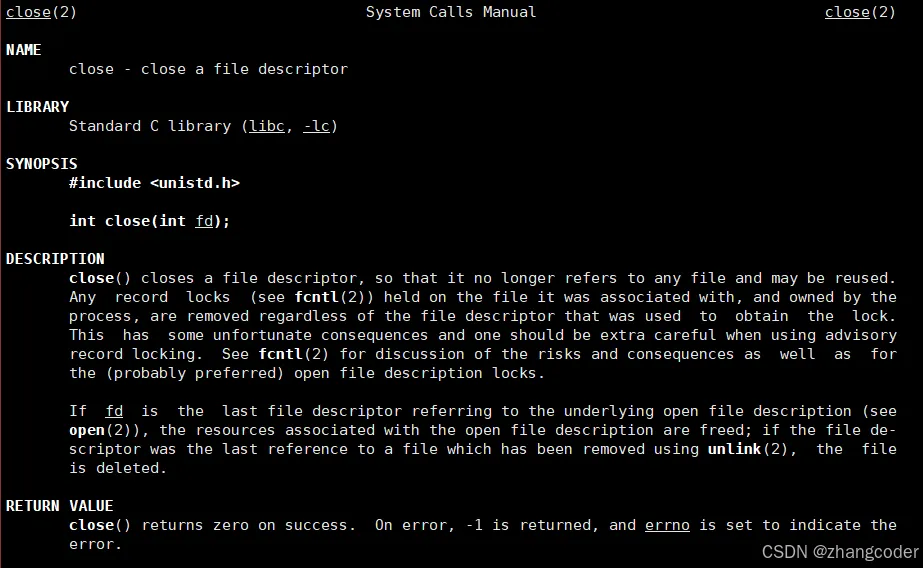
close系统调用作用: 依照文件描述符关闭指定文件
注意检查返回值是否为-1
write
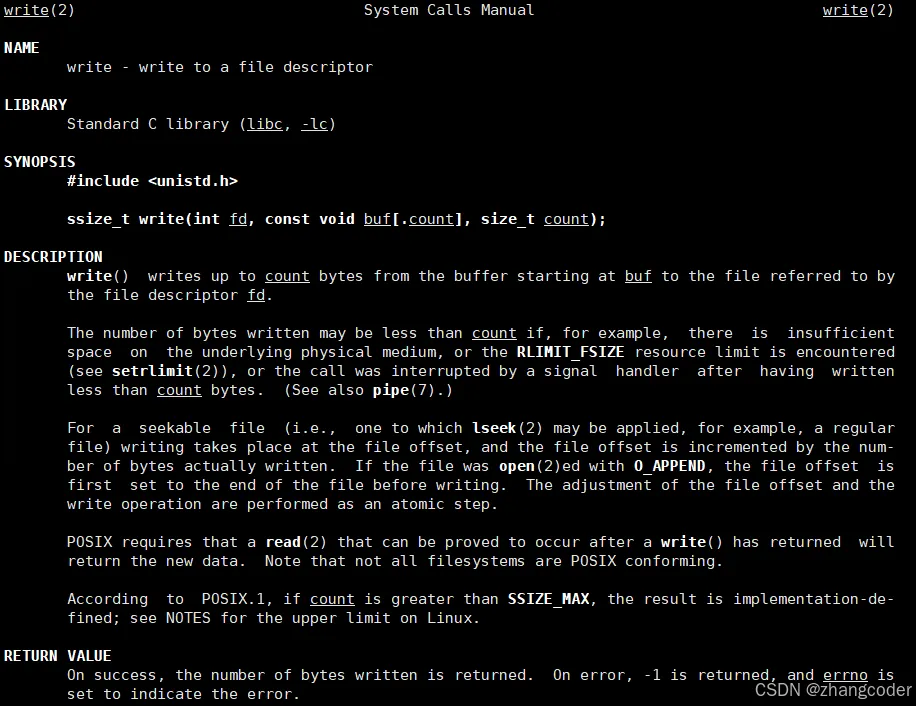
需要包含<unistd.h>
write系统调用作用: 向一个文件描述符写入,即写入文件时需要依靠文件描述符
ssize_t write(int fd, const void buf[.count], size_t count);
第一个参数是文件描述符,第二个参数是从buf数组,要从此处取数据,第三个参数是要写入的字节数,返回值是ssize_t
ssize_t类型的解释
glibc-2.42库中有定义:
在posix/sys/type.h中:
#ifndef __ssize_t_definedtypedef __ssize_t ssize_t;#define __ssize_t_defined#endif
在sysdeps/generic/_G_config.h中:
#define _G_ssize_t ssize_t
在bits/types.h中:
__STD_TYPE __SSIZE_T_TYPE __ssize_t;
在bits/typesizes.h中:
#define __SSIZE_T_TYPE __SWORD_TYPE
在posix/bits/type.h中:
#if __WORDSIZE == 32
# define __SQUAD_TYPE    __int64_t
# define __UQUAD_TYPE    __uint64_t
# define __SWORD_TYPE    int
# define __UWORD_TYPE    unsigned int
# define __SLONG32_TYPE    long int
# define __ULONG32_TYPE    unsigned long int
# define __S64_TYPE    __int64_t
# define __U64_TYPE    __uint64_t
/* We want __extension__ before typedef's that use nonstandard base types
   such as `long long' in C89 mode.  */
# define __STD_TYPE    __extension__ typedef
#elif __WORDSIZE == 64
# define __SQUAD_TYPE    long int
# define __UQUAD_TYPE    unsigned long int
# define __SWORD_TYPE    long int
# define __UWORD_TYPE    unsigned long int
# define __SLONG32_TYPE    int
# define __ULONG32_TYPE    unsigned int
# define __S64_TYPE    long int
# define __U64_TYPE    unsigned long int
/* No need to mark the typedef with __extension__.   */
# define __STD_TYPE    typedef
#else
# error
#endif
看到__SWORD_TYPE有两种定义方式:
# define __SWORD_TYPE    int  //#if __WORDSIZE == 32
# define __SWORD_TYPE    long int //#elif __WORDSIZE == 64
结论:ssize_t的大小和系统架构有关,可以是int,也可以是long int
使用
open返回文件描述符,可以传入write
#include <stdio.h>
#include <fcntl.h>
#include <sys/stat.h>
#include <string.h>
#include <unistd.h>
int main()
{
umask(0);
int fd=open("test.txt",O_CREAT|O_WRONLY,0666);//必须是八进制,有前导0!
if (fd==-1)
    {
perror("open failed");
return -1;
    }
const char arr[]="teststring\n";
if (write(fd,arr,strlen(arr))==-1)//不用写成strlen(arr)+1
    {
perror("write failed");
return -1;
    }
if (close(fd)==-1)
    {
perror("close failed");
return -1;
    }
return 0;
}
注:O_WRONLY是必须要加的,否则进程对test.txt没有写权限
运行结果:

write默认从文件起始位置写入
将上方代码的const char arr[]="teststring\n",改成const char arr[]="abcd"后执行:
可以看到前4个字符被替换了,证明write本身默认从文件起始位置写入,不会先清空文件后写入(open第二个参数没有添加其他的功能)

截断写入
修改上方代码: int fd=open("test.txt",O_CREAT|O_WRONLY|O_TRUNC,0666),const char arr[]="a\n"后执行:
可以看到原来的字符串消失了:
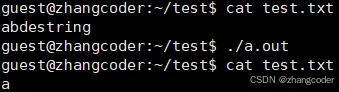
O_TRUNC的功能:打开文件时会清空文件(也称截断文件)

追加写入
修改上方代码: int fd=open("test.txt",O_CREAT|O_WRONLY|O_APPEND,0666),const char arr[]="bc\n"后执行:
可以看到在原文件的基础上追加写入了新字符串:
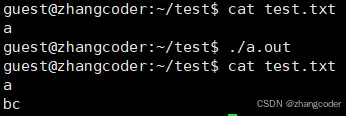
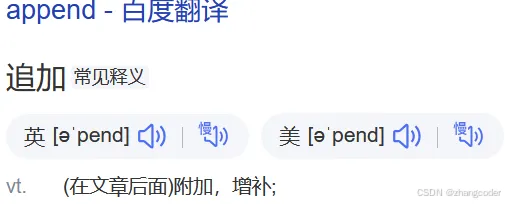
O_APPEND的功能:追加写入打开的文件
4.回顾C语言fopen的第二个参数
FILE * fopen ( const char * filename, const char * mode );
可以推出Linux下的fopen函数的内部一定使用了open系统调用
mode和宏的对应
从glibc-2.42库来看:
在include/stdio.h中:
#if IS_IN (libc)
extern FILE *_IO_new_fopen (const char*, const char*);
#define fopen(fname, mode) _IO_new_fopen (fname, mode)
在libio/iofopen.c中:
FILE* _IO_new_fopen (const char *filename, const char *mode)
{
return __fopen_internal(filename, mode, 1);
}
在libio/iofopen.c中,__fopen_internal函数并没有显式使用open系统调用:
FILE *__fopen_internal (const char *filename, const char *mode, int is32){ struct locked_FILE { struct _IO_FILE_plus fp;#ifdef _IO_MTSAFE_IO _IO_lock_t lock;#endif struct _IO_wide_data wd; } *new_f = (struct locked_FILE *) malloc (sizeof (struct locked_FILE)); if (new_f == NULL) return NULL;#ifdef _IO_MTSAFE_IO new_f->fp.file._lock = &new_f->lock;#endif _IO_no_init (&new_f->fp.file, 0, 0, &new_f->wd, &_IO_wfile_jumps); _IO_JUMPS (&new_f->fp) = &_IO_file_jumps; _IO_new_file_init_internal (&new_f->fp); if (_IO_file_fopen ((FILE *) new_f, filename, mode, is32) != NULL) return __fopen_maybe_mmap (&new_f->fp.file); _IO_un_link (&new_f->fp); free (new_f); return NULL;}
在libio/fileops中,只看_IO_new_file_fopen内主要部分:
FILE *
__fopen_internal (const char *filename, const char *mode, int is32)
{
struct locked_FILE
  {
struct _IO_FILE_plus fp;
#ifdef _IO_MTSAFE_IO
    _IO_lock_t lock;
#endif
struct _IO_wide_data wd;
  } *new_f = (struct locked_FILE *) malloc (sizeof (struct locked_FILE));

if (new_f == NULL)
return NULL;
#ifdef _IO_MTSAFE_IO
  new_f->fp.file._lock = &new_f->lock;
#endif
  _IO_no_init (&new_f->fp.file, 0, 0, &new_f->wd, &_IO_wfile_jumps);
  _IO_JUMPS (&new_f->fp) = &_IO_file_jumps;
  _IO_new_file_init_internal (&new_f->fp);
if (_IO_file_fopen ((FILE *) new_f, filename, mode, is32) != NULL)
return __fopen_maybe_mmap (&new_f->fp.file);

  _IO_un_link (&new_f->fp);
free (new_f);
return NULL;
}
mode见下表:
C string containing a file access mode. It can be:
| read: | |
| write: | |
| append: | |
| read/update: | |
| write/update: | |
| append/update: |
从_IO_new_file_fopen得知:
"r"对应O_RDONLY
"w"对应O_CREAT|O_TRUNC|O_WRONLY
"a"对应O_CREAT|O_APPEND|O_WRONLY
"r+"对应O_RDWR
"w+"对应O_RDWR
"a+"对应O_RDWR
结论:各种语言的打开或者和关闭等文件操作函数在Linux系统下封装了open/close等系统调用
原文首发于CSDN,点击阅读全文即可查看
参考资料
OS2.【Linux】基本指令入门(1): https://zhangcoder.blog.csdn.net/article/details/145089888?spm=1011.2415.3001.5331
[2]74.【C语言】文件操作(1): https://zhangcoder.blog.csdn.net/article/details/142746319?spm=1011.2415.3001.5331
[3]75.【C语言】文件操作(2): https://zhangcoder.blog.csdn.net/article/details/142786554?spm=1011.2415.3001.5331
[4]77.【C语言】文件操作(3): https://zhangcoder.blog.csdn.net/article/details/142789521?spm=1011.2415.3001.5331
[5]79.【C语言】文件操作(4): https://zhangcoder.blog.csdn.net/article/details/142822612?spm=1011.2415.3001.5331
[6]88.【C语言】文件操作(5): https://zhangcoder.blog.csdn.net/article/details/143115844?spm=1011.2415.3001.5331
[7]89.【C语言】文件操作(6): https://zhangcoder.blog.csdn.net/article/details/143143880?spm=1011.2415.3001.5331
[8]OS3.【Linux】基本指令入门(2): https://zhangcoder.blog.csdn.net/article/details/145284197
[9]OS16.【Linux】冯依诺曼体系结构和操作系统的浅层理解: https://zhangcoder.blog.csdn.net/article/details/149256492?spm=1011.2415.3001.5331
[10]OS9.【Linux】基本权限(下): https://zhangcoder.blog.csdn.net/article/details/148295741?spm=1011.2415.3001.5331
[11]https://linuxvox.com/blog/linux-open-system-call/: https://linuxvox.com/blog/linux-open-system-call/
[12]https://pubs.opengroup.org/onlinepubs/9799919799/basedefs/sys_stat.h.html: https://pubs.opengroup.org/onlinepubs/9799919799/basedefs/sys_stat.h.html
随机文章
-
 10个月宝宝每天需要喝多少奶粉?
- Ruff 0.16:Python 工具链从“快”走向“默认更严格”
- 带了一个不会python的新人,真的受不了
- 【Python爬虫练手】超有趣爬虫练手项目合集
- 【Python】Django 电子设备商城系统(源码+说明文档)
- 少儿编程Python: 娃学编程卡壳循环查找?吃透 in、not in 轻松通关
- Python教程(36)列表是百宝箱,什么都能装 —— 一个人的信息卡
- Python 线性代数 01:向量、矩阵与 NumPy 数组
- Python教程 Episode 23 - AI Agent开发入门
- 《Python 从入门到精通》126|事务是什么:数据为什么需要“要么都成功,要么都失败”
- Kafka/消息队列的 Linux 内核依赖:页缓存、磁盘顺序写、零拷贝与网络模型