一、安装 ANTsPy
首先你需要在电脑上安装 Anaconda,生成一个新的环境,方便不同 Python 包的版本管理:
conda create -n antspy python=3.10pip install antspyxpython -m ipykernel install --user --name=ANTsPy
激活该环境:
安装 ANTsPy:
安装一些可能需要用到的包:
pip install ipykernelpip install jupyterpython -m ipykernel install --user --name=ANTsPy
二、实例代码
import antsimport numpy as npfrom scipy.ndimage import zoom# read images as ants classimg_CT = ants.image_read('CT_demo.tif')img_T1 = ants.image_read('T1_demo.tif')# convert ants class to numpy for further manipulation img_CT = img_CT.numpy()img_CT = zoom(img_CT, (0.5, 0.5, 1))# convert numpy array to ants class for registrationimg_CT = ants.from_numpy(img_CT)# do ANTs registrationmytx = ants.registration(fixed=img_CT , moving=img_T1, type_of_transform='SyNRA' )# get warped image and save itimg_T1_warped = mytx['warpedmovout']ants.image_write(img_T1_warped, 'T1_warped.tif')
三、关键代码分析
(1)读取图像
# read images as ants classimg_CT = ants.image_read('CT_demo.tif')img_T1 = ants.image_read('T1_demo.tif')
利用 ants.image_read 读入的图像属于 ANTsImage 类,如果直接 print 可以看到相关的图像信息:
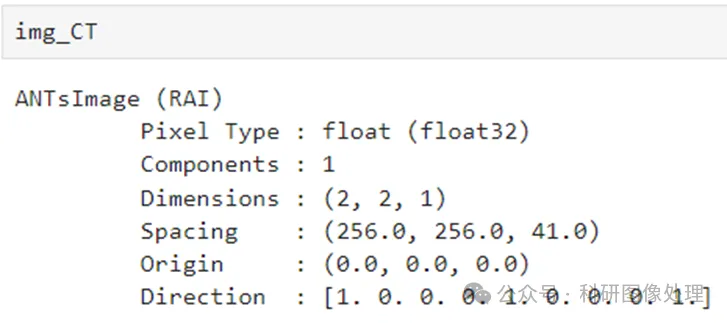
(2)ants class 和 numpy array 之间相互转换
# convert ants class to numpy for further manipulation img_CT = img_CT.numpy()img_CT = zoom(img_CT, (0.5, 0.5, 1))# convert numpy array to ants class for registrationimg_CT = ants.from_numpy(img_CT)
读入的图像属于 ANTsImage 类,如果需要更灵活的操作,可以将这个类转为 Numpy
array,进行各种 Array 操作和变换。
这里是将图像的X和Y方向缩小到原来的一半,然后再把 Numpy array 转为 ANTsImage 类。
ANTs Registration的输入需要是ANTsImage类。
(3)Ants
registration
# do ANTs registrationmytx = ants.registration(fixed=img_CT , moving=img_T1, type_of_transform='SyNRA' )
这里需要注意 type_of_transform 需要根据自身图像来做选择。
ANTs 中可以选择各种各样的变换类型,其中一部分:
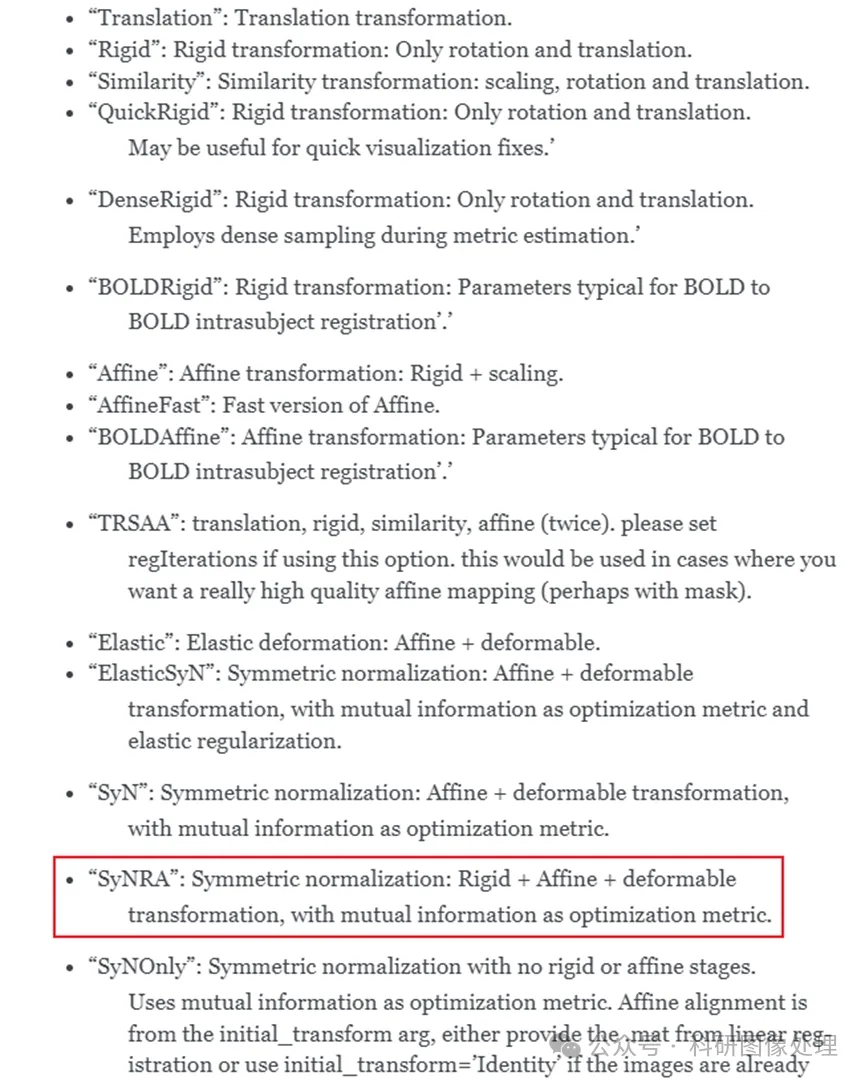
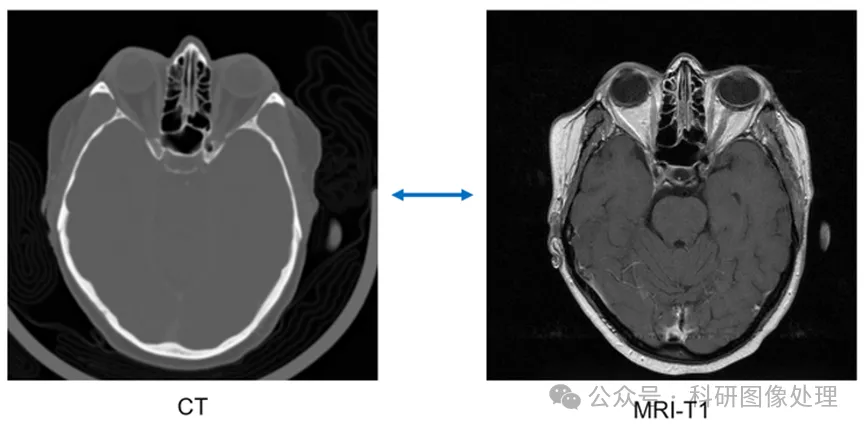
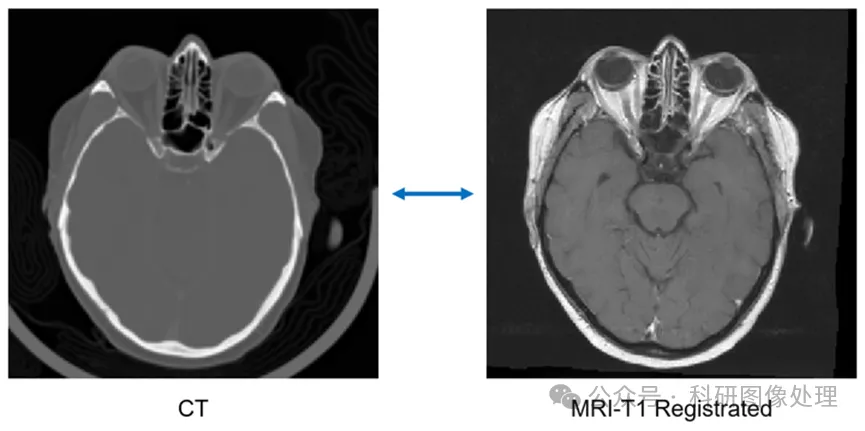
因为 Demo 的两个模态的数据存在位移,所以这里选择 'SyNRA' 的变换类型,即:Rigid+Affine+Nonlinear.
(4)变换后图像保存
# get warped image and save itimg_T1_warped = mytx['warpedmovout']ants.image_write(img_T1_warped, 'T1_warped.tif')
mytx 这个变量包含了:
'warpedmovout',变换后moving图像
'warpedfixout',反变换的fixed图像
'fwdtransforms',变换矩阵的保存路径
'invtransforms',反变换矩阵的保存路径
这里需要注意变换矩阵通常会默认保存在 'C:\\Users\\ADMINI~1\\AppData\\Local\\Temp\\'


 10个月宝宝每天需要喝多少奶粉?