在日常的Python开发中,我们经常需要让程序在特定时间执行某些任务:每天早上8点发送邮件提醒、每隔30分钟检查服务器状态、每周清理一次临时文件等等。虽然Windows有任务计划程序,Linux有cron,但作为Python开发者,我们更希望用纯Python的方式来解决这个问题。
schedule库就是为此而生的轻量级定时任务解决方案。它语法简洁、易于理解,特别适合Python初学者和中小型项目使用。本文将带你从零开始掌握schedule库,让你的Python程序拥有"时间感知"的能力。
📋 问题分析
🤔 为什么需要定时任务?
在实际的Python开发中,我们经常遇到这样的场景:
💭 传统解决方案的痛点
Windows任务计划程序:
time.sleep()循环:
import timewhileTrue:# 执行任务 do_something() time.sleep(3600) # 休眠1小时
💡 解决方案:schedule库
🚀 安装与基本使用
安装命令:
pip install schedule
基本语法结构:
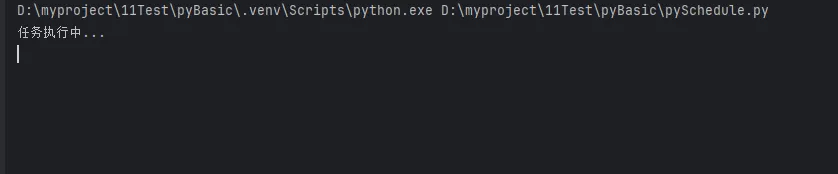
import scheduledefjob():print("任务执行中...")# 设置定时任务schedule.every(10).seconds.do(job)schedule.every().hour.do(job)schedule.every().day.at("09:00").do(job)# 保持程序运行whileTrue: schedule.run_pending() time.sleep(1)
🔥 三个实战案例
📝 代码实战
🕐 案例一:系统监控助手
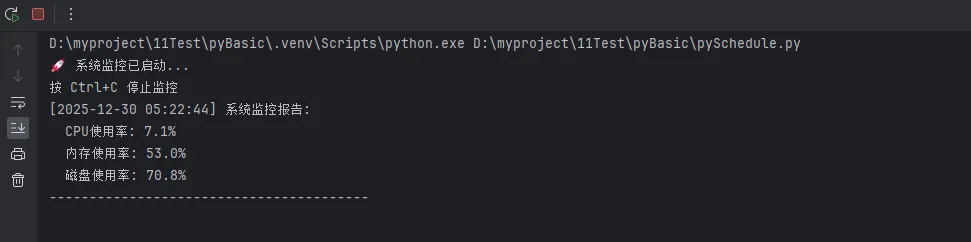
这个例子展示如何定期监控系统资源使用情况:
import scheduleimport timeimport psutilfrom datetime import datetimedefsystem_monitor():"""系统资源监控函数""" now = datetime.now().strftime("%Y-%m-%d %H:%M:%S")# 获取CPU和内存使用率 cpu_percent = psutil.cpu_percent(interval=1) memory = psutil.virtual_memory() memory_percent = memory.percent# 获取磁盘使用情况 disk = psutil.disk_usage('C:/') disk_percent = (disk.used / disk.total) * 100print(f"[{now}] 系统监控报告:")print(f" CPU使用率: {cpu_percent}%")print(f" 内存使用率: {memory_percent}%")print(f" 磁盘使用率: {disk_percent:.1f}%")# 预警机制if cpu_percent > 80:print("⚠️ 警告:CPU使用率过高!")if memory_percent > 80:print("⚠️ 警告:内存使用率过高!")if disk_percent > 90:print("⚠️ 警告:磁盘空间不足!")print("-" * 40)defsetup_monitoring():"""设置监控任务"""# 每30秒检查一次系统状态 schedule.every(30).seconds.do(system_monitor)print("🚀 系统监控已启动...")print("按 Ctrl+C 停止监控")try:whileTrue: schedule.run_pending() time.sleep(1)except KeyboardInterrupt:print("\n📴 系统监控已停止")if __name__ == "__main__": setup_monitoring()
实用技巧:
- • 使用
psutil库获取系统信息,需要先安装:pip install psutil
📊 案例二:数据采集器
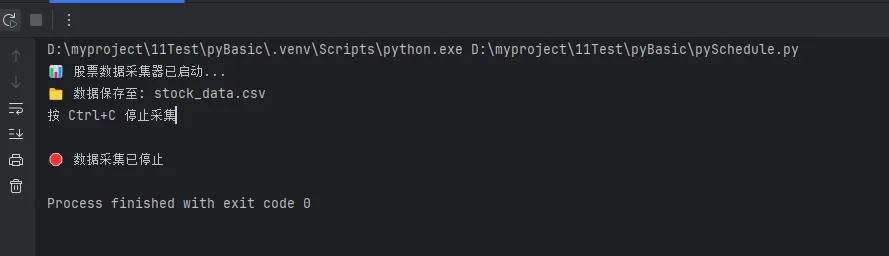
这个例子展示如何定期采集股票价格数据:
import scheduleimport timeimport requestsfrom datetime import datetimeimport csvimport osclassStockDataCollector:def__init__(self, symbols):self.symbols = symbolsself.data_file = "stock_data.csv"self.init_csv_file()definit_csv_file(self):"""初始化CSV文件"""ifnot os.path.exists(self.data_file):withopen(self.data_file, 'w', newline='', encoding='utf-8') as file: writer = csv.writer(file) writer.writerow(['时间', '股票代码', '当前价格', '涨跌幅'])defget_stock_price(self, symbol):"""获取股票价格(模拟数据)"""# 这里使用模拟数据,实际项目中可以调用真实的股票APIimport random base_price = {"AAPL": 150, "GOOGL": 2800, "MSFT": 300} current_price = base_price.get(symbol, 100) * (1 + random.uniform(-0.05, 0.05)) change_percent = random.uniform(-5, 5)return current_price, change_percentdefcollect_data(self):"""采集股票数据""" timestamp = datetime.now().strftime("%Y-%m-%d %H:%M:%S")print(f"📈 [{timestamp}] 开始采集股票数据...")for symbol inself.symbols:try: price, change = self.get_stock_price(symbol)# 保存数据到CSVwithopen(self.data_file, 'a', newline='', encoding='utf-8') as file: writer = csv.writer(file) writer.writerow([timestamp, symbol, f"{price:.2f}", f"{change:.2f}%"])print(f" {symbol}: ${price:.2f} ({change:+.2f}%)")except Exception as e:print(f"❌ 采集 {symbol} 数据失败: {e}")print("✅ 数据采集完成\n")defstart_collecting(self):"""启动数据采集"""# 工作日每5分钟采集一次(9:30-15:30) schedule.every(5).minutes.do(self.collect_data)# 可以添加更复杂的时间规则# schedule.every().monday.at("09:30").do(self.collect_data)print("📊 股票数据采集器已启动...")print(f"📁 数据保存至: {self.data_file}")print("按 Ctrl+C 停止采集")try:whileTrue: schedule.run_pending() time.sleep(1)except KeyboardInterrupt:print("\n🛑 数据采集已停止")if __name__ == "__main__":# 要监控的股票代码 stocks = ["AAPL", "GOOGL", "MSFT"] collector = StockDataCollector(stocks) collector.start_collecting()
核心特点:
🧹 案例三:文件清理管家
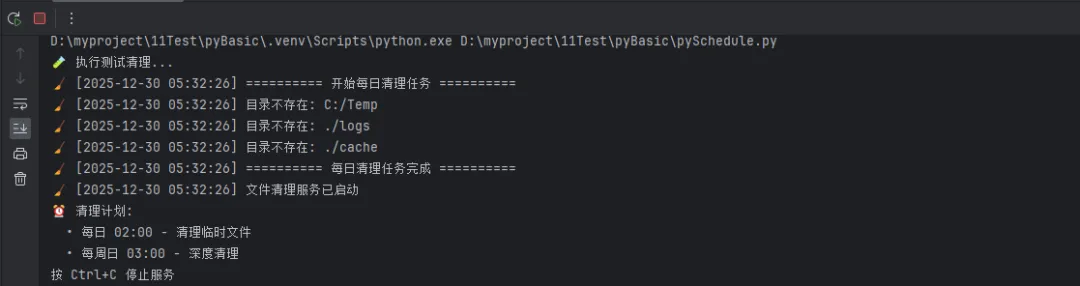
这个例子展示如何定期清理临时文件和日志文件:
import scheduleimport timeimport osimport shutilfrom datetime import datetime, timedeltafrom pathlib import PathclassFileCleanupManager:def__init__(self, config):self.config = configself.log_file = "cleanup_log.txt"deflog_message(self, message):"""记录日志""" timestamp = datetime.now().strftime("%Y-%m-%d %H:%M:%S") log_entry = f"[{timestamp}] {message}\n"withopen(self.log_file, 'a', encoding='utf-8') as f: f.write(log_entry)print(f"🧹 {log_entry.strip()}")defclean_old_files(self, directory, days_old, file_pattern="*"):"""清理指定天数前的文件""" cleanup_count = 0 total_size = 0 cutoff_date = datetime.now() - timedelta(days=days_old)try: directory_path = Path(directory)ifnot directory_path.exists():self.log_message(f"目录不存在: {directory}")returnfor file_path in directory_path.glob(file_pattern):if file_path.is_file():# 检查文件修改时间 file_time = datetime.fromtimestamp(file_path.stat().st_mtime)if file_time < cutoff_date:try: file_size = file_path.stat().st_size file_path.unlink() # 删除文件 cleanup_count += 1 total_size += file_sizeexcept Exception as e:self.log_message(f"删除文件失败 {file_path}: {e}")if cleanup_count > 0: size_mb = total_size / (1024 * 1024)self.log_message(f"清理完成 - {directory}: 删除 {cleanup_count} 个文件,释放 {size_mb:.2f} MB")else:self.log_message(f"无需清理 - {directory}: 没有找到过期文件")except Exception as e:self.log_message(f"清理目录失败 {directory}: {e}")defclean_empty_directories(self, directory):"""清理空目录"""try: directory_path = Path(directory) removed_count = 0# 从最深层开始检查for dir_path insorted(directory_path.rglob('*'), key=lambda p: len(p.parts), reverse=True):if dir_path.is_dir() and dir_path != directory_path:try:ifnotany(dir_path.iterdir()): # 检查目录是否为空 dir_path.rmdir() removed_count += 1except Exception:pass# 目录不为空或删除失败,继续下一个if removed_count > 0:self.log_message(f"删除空目录: {removed_count} 个")except Exception as e:self.log_message(f"清理空目录失败: {e}")defdaily_cleanup(self):"""每日清理任务"""self.log_message("========== 开始每日清理任务 ==========")for task inself.config['daily_tasks']:self.clean_old_files( directory=task['directory'], days_old=task['days_old'], file_pattern=task.get('pattern', '*') )self.log_message("========== 每日清理任务完成 ==========\n")defweekly_cleanup(self):"""每周清理任务"""self.log_message("========== 开始每周清理任务 ==========")# 执行每日清理self.daily_cleanup()# 清理空目录for task inself.config['daily_tasks']:self.clean_empty_directories(task['directory'])# 清理自己的日志文件(保留30天)self.clean_old_files(".", 30, "cleanup_log*.txt")self.log_message("========== 每周清理任务完成 ==========\n")defstart_cleanup_service(self):"""启动清理服务"""# 每天凌晨2点执行清理 schedule.every().day.at("02:00").do(self.daily_cleanup)# 每周日凌晨3点执行深度清理 schedule.every().sunday.at("03:00").do(self.weekly_cleanup)self.log_message("文件清理服务已启动")print("⏰ 清理计划:")print(" • 每日 02:00 - 清理临时文件")print(" • 每周日 03:00 - 深度清理")print("按 Ctrl+C 停止服务")try:whileTrue: schedule.run_pending() time.sleep(60) # 每分钟检查一次except KeyboardInterrupt:self.log_message("文件清理服务已停止")print("\n🛑 清理服务已停止")if __name__ == "__main__":# 清理配置 cleanup_config = {'daily_tasks': [ {'directory': 'C:/Temp','days_old': 7,'pattern': '*' }, {'directory': './logs','days_old': 30,'pattern': '*.log' }, {'directory': './cache','days_old': 3,'pattern': '*.tmp' } ] }# 启动清理管家 cleaner = FileCleanupManager(cleanup_config)# 可以立即执行一次测试print("🧪 执行测试清理...") cleaner.daily_cleanup()# 启动定时服务 cleaner.start_cleanup_service()
高级特性:
🎯 核心要点总结
通过本文的学习,你已经掌握了schedule库的核心用法和实战技巧。让我们回顾三个关键点:
1. 语法简洁直观:schedule库采用链式调用的方式,schedule.every(10).seconds.do(job)这样的语法几乎就是自然语言的表达,极大降低了学习成本,特别适合Python初学者快速上手。
2. 功能强大实用:从简单的定时执行到复杂的系统监控、数据采集、文件管理,schedule库都能胜任。配合Python的丰富生态,可以构建出功能完整的自动化解决方案,这正是Python开发的魅力所在。
3. 扩展性优秀:通过面向对象设计、异常处理、多线程等编程技巧,可以将schedule库打造成企业级的任务调度系统。在上位机开发等工业应用中,这种可靠性和扩展性尤为重要。
掌握了schedule库,你的Python程序将拥有"时间感知"的能力,无论是日常开发还是工业自动化项目,都能游刃有余。继续探索Python的更多可能性,让编程成为你解决实际问题的得力助手!