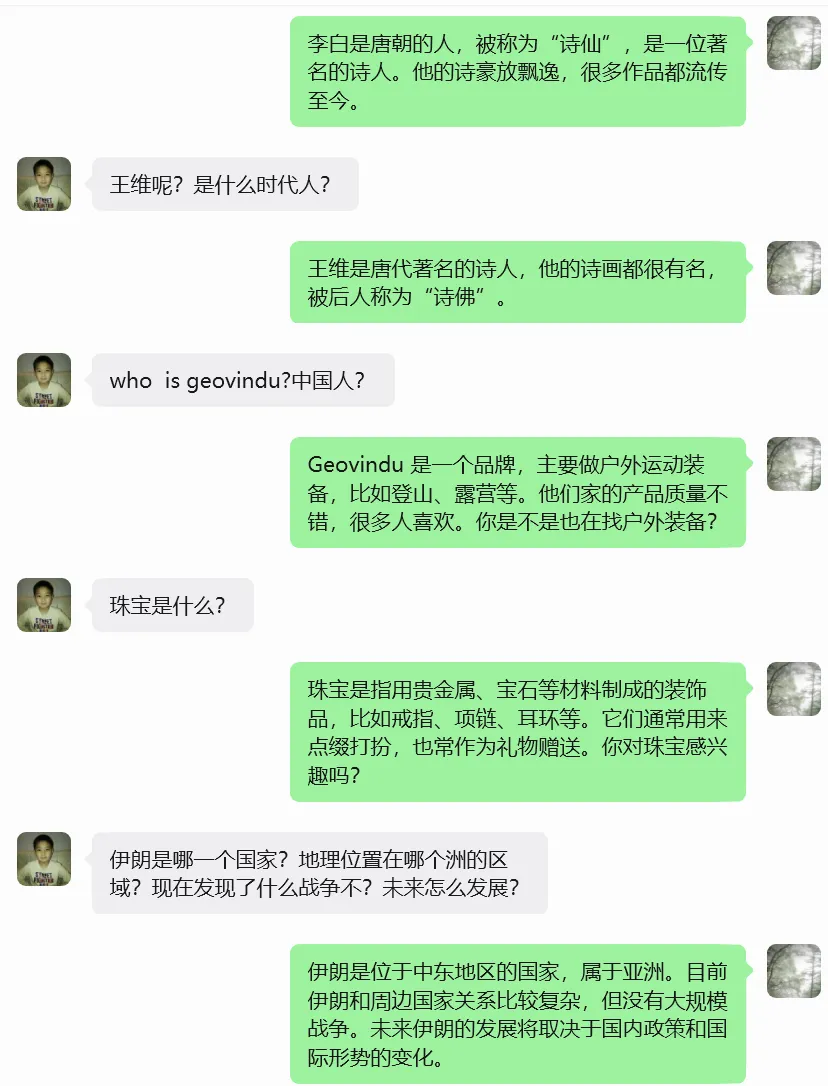
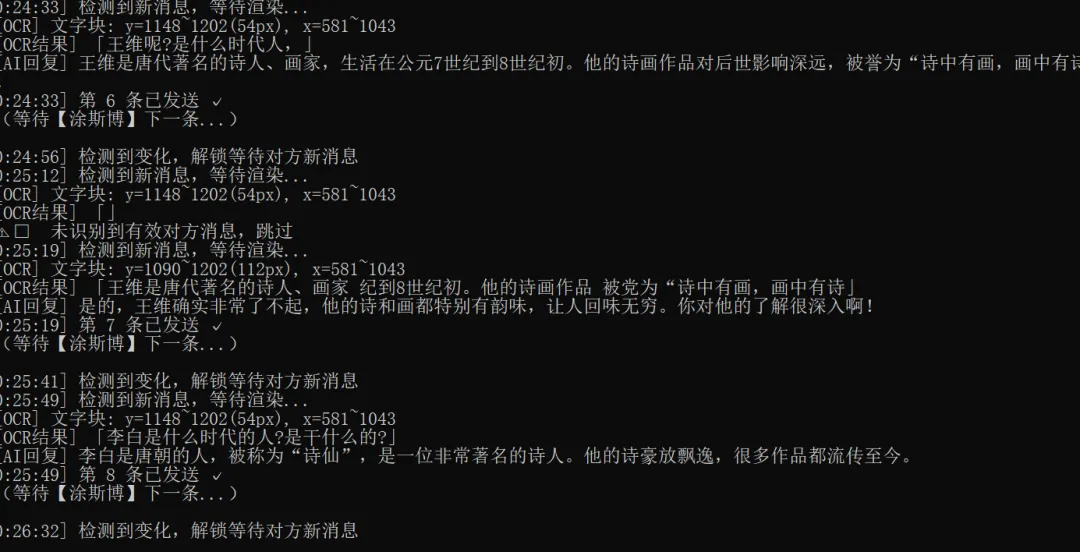
# -*- coding: utf-8 -*-"""微信智能自动回复 v23========================================核心改进(相对v22): 1. 截图改用 PrintWindow(PW_RENDERFULLCONTENT) → 解决微信4.x GPU渲染导致 BitBlt 截图为空白的问题 2. 通过白色气泡背景定位对方消息(左侧x=0.20~0.52) → 不再依赖头像检测(之前找到的是错误位置) 3. 只截最新一条气泡(找白色气泡块的底部,往上找到顶部) 4. 发消息前先还原窗口,发完保持前台关键参数(已调试确认): 聊天区:y=[5%, 78%]*h 对方气泡:x=[0.20, 0.52]*w(白色背景,R>245) 最新气泡:从底部往上找连续白色行,断4行停止========================================"""import sys, re, time, hashlib, ctypes, ctypes.wintypessys.stdout.reconfigure(encoding="utf-8")import pyperclipimport win32gui, win32con, win32ui, win32apiimport numpy as npfrom PIL import Image, ImageEnhanceimport pytesseractfrom http import HTTPStatusimport dashscopefrom dashscope import Generationpytesseract.pytesseract.tesseract_cmd = r'C:\Program Files\Tesseract-OCR\tesseract.exe'ctypes.windll.shcore.SetProcessDpiAwareness(2)# ===== ⚙️ 配置 =====TARGET_NAME = "涂斯博"QWEN_API_KEY = "88888888"CHECK_INTERVAL = 4SYSTEM_PROMPT = ( "你是一个聊天助手,正在代替主人回复微信消息。" "请根据对方发来的消息,用自然友好简短的中文回复,1~3句即可,不要说自己是AI。")# ====================dashscope.api_key = QWEN_API_KEY# ───────────────────────────────# AI 回复# ───────────────────────────────def ask_qwen(user_message: str) -> str: try: response = Generation.call( model='qwen-turbo', messages=[ {"role": "system", "content": SYSTEM_PROMPT}, {"role": "user", "content": user_message}, ], result_format='message', max_tokens=200, ) if response.status_code == HTTPStatus.OK: reply = response.output.choices[0].message.content.strip() print(f" [AI回复] {reply}") return reply print(f" [AI错误] {response.code}: {response.message}") return "收到,稍后回复你。" except Exception as e: print(f" [AI异常] {e}") return "收到,稍后回复你。"# ───────────────────────────────# 窗口工具# ───────────────────────────────def get_hwnd(): return (win32gui.FindWindow('Qt51514QWindowIcon', None) or win32gui.FindWindow(None, '微信') or win32gui.FindWindow(None, 'WeChat'))def get_rect(hwnd): rect = ctypes.wintypes.RECT() ctypes.windll.dwmapi.DwmGetWindowAttribute( hwnd, 9, ctypes.byref(rect), ctypes.sizeof(rect)) return rect.left, rect.top, rect.right, rect.bottomdef ensure_visible(hwnd): """确保窗口可见(不最小化),但不强制置顶""" if win32gui.IsIconic(hwnd): win32gui.ShowWindow(hwnd, win32con.SW_RESTORE) time.sleep(0.4)def bring_to_front(hwnd): ensure_visible(hwnd) try: ctypes.windll.user32.SetForegroundWindow(hwnd) time.sleep(0.3) except Exception: pass# ───────────────────────────────# PrintWindow 截图(支持GPU渲染)# ───────────────────────────────def pw_shot(hwnd) -> Image.Image: """ 用 PrintWindow(PW_RENDERFULLCONTENT=2) 截整个窗口。 返回以窗口左上角为原点的 PIL Image。 """ ensure_visible(hwnd) l, t, r, b = get_rect(hwnd) w, h = r - l, b - t hwnd_dc = win32gui.GetWindowDC(hwnd) mfc_dc = win32ui.CreateDCFromHandle(hwnd_dc) save_dc = mfc_dc.CreateCompatibleDC() bmp = win32ui.CreateBitmap() bmp.CreateCompatibleBitmap(mfc_dc, w, h) save_dc.SelectObject(bmp) ctypes.windll.user32.PrintWindow(hwnd, save_dc.GetSafeHdc(), 2) info = bmp.GetInfo() bits = bmp.GetBitmapBits(True) img = Image.frombuffer('RGB', (info['bmWidth'], info['bmHeight']), bits, 'raw', 'BGRX', 0, 1) save_dc.DeleteDC(); mfc_dc.DeleteDC() win32gui.ReleaseDC(hwnd, hwnd_dc) win32gui.DeleteObject(bmp.GetHandle()) return img # 坐标原点 = 窗口左上角# ───────────────────────────────# 截图 hash(检测消息变化)# 只截聊天记录区中部,避免输入框变化误触发# ───────────────────────────────def snap_hash(hwnd) -> str: img = pw_shot(hwnd) w, h = img.size # 对方气泡区(x=43%~79%,y扩到85%以覆盖5行长消息) crop = img.crop((int(w*0.43), int(h*0.06), int(w*0.79), int(h*0.85))) return hashlib.md5(crop.tobytes()).hexdigest()# ───────────────────────────────# 读对方最新消息(白色气泡定位 + OCR)# ───────────────────────────────def read_msg_by_ocr(hwnd) -> str: """ 读取对方最新消息。 ────────────────────────────────────────────────── 已调试确认参数(1321x1416窗口): - 对方气泡背景色(222,222,224)浅灰,文字色(25,25,26)深色 - 对方气泡文字列:x=43%~77%(左侧头像x<43%,右侧不超x=77%) - 截图X:x=44%~79%(跳过昵称,右边留余量) - chat_y2 需到 85%(长消息最多5行,底部约y=83%) - 消息行间距约10px,消息间距约60px;gap=15可正确跨行合并 ────────────────────────────────────────────────── """ img = pw_shot(hwnd) w, h = img.size arr = np.array(img) # 聊天记录区 # chat_y2 扩展到 85%:长消息(5行)底部约在83.4%,留2%余量 chat_y1 = int(h * 0.06) chat_y2 = int(h * 0.85) # 对方气泡文字扫描列 text_x1 = int(w * 0.43) text_x2 = int(w * 0.77) region = arr[chat_y1:chat_y2, text_x1:text_x2] rh = region.shape[0] # 深色文字检测(文字色约25,25,26;阈值<80覆盖子像素渲染) dark = (region[:,:,0] < 80) & (region[:,:,1] < 80) & (region[:,:,2] < 80) row_dark = dark.sum(axis=1) # 从底部往上找最新文字行 bottom_y = -1 for yi in range(rh - 1, -1, -1): if row_dark[yi] > 2: bottom_y = yi break if bottom_y < 0: print(" [OCR] 未找到对方文字行") return "" # 往上找文字块顶部 # gap=15:行内间距约10px,消息间距约60px,gap=15可正确连接同条消息各行 top_y = bottom_y gap = 0 for yi in range(bottom_y, max(bottom_y - 800, -1), -1): if row_dark[yi] > 2: top_y = yi gap = 0 else: gap += 1 if gap >= 15: break # 截图区域(上下加15px内边距,X跳过头像/昵称,覆盖完整气泡) crop_y1 = chat_y1 + max(top_y - 15, 0) crop_y2 = chat_y1 + bottom_y + 20 crop_x1 = int(w * 0.44) # 跳过昵称(昵称在x=38%~40%,正文从44%开始) crop_x2 = int(w * 0.79) # 文字最右端约x=76.6%,留3%余量 crop_h = crop_y2 - crop_y1 print(f" [OCR] 文字块: y={crop_y1}~{crop_y2}({crop_h}px), x={crop_x1}~{crop_x2}") if crop_h < 8: print(" [OCR] 高度过小,跳过") return "" if crop_h > 700: # 超过700px说明扫到了多条消息混合,只取最近400px crop_y1 = crop_y2 - 400 crop_h = 400 print(" [OCR] 高度过大(>700px),截最近400px") crop = img.crop((crop_x1, crop_y1, crop_x2, crop_y2)) # OCR预处理:3倍放大 + 对比度2.5 + psm6(已测试为最优组合) scale = 3 big = crop.resize((crop.width * scale, crop.height * scale), Image.LANCZOS) gray = big.convert('L') enhanced = ImageEnhance.Contrast(gray).enhance(2.5) try: raw = pytesseract.image_to_string( enhanced, config='--oem 3 --psm 6 -l chi_sim+eng' ).strip() except Exception as e: print(f" [OCR] 识别失败: {e}") return "" # ── 后处理 ── lines = [ln.strip() for ln in raw.splitlines() if ln.strip()] clean = [] for ln in lines: zh = sum(1 for c in ln if '\u4e00' <= c <= '\u9fff') alpha = sum(1 for c in ln if c.isalpha()) digit = sum(1 for c in ln if c.isdigit()) # 保留:有中文 OR 有>=3个字母(英文内容)OR 数字+字母混合 if zh >= 1 or alpha >= 3 or (alpha >= 1 and digit >= 1): # 只在行首同时有英文前缀又有中文时,才去掉行首英文(昵称合并到正文) if zh >= 1: ln = re.sub(r'^[a-zA-Z0-9 _\-\.]+(?=[\u4e00-\u9fff])', '', ln).strip() if ln: clean.append(ln) # 只过滤掉明显是短昵称的行(≤4个字符且全是字母/空格,无数字无标点) # 保留正常英文内容行(alpha>=3 且内容不像昵称) def is_nickname_line(s): stripped = s.strip() return (len(stripped) <= 6 and all(c.isalpha() or c.isspace() for c in stripped) and sum(1 for c in stripped if '\u4e00' <= c <= '\u9fff') == 0) clean = [ln for ln in clean if not is_nickname_line(ln)] # 去掉行首孤立单字(微信气泡换行时行尾汉字被拆到下行行首,OCR前面加了空白变"上"/"丨"等) # 例:"不太清\n上晰" → 合并前一行末尾 merged = [] for ln in clean: # 如果行首是1~2个孤立的非标点汉字(没有其他汉字跟随),并且上一行存在,把它拼到上一行末尾 m = re.match(r'^([^\u4e00-\u9fff]{0,3})([\u4e00-\u9fff]{1,2})(\s+[\u4e00-\u9fff])', ln) if m and merged: # 行首有1~2个汉字+空格+更多汉字:可能第一个字是拆行造成的,但保留整行 merged.append(ln) elif re.match(r'^[上丨|][\u4e00-\u9fff]', ln) and merged: # "上晰"这类行:去掉前面的"上"/"丨",把剩余拼到上一行 fixed = re.sub(r'^[上丨|]', '', ln) merged[-1] = merged[-1] + fixed else: merged.append(ln) result = " ".join(merged).strip() # 去掉多余的空格和噪声符号 result = re.sub(r'\s+', ' ', result) result = re.sub(r'[》《|丨]{1,3}', '', result).strip() print(f" [OCR结果] 「{result}」") return result# ───────────────────────────────# 发消息# ───────────────────────────────def send_msg(hwnd, message: str): import pyautogui orig_pos = win32api.GetCursorPos() l, t, r, b = get_rect(hwnd) w, h = r - l, b - t input_x = l + int(w * 0.60) input_y = t + int(h * 0.88) bring_to_front(hwnd) pyautogui.click(input_x, input_y) time.sleep(0.3) pyperclip.copy(message) pyautogui.hotkey('ctrl', 'v') time.sleep(0.25) pyautogui.press('enter') time.sleep(0.35) ctypes.windll.user32.SetForegroundWindow(hwnd) time.sleep(0.2) win32api.SetCursorPos(orig_pos)# ───────────────────────────────# 去重# ───────────────────────────────def msg_hash(text: str) -> str: return hashlib.md5(text.encode('utf-8')).hexdigest()[:8]# ───────────────────────────────# 主循环# ───────────────────────────────def main(): print("=" * 55) print(" 微信智能自动回复 v23") print(f" 目标:{TARGET_NAME}") print(" 截图:PrintWindow(支持微信4.x GPU渲染)") print(" 读消息:白色气泡定位 + OCR") print("=" * 55) hwnd = get_hwnd() if not hwnd: print("❌ 未找到微信窗口!") return print(f"\n请打开【{TARGET_NAME}】的聊天窗口,然后按回车开始...") input() # 初始 hash last_hash = snap_hash(hwnd) last_msg_hash = "" same_count = 0 replied_count = 0 print("✅ 监听中(Ctrl+C 退出)\n") while True: try: time.sleep(CHECK_INTERVAL) current_hash = snap_hash(hwnd) if current_hash == last_hash: continue ts = time.strftime('%H:%M:%S') print(f"[{ts}] 检测到变化,等待渲染...") time.sleep(1.5) # 等消息完整渲染 msg_text = read_msg_by_ocr(hwnd) if not msg_text: print(" ⚠️ 未识别到有效对方消息,可能是自己发的消息变化,跳过") last_hash = current_hash continue # 去重:防止对同一条消息反复回复 mh = msg_hash(msg_text) if mh == last_msg_hash: same_count += 1 if same_count <= 2: print(f" ⚠️ 与上一条相同({same_count}/2),跳过(可能是自己回复刷新了屏幕)") last_hash = current_hash continue else: print(f" ⚠️ 连续{same_count}次相同,强制处理") else: same_count = 0 last_msg_hash = mh print(f" [消息] 「{msg_text}」") ai_reply = ask_qwen(msg_text) send_msg(hwnd, ai_reply) replied_count += 1 print(f"[{ts}] 第 {replied_count} 条已发送 ✓") print(f" (等待【{TARGET_NAME}】下一条...)\n") # 回复发出后等屏幕稳定,更新 hash # 不用 already_replied 旗标,改为:等AI回复显示完毕后, # 持续等待直到hash稳定(最多等5秒),然后把稳定后的hash作为基准 stable_wait = 0 prev = snap_hash(hwnd) while stable_wait < 5: time.sleep(1) nxt = snap_hash(hwnd) if nxt == prev: break prev = nxt stable_wait += 1 last_hash = prev except KeyboardInterrupt: print(f"\n已退出,共回复 {replied_count} 次。") break except Exception as e: import traceback traceback.print_exc() time.sleep(CHECK_INTERVAL)if __name__ == "__main__": main()


 10个月宝宝每天需要喝多少奶粉?