Hyperview Python二次开发,自动读取曲线最大值并填入表格(tableview)
- 2026-06-29 18:09:27
Hyperview Python二次开发,自动读取曲线最大值并填入表格(tableview)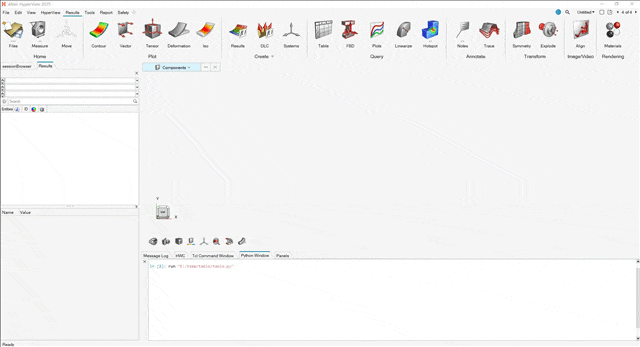
HyperView 基于Tcl语言读取曲线最大值并填入表格实现方法: HyperView二次开发之将曲线最大值输入到表格中(tableview) HyperView 基于Python语言读取曲线最大值并填入表格实现方法:
获取最大值可用=max(p1w1c1.y)
已知x,获取y可用=lininterp(p1w1c1.y,p1w1c1.x,x)。比如获取10ms时刻曲线y值:=lininterp(p1w1c1.y,p1w1c1.x,10),已知y获取x值,将前两个参数调换即可。
# 指定文件路径import osdir_path = r"E:\temp"file_name = "binout0000"file_path = os.path.join(dir_path,file_name)print(file_path)#def read_curve_from_file (file_source,subcase,datadype,request,components): import hw import hw.hg as hg# 设置激活的窗口为 plot ses = hw.Session() page = ses.get(hw.Page) page.setAttributes(layout = 1)#win = ses.get(hw.Window) win = ses.get(hw.Window,window = 1) win.type = "xy"## 获取binout000 文件的object#data = hg.DataFile(file_path)## 获取binout0000 文件信息## 设置 subcase#data.subcase = "glstat"## 获取 subcase 拥有的requests#data.getRequests("glstat")## 获取 subcase 拥有的components#data.getComponents("glstat")## 获取某一个 request 所拥有的 components#data.getComponentsPerRequest("matsum","BEAM_M12_016") curve = hg.CurveXY( xFile=file_source, xSource="file", xSubcase=subcase, xDataType="Time", xRequest="Time", xComponent="Time", yFile=file_source, ySource="file", ySubcase=subcase, yDataType=datadype, yRequest=request, yComponent=components,# label="{y.HWRequest} - {y.HWComponent}" label="{y.HWComponent}" ) win.update() new_curve_id = curve.idprint(new_curve_id)return new_curve_id#def create_curve_by_math (): import hw import hw.hg as hg# 设置激活的窗口为 plot ses = hw.Session() page = ses.get(hw.Page) pageid = page.id win = ses.setActive(hw.Window,window = 1) win.type = "xy" curve = hg.CurveXY( xSource="math", xExpression=f"p{pageid}w1c1.x", ySource="math", yExpression=f"sqrt(p{pageid}w1c1.y*p{pageid}w1c1.y+p{pageid}w1c2.y*p{pageid}w1c2.y+p{pageid}w1c3.y*p{pageid}w1c3.y)", label="Result_force" ) win.update() new_curve_id = curve.idprint(new_curve_id)return new_curve_id#def set_table (): import hw import hw.hg as hg# 设置激活的窗口为 plot ses = hw.Session() page = ses.get(hw.Page)#win = ses.get(hw.Window) win = ses.get(hw.Window,window = 2) ses.setActive(hw.Window,window = 2) win.type = "table"# table =hw.TableViewWindow(hw.Page,hw.Window)# 设置一个单元格数值 win.setCellData('a1','axial')# 设置多个单元格数值 win.setCellData({'b1':'shear s','c1':'shear t','d1':'Result'})# 设置字体 font=hw.Font(size=10,style='bold',family='Noto Sans') win.setCellFont('a1:D10',font)# 一句表格内内容自动设定列宽 win.setAutofitColumnWidth("a:d",True)# 设置背景色 win.setCellBackgroundColor(['a1:d1'],(135,206,235))# win.setCellAlignmentHorizontal('a1:d1','center') win.setCellAlignmentVertical('a1:d1','middle')# pageid = win.page.id win.setCellData('a2',f'=max(p{pageid}w1c1.y)') win.setCellData('b2',f'=max(p{pageid}w1c2.y)') win.setCellData('c2',f'=max(p{pageid}w1c3.y)') win.setCellData('d2',f'=max(p{pageid}w1c4.y)')# win.mergeCells("a3:d4")# tableRule=hg.TableRule() tableRule.textColor=(0,0,0)#green tableRule.backgroundColor=(0,255,0) tableRule.cellList = ['A2:D2'] tableRule.operator='<' tableRule.value = 1000# tableRule1=hg.TableRule() tableRule1.textColor=(0,0,0)# "yellow" tableRule1.backgroundColor=(255,255,0) tableRule1.cellList = ['A2:D2'] tableRule1.operator='>' tableRule1.value = 1000#"brown" tableRule2=hg.TableRule() tableRule2.textColor=(0,0,0) tableRule2.backgroundColor=(150,75,0) tableRule2.cellList = ['A2:D2'] tableRule2.operator='>' tableRule2.value = 4200# tableRule3=hg.TableRule() tableRule3.textColor=(0,0,0) tableRule3.backgroundColor=(250,0,0) tableRule3.cellList = ['A2:D2'] tableRule3.operator='>' tableRule3.value = 4700 win.refresh()#💡往期文章
HyperMesh Python 二次开发 提高脚本运行速度的方法(以每个solid建立一个component为例)
CAE仿真 网格评价中的雅可比为什么是0-1?及参数单元是什么
Hyperview云图显示各个零件屈服,断后延伸率,应力与屈服比值(应力归一化),失效应变归一化
HyperMesh Python二次开发-自动修改Component名字
本文来自网友投稿或网络内容,如有侵犯您的权益请联系我们删除,联系邮箱:wyl860211@qq.com 。

