开发者的Python:Windows 平台编译安装 Python Debug 版本
📋 目录
1. 前置准备
1.1 安装 Visual Studio
Step 1: 下载 Visual Studio 2026 Community 版本
- • 访问: https://visualstudio.microsoft.com/zh-hans/downloads/
- • 下载 "Visual Studio Community 2026"
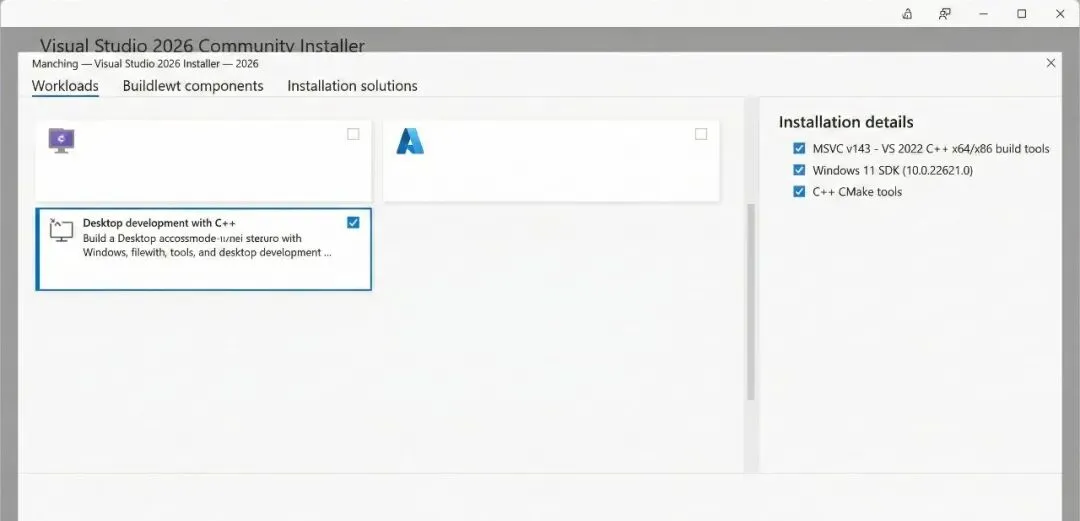
Step 2: 运行安装程序,选择以下工作负载:
☑ 使用 C++ 的桌面开发
Step 3: 在"单个组件"选项卡中,确保选中:
☑ MSVC v143 - VS 2022 C++ x64/x86 生成工具☑ Windows 11 SDK (10.0.22621.0) 或最新版本☑ C++ CMake 工具
Step 4: 点击"安装",等待安装完成
1.2 安装 Git
Step 1: 下载 Git for Windows
- • 访问: https://git-scm.com/download/win
Step 2: 使用默认选项安装
2. 下载 Python 源代码
Step 1: 打开命令提示符或 PowerShell
Step 2: 创建工作目录并进入:
mkdir C:\PythonBuildcd C:\PythonBuild
Step 3: 克隆 Python 仓库:
git clone https://github.com/python/cpython.git
Step 4: 切换到指定版本(我们这里假设地以Python 3.13 为例):
cd cpythongit checkout v3.13.0
3. 编译 Debug 版本
3.1 打开开发者命令提示符
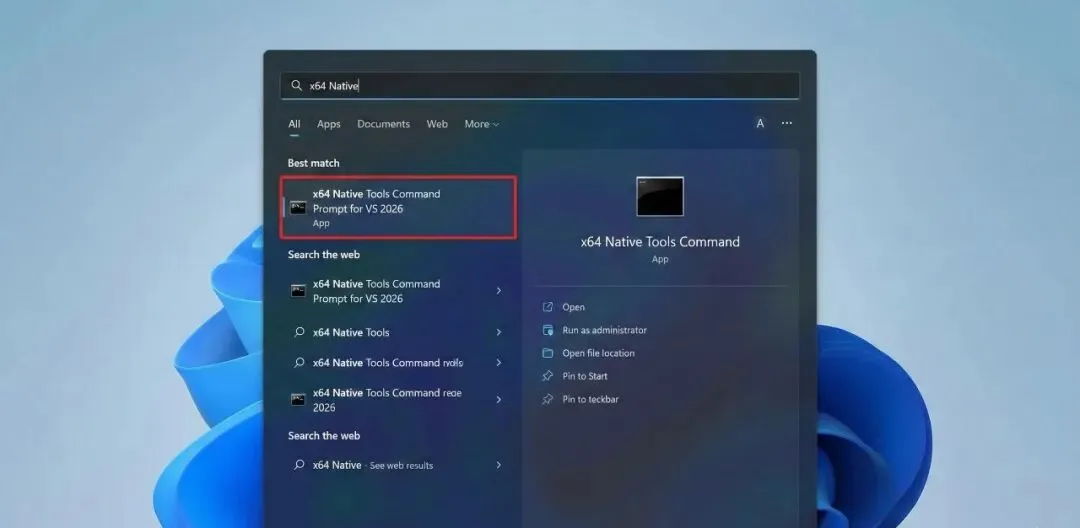
Step 1: 在 Windows 开始菜单搜索:
x64 Native Tools Command Prompt for VS 2026
Step 2: 右键选择"以管理员身份运行"
3.2 导航到源代码目录
cd C:\PythonBuild\cpython
3.3 进入 PCbuild 目录
cd PCbuild
3.4 获取外部依赖
Step 1: 运行获取外部依赖的脚本:
get_externals.bat
这个脚本会自动下载编译 Python 所需的外部库
⚠️ 注意:此步骤需要网络连接,可能需要3到10分钟左右的时间。
预期输出:
Fetching external libraries...Fetching bzip2-1.0.8...Fetching sqlite-3.45.1.0...Fetching openssl-3.0.13......Finished fetching external libraries.
3.5 编译 Debug 版本
build.bat -c Debug -p x64 -e
3.6 等待编译完成
编译过程可能需要 10-30 分钟,取决于电脑配置。
成功编译的输出示例:
Build succeeded. 0 Warning(s) 0 Error(s)Time Elapsed 00:15:32.41
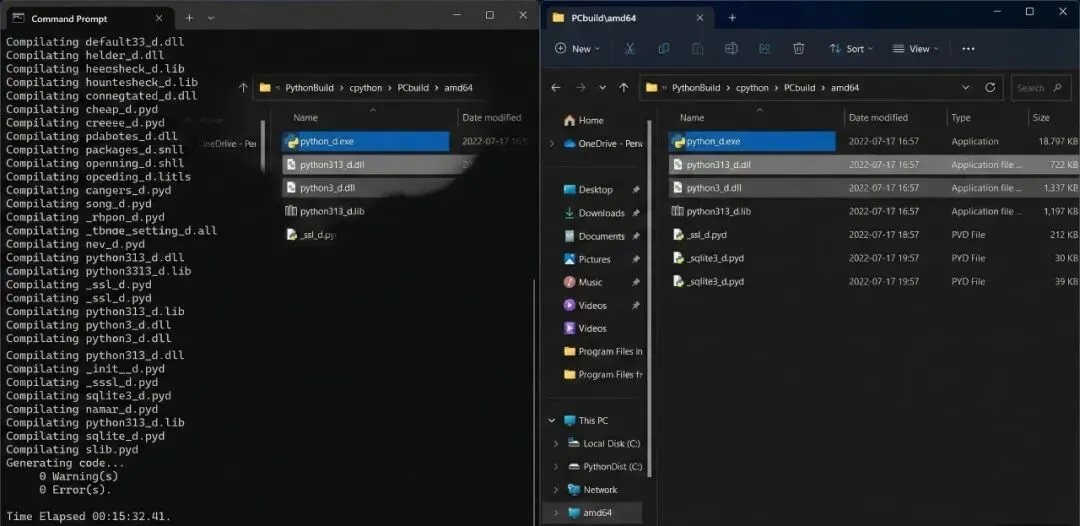
3.7 确认编译产物
编译完成后,在 PCbuild\amd64 目录(64位)或 PCbuild\win32 目录(32位)中应该能找到:
C:\PythonBuild\cpython\PCbuild\amd64\├── python_d.exe ← Debug 版 Python 可执行文件├── pythonw_d.exe ← Debug 版 Python├── python313_d.dll ← Debug 版 Python DLL├── python313_d.lib ← Debug 版 Python 库├── python3_d.dll├── python3_d.lib├── _ssl_d.pyd├── _sqlite3_d.pyd└── ... 其他 _d.pyd 文件
4. 配置环境变量
4.1 设置系统环境变量
Step 1: 右键"此电脑" → "属性" → "高级系统设置"
Step 2: 点击"环境变量"按钮
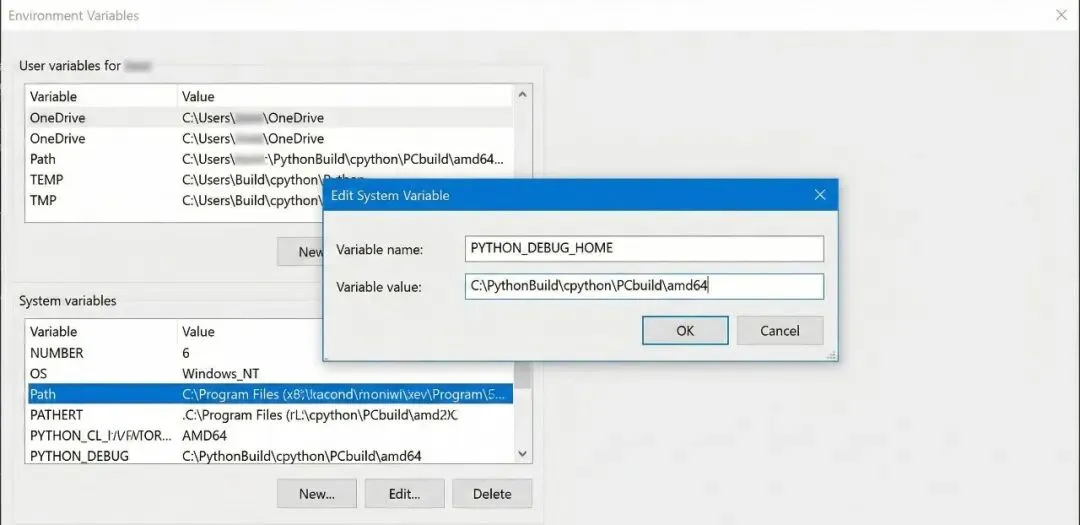
Step 3: 在"系统变量"中找到 Path,点击"编辑"
Step 4: 添加以下路径(注意这里要根据你实际路径来调整):
C:\PythonBuild\cpython\PCbuild\amd64
Step 5: 新建系统变量:
| |
|---|
PYTHON_DEBUG_HOME | C:\PythonBuild\cpython\PCbuild\amd64 |
PYTHON_DEBUG_INCLUDE | C:\PythonBuild\cpython\Include |
PYTHON_DEBUG_LIBS | C:\PythonBuild\cpython\PCbuild\amd64 |
4.2 配置 pip
Debug 版 Python 默认没有 pip,需要手动安装:
Step 1: 下载 get-pip.py
curl https://bootstrap.pypa.io/get-pip.py -o get-pip.py
Step 2: 使用 Debug 版 Python 安装 pip
C:\PythonBuild\cpython\PCbuild\amd64\python_d.exe get-pip.py
5. 验证安装
5.1 验证 Python Debug 版本
Step 1: 打开新的命令提示符
Step 2: 运行 Debug 版 Python:
C:\PythonBuild\cpython\PCbuild\amd64\python_d.exe
预期输出:
Python 3.13.0 (tags/v3.13.0:60403a5, Oct 7 2024, 14:56:35) [MSC v.1941 64 bit (AMD64)] on win32Type "help", "copyright", "credits" or "license" for more information.>>>
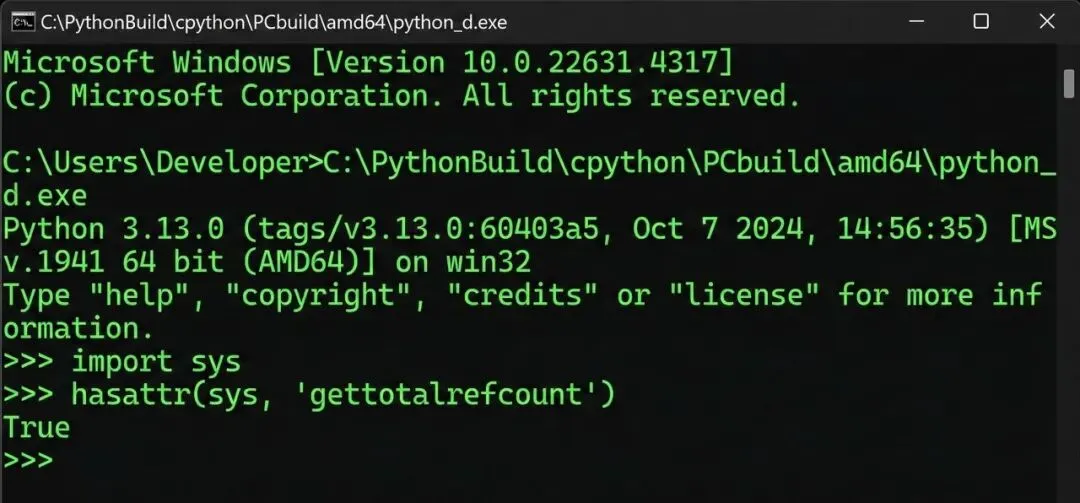
Step 3: 验证是 Debug 版本:
>>> import sys>>> hasattr(sys, 'gettotalrefcount')True
如果返回 True,说明是 Debug 版本
5.2 验证 lib 文件存在
dir C:\PythonBuild\cpython\PCbuild\amd64\python313_d.lib
预期输出:
Volume in drive C is Windows Directory of C:\PythonBuild\cpython\PCbuild\amd6410/07/2024 02:30 PM 547,832 python313_d.lib 1 File(s) 547,832 bytes
5.3 验证头文件
dir C:\PythonBuild\cpython\Include\Python.h
7. 常见问题解决
问题 1:get_externals.bat 下载失败
解决方案:
问题 2:链接错误 LNK2019
解决方案:确保编译完整版本:
build.bat -c Debug -p x64 -e --regen
附录:目录结构总览
C:\PythonBuild\cpython\├── Include\ ← 头文件目录│ ├── Python.h│ ├── object.h│ └── ...├── Lib\ ← Python 标准库│ ├── os.py│ ├── sys.py│ └── ...├── PCbuild\│ ├── amd64\ ← 64位编译输出│ │ ├── python_d.exe│ │ ├── python313_d.lib ← ★ 目标文件│ │ ├── python313_d.dll│ │ └── ...│ ├── win32\ ← 32位编译输出│ ├── build.bat│ ├── get_externals.bat│ └── pcbuild.sln└── externals\ ← 外部依赖库 ├── openssl-3.0.x\ ├── sqlite-3.x\ └── ...
 10个月宝宝每天需要喝多少奶粉?
