上期我们成功创建了自定义的天气查询服务接口(GetWeather.srv)。今天,我们将把这个接口用起来,用 Python 编写服务端(Server),让它真正能够提供天气查询服务!🌦️
🛠️ 一、创建 ROS2 服务端步骤
用 Python 编写服务端,通常遵循以下 4 个标准步骤:
导入服务接口:引入我们上期自定义的消息类型 GetWeather。
创建服务端回调函数:定义一个函数,用于处理客户端的请求。
声明并创建服务端:在节点中注册这个服务。
编写回调函数逻辑:在函数中实现具体的业务逻辑(比如随机生成天气)。
🐍 二、Python 服务端代码编写
假设我们在 weather_py_server功能包中,创建weather_py_server.py。
1. 完整代码
import randomimport rclpyfrom rclpy.node import Node# 1. 导入自定义的服务接口from weather_service_demo.srv import GetWeatherclass WeatherServer(Node): def __init__(self): super().__init__('weather_server') # 3. 声明并创建服务端 self.srv = self.create_service( GetWeather, 'get_weather', self.get_weather_callback) self.get_logger().info('Weather Server is ready.') # 2. 创建服务端回调函数 def get_weather_callback(self, request, response): # 4. 编写回调函数逻辑 self.get_logger().info(f'Received request for date: {request.date}') # 模拟根据日期返回不同的天气(这里随机生成) weather_options = ['Sunny', 'Rainy', 'Cloudy', 'Snowy'] response.weather_status = random.choice(weather_options) self.get_logger().info(f'Sending back response: {response.weather_status}') return responsedef main(args=None): rclpy.init(args=args) weather_server = WeatherServer() rclpy.spin(weather_server) weather_server.destroy_node() rclpy.shutdown()if __name__ == '__main__': main()
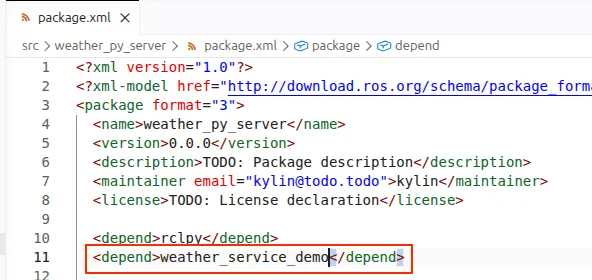
2. 修改配置文件增加依赖,明确指出服务端的代码,依赖于上文写的自定义服务接口。
🧪 三、Python 服务端通信测试
代码写好后,我们需要验证服务端是否能正常工作。
1. 编译与运行
首先确保环境变量已设置,然后运行服务端:
# 终端1cd ~/your_workspacecolcon buildsource install/setup.bashros2 run weather_py_server weather_server
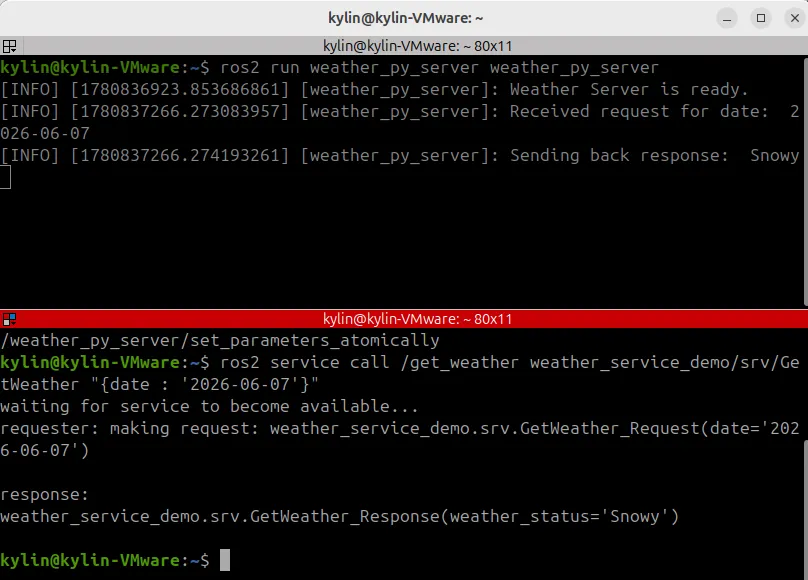
看到日志输出 Weather Server is ready.,说明服务端已上线。
2. 用命令行测试
打开一个新的终端,使用 ros2 service call命令发送请求:
# 终端2ros2 service call /get_weather weather_service_demo/srv/GetWeather "{date: '2024-12-25'}"
如果一切正常,你会立刻收到服务端的回复,比如:
response:weather_status: Sunny
3. 用 rqt 工具测试
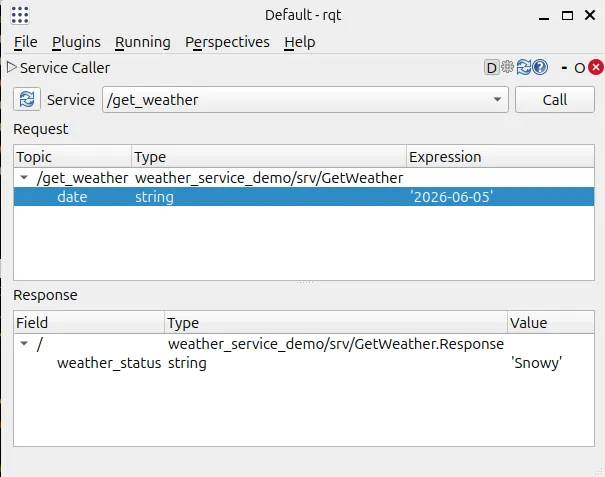
rqt是更直观的图形化测试工具。
打开终端输入 rqt。
选择 Plugins-> Services-> Service Caller。
在下拉框选择 /get_weather服务。
在 date输入框填写 2024-12-25,点击 Call。
右侧会显示返回的 weather_status。
📢 下期预告
服务端已经准备好了,但总不能每次都靠人工敲命令来查询天气吧?下期我们将编写 Python 客户端(Client),让程序自动去请求服务!🚀
💬 互动一下:
你觉得在服务端代码中,除了随机选择天气,还可以加入哪些有趣的逻辑(比如根据日期判断季节)?欢迎在评论区分享你的想法!👇

 10个月宝宝每天需要喝多少奶粉?
