Python|SAM2安装与图像分割
- 2026-07-06 19:16:49

科研图像处理

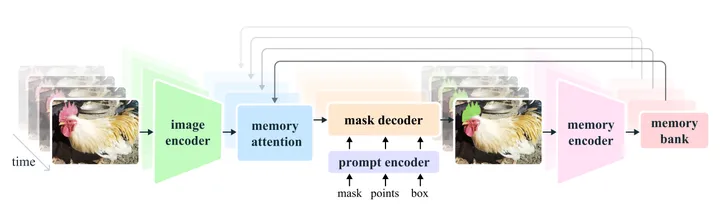
SAM2(Segment Anything Model 2) 是 Meta AI 于 2024 年提出的通用视觉分割模型,是在 SAM 的基础上面向视频与时序数据的重要升级。
https://github.com/facebookresearch/sam2
相比只能对单张图像进行交互式分割的 SAM,SAM2 引入了时序一致性建模与掩膜传播(mask propagation)机制,能够在用户仅对少量帧进行提示(points / boxes / masks)的情况下,将目标分割结果稳定传播到整段视频或时间序列中。
之前的文章介绍了基于SAM的细胞分割与追踪方法:
点击跳转《利用Segment Anything进行细胞分割》
点击跳转《利用 Track-Anything 进行细胞追踪》
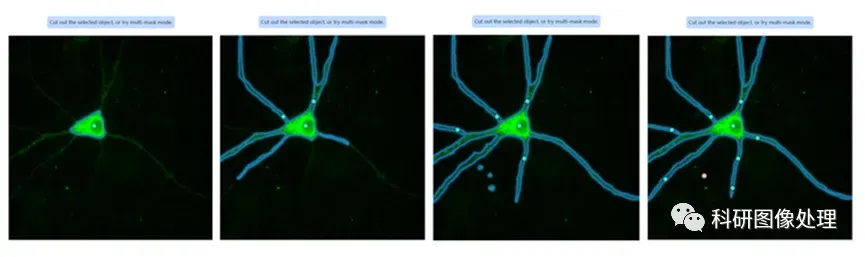
SAM2不仅可以对单张图片进行分割,在视频上的分割表现也有显著提升,且 仅需个别标注 即可工作,不依赖大规模自训练;
另外SAM2对目标形态变化、遮挡、短暂消失具有较强鲁棒性;

SAM2的这些优势天然适用于复杂的细胞和动物追踪任务。
因此,SAM2 为细胞追踪、形态动态分析、长时间成像数据的自动化处理,提供了一种低标注成本、高泛化能力的通用解决方案。

这篇文章会介绍怎样在Windows系统,安装SAM2,并实现单张图片的分割。
一、SAM2的安装
1、创建一个新的conda环境
首先你需要在电脑上安装Anaconda,生成一个新的环境,方便不同Python包的版本管理:
conda create -n SAM2 python=3.10激活该环境:
conda activate SAM22、安装GPU dependency
SAM2必须用比较好的GPU才能运行,首先安装对应CUDA版本的Pytorch
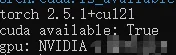
pip install torch torchvision --index-url https://download.pytorch.org/whl/cu121如果成功安装,运行:
python -c "import torch; print('torch', torch.__version__); print('cuda available:', torch.cuda.is_available()); print('gpu:', torch.cuda.get_device_name(0) if torch.cuda.is_available() else None)"如果你可以看到如下的Output,则说明可以调用GPU了:
3、SAM2下载
cd到一个合适的文件夹,然后git clone SAM2的repo:
git clone https://github.com/facebookresearch/sam2.gitclone完成后,cd进入sam2的文件夹:
cd sam2然后安装可以在Jupyter Notebook运行的SAM2:
pip install -e ".[notebooks]"4、Checkpoints下载
SAM2的模型权重需要另外下载,可以通过运行:
cd checkpoints && \./download_ckpts.sh && \cd ..
如果仅需要其中一种模型,可以手动在GitHub上下载,然后放到.\sam2\checkpoints文件夹中。
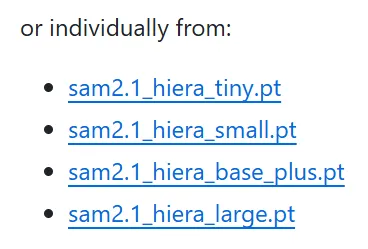
文章中利用最大的模型:sam2.1_hiera_large.pt,大小856MB。
二、SAM2分割单张图像
推荐在Jupyter Notebook中调用SAM2。
1、加载SAM2模型
import numpy as npimport torchimport matplotlib.pyplot as pltfrom PIL import Imagefrom sam2.build_sam import build_sam2from sam2.sam2_image_predictor import SAM2ImagePredictordevice = torch.device("cuda" if torch.cuda.is_available() else "cpu")print("Using device:", device)img_path = "images/demo_cell_image.jpg"image = np.array(Image.open(img_path).convert("RGB"))ckpt = "../checkpoints/sam2.1_hiera_large.pt"cfg = "configs/sam2.1/sam2.1_hiera_l.yaml"model = build_sam2(cfg, ckpt, device=device)predictor = SAM2ImagePredictor(model)predictor.set_image(image)
这一步主要是Check是否能调用GPU,加载图像以及模型的Checkpoint。
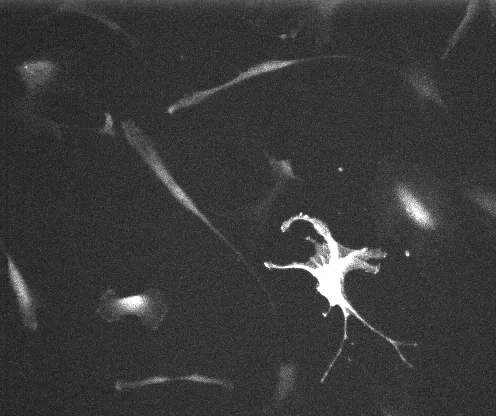
SAM2的输入应该是H×W×3的一个NumPy array,所以对于一个单通道的图像来说,首先需要先调整一下对比度,存成jpg格式:
2、定义特征点选择分割物体
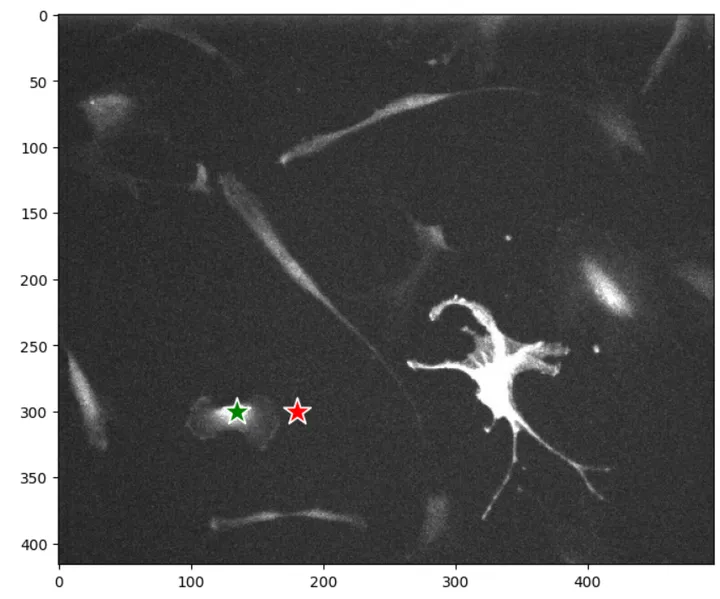
在分割之前,你需要告诉SAM2,你想要分割哪个物体。
input_point = np.array([[135, 300],[180,300]]) # (x, y)input_label = np.array([1,0]) # 1 (foreground point) or 0 (background point)
选点有Positive和Negative两种,Positive代表想要分割的物体(foreground, label = 1),Negative代表非目标物体(background, label = 0)。
可以只定义foreground,但给定的标签越多,分割越准确。
3、分割图像
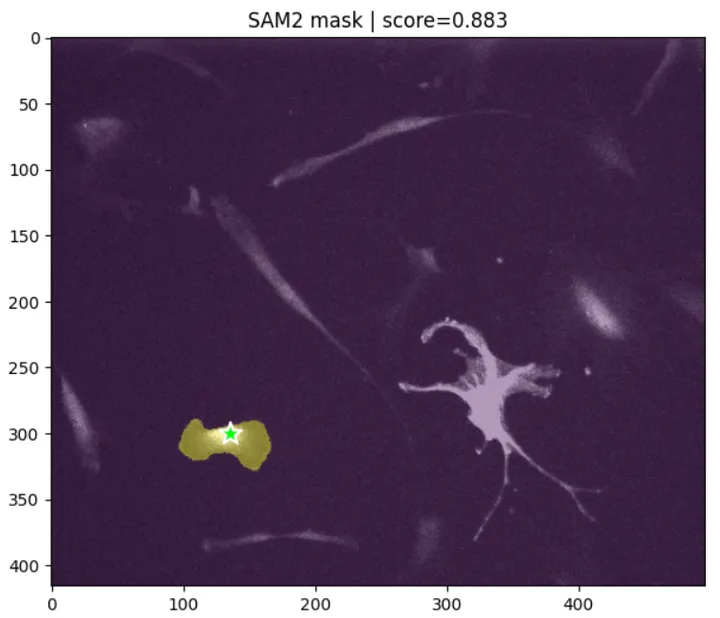
masks, scores, _ = predictor.predict(point_coords=input_point,point_labels=input_label,multimask_output=False,)mask = masks[0] # (H, W) bool
如果‘multimask_output’选择True,会生成Score排名前三的Mask,这里为了节省时间,选择False,只输出排名第一的Mask:
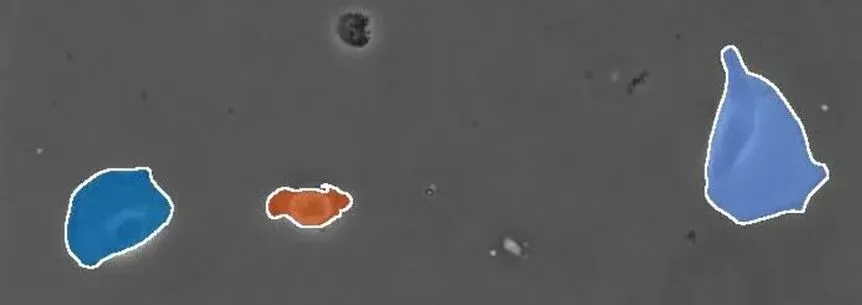
三、SAM2 zero-shot分割整张图像的物体
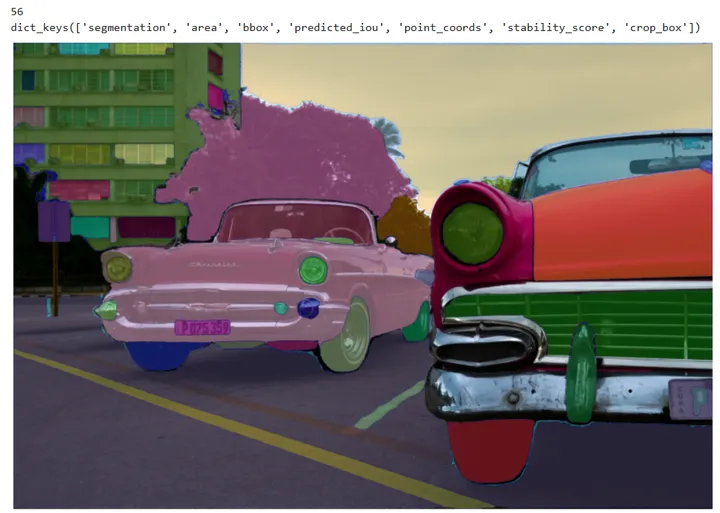
SAM2可以不依赖输入,分割整张图像:
from sam2.build_sam import build_sam2from sam2.automatic_mask_generator import SAM2AutomaticMaskGeneratorsam2_checkpoint = "../checkpoints/sam2.1_hiera_large.pt"model_cfg = "configs/sam2.1/sam2.1_hiera_l.yaml"sam2 = build_sam2(model_cfg, sam2_checkpoint, device=device, apply_postprocessing=False)mask_generator = SAM2AutomaticMaskGenerator(sam2)img_path = "images/cars.jpg"image = np.array(Image.open(img_path).convert("RGB"))masks = mask_generator.generate(image)print(len(masks))print(masks[0].keys())def show_anns(anns, borders=True):if len(anns) == 0:returnsorted_anns = sorted(anns, key=(lambda x: x['area']), reverse=True)ax = plt.gca()ax.set_autoscale_on(False)img = np.ones((sorted_anns[0]['segmentation'].shape[0], sorted_anns[0]['segmentation'].shape[1], 4))img[:, :, 3] = 0for ann in sorted_anns:m = ann['segmentation']color_mask = np.concatenate([np.random.random(3), [0.5]])img[m] = color_maskif borders:import cv2contours, _ = cv2.findContours(m.astype(np.uint8), cv2.RETR_EXTERNAL, cv2.CHAIN_APPROX_NONE)# Try to smooth contourscontours = [cv2.approxPolyDP(contour, epsilon=0.01, closed=True) for contour in contours]cv2.drawContours(img, contours, -1, (0, 0, 1, 0.4), thickness=1)ax.imshow(img)plt.figure(figsize=(20, 20))plt.imshow(image)show_anns(masks)plt.axis('off')plt.show()
效果:
SAM2是在自然图像上训练的,如果要分割细胞图像,可以利用Cellpose-SAM:
点击跳转:《Cellpose-SAM | 超人类水平的细胞分割》
后面会介绍怎样利用SAM2进行多细胞追踪以及动物追踪:
希望对大家有帮助~
往期推荐

点赞在看哦~

